Sunday, June 9, 2013

(Cara)mellow Out

I've been at war with myself. I was hit by a lightning bolt-- the idea that I could make a career out of food, specifically baking, even more specifically bread. In the past, I've written off my interest in food as a hobby. My mom once suggested I go to culinary school and I'm pretty sure I laughed at her. Food is my playtime, where I go to escape from stress, was it worth looking into as a job? Would it ruin my time in the kitchen?

But now I'm not laughing. I'm probably the opposite of laughing by having a mini quarter life crisis, or at least parallel to laughing, mooning over the romantic notion of getting up in the dead of night to go to work, bake fresh bread, handmake croissants, drink black coffee and watch the sun come up through the front window of the bakery. Sigh. The draw of hands on, hard work. Bread, sweat and tears.

While I pondering this 180 degree turn in life, I hit the library to find some books on baking, the industry, French pastry, basically any information I can get my hands on. Among them was Butter Cream, a non-fiction book by Denise Roig, a professor at Concordia (my university) who took a year off to go to pastry school and write about it.

Roig's stories about tarts and triumph, buttercream and breakdowns both pushed me towards the edge, making me pine for a world I don't know, while also putting the fear of the pastry Gods in me. The book is chock full of the trials and tribulations of not only the author, but her classmates, who several times over the course of the book all have moments of "I cannot TAKE THIS ANYMORE." She talks about the insane hours bakers and pastry chefs work, and still, I can't help but think.... Is it insane if you love it? How much do I love it? I finished the book in under a week.

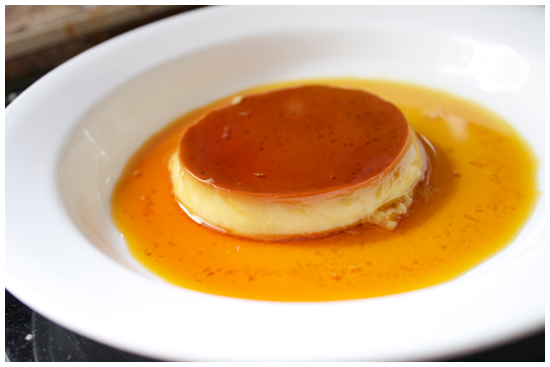
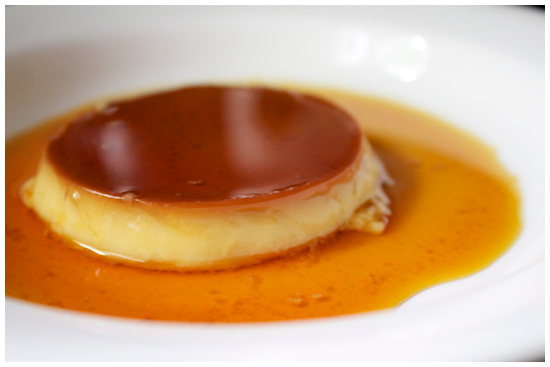
The other cool thing about the book is that some of the teachers at the pastry school allowed the author to republish some of the recipes she mastered in her time there. One such recipe is today's blog: Crème Caramel. A base of lightly sweetened custard, capped off and and soaking luxuriously in a bath of caramel. So at least while I'm having thoughts about the direction of my life, I have something sweet to stew over it with. (Psst....another great thing about this dessert is that you can make it a day ahead, and it's served cool-- a nice, elegant dessert for warm summer weather.)

Crème Caramel

Makes 6 ramekins
Ingredients

1 cup sugar
1/2 cup water

2 cups milk (preferably 3.25% or 2%)
1/3 cup sugar
2 eggs
2 egg yolks
1 tsp vanilla

1. Make the caramel by combining the water and the 1 cup of sugar in a saucepan over medium heat. The mixture will start to bubble. DO NOT stir the caramel with a spoon, or the sugar will crystallize. Instead, gently swirl occasionally, brushing spare sugar back into the mix with a pastry brush coated with water.

2. The mixture will start steaming, and then when the water evaporates, it will slowly start to turn colour. Fill a heatproof bowl with cold water and ice.

3. When the caramel turns a deep amber, quickly remove the pan from the heat and plunge the bottom into the bowl of ice to stop the cooking process.

4. Quickly divide the caramel between the ramekins. If it sticks to the bottom of the pan, put it back over gentle heat to warm it up. (Pro tip: to clean pans with caramel hardened on the bottom, boil water in the pans until it dissolves back into sugar, then, pour it away!)

5. Preheat the oven to 325 degrees. Put the milk in a saucepan, over low-medium heat. In the meantime, whisk together sugar, eggs and the vanilla in a large heatproof bowl.

6. When the milk begins steaming, whisk a small amount of it into the egg mixture, doing so quickly to avoid cooking the egg. Then, whisk in the remainder of the milk.

7. Strain the mixture (in case of bits of egg) and then divide among the ramekins. Place the ramekins in an ovenproof dish, filling it halfway up with warm water. (This is sometimes called a "bain marie.")

8. Bake for 45 minutes, or until a tester in the custard emerges nearly clean. Let cool completely before refrigerating.

9. Before serving, run a thin knife around the edge of the ramekin to loosen, then turn upside down on serving plates. Voila!

I am Jack's Step By Step Photos

1. Combine sugar and water over medium heat. The mixture will start to bubble, steam and eventually change colour. Do not stir, instead, gently swirl the pan to avoid crystallizing the sugar.
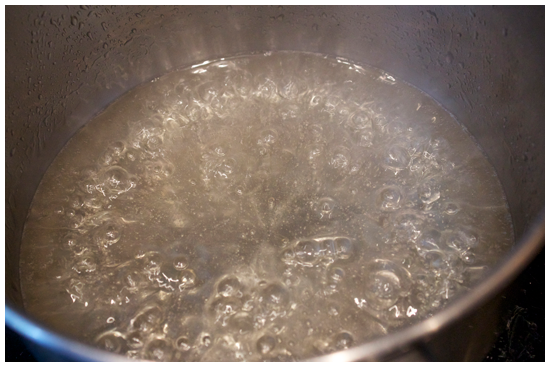
2. When the sugar mixture turns amber, plunge the bottom of the pot into a waiting bowl of ice water to stop the cooking process.
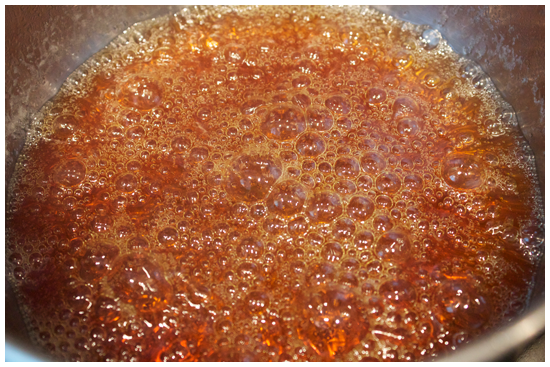
3. Pour the caramel into the six ramekins. While it's cooking, prepare the custard. (Scroll down!)
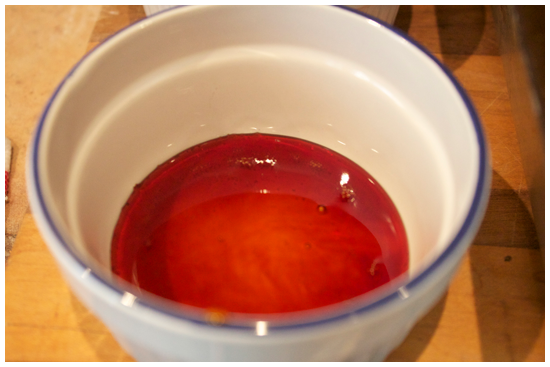
 4. Preheat the oven to 325 degrees. Heat the milk on the stove until it starts steaming. In a separate bowl whisk together sugar, vanilla, eggs and egg yolks. Add the hot milk to the egg mixture, streaming it in while whisking vigorously to avoid clumps of cooked egg.
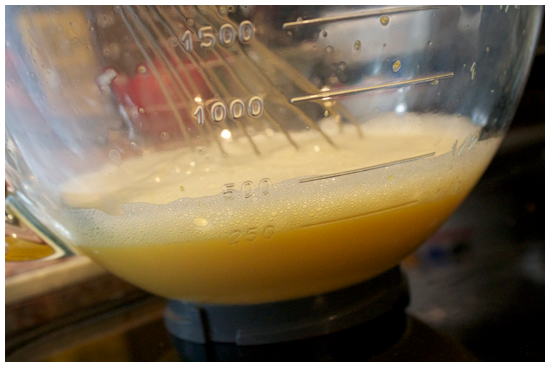
5. Strain the mixture once, then divide it among the six ramekins. Place the ramekins in a deep ovenproof dish, and fill it halfway up with warm water.
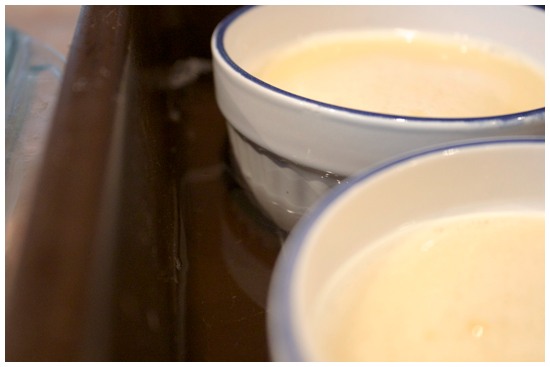
6. Bake for 45 minutes, until a knife inserted comes out mostly clean. Then, let cool completely before setting them in the fridge.
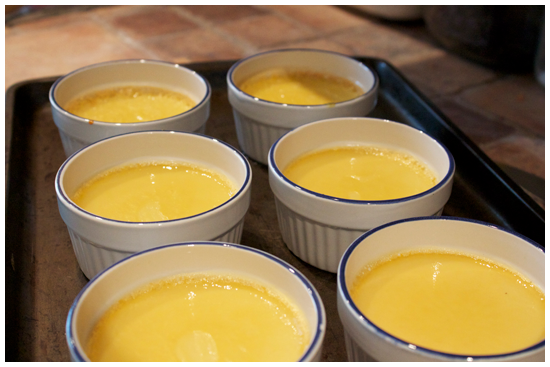
7. Come serving time, run a thin knife around the edge of the ramekin to loosen it. Invert on a serving plate, garnish and serve!
Sunday, June 2, 2013

Puffed Up Kicks

Wow wow wow wow! The blog has hit some pretty exciting milestones lately! Including over 2000 pageviews, and a solid 30 followers on Facebook. As promised, I'll be posting my Cheeseburger Pizza recipe soon as I can! I'm pumped to share it with all of you. But forget, dinner, let's talk dessert. (Again.)

There are all sorts of rules and guidelines to life. My parents taught me to never show up to an invitation empty handed. A common rule of thumb is that you should never try out a brand new recipe when you're serving it to other people. I have a belief that if I'm going to spend money on ingredients, I want to put that money to good use by trying something I've never done before. I want to push the limits of my knowledge and my skills, and I admit, be the one who shows up to the pot luck with the dish that's a touch more elaborate than the rest. It comes with the territory of being competitive. ANYWAY.

As you might guess, my philosophy sort of thumbs its nose at the first rule in the wrong situation, and completely stomps on the toes of the second. If you try a new recipe and it goes wrong, you're the one showing up with the store bought two bite brownies. Delicious, but don't get me wrong, not spectacular.

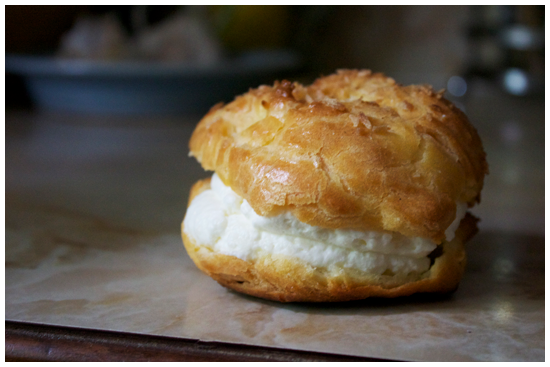
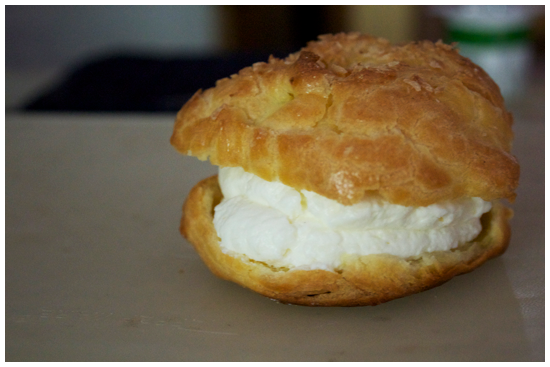
Know what's spectacular? Cream puffs. Baked up to puffy, crispy heights and sandwiched around smooth, sweet whipped cream, nuanced with light bite and warm milky flavour of shredded coconut. Although it was only my second crack ever at making choux pastry, I threw caution to the wind and whipped up these babies to bring to lunch with my two friends, Sarah and Hannah. They're light and summery and they make a great first impression. The cream puffs were delicious too.

Giant Coconut Cream Puffs

Makes 8 Puffs 
Recipe adapted from Sticky, Chewy, Messy, Gooey by Jill O'Connor

Ingredients


1 cup water
1/2 cup unsalted butter
1/2 tsp salt
2 tbsp sugar
1 1/4 cups all purpose flour, sifted and THEN measured
4-5 large eggs, beaten
1 egg + 1 tbsp water for eggwash
1/2 cup shredded coconut

1 1/2 cups heavy cream, cold
1/2 cup icing sugar
1 cup shredded coconut (sweetened or unsweetened, to your own taste)

1. Move a rack to the bottom of the oven and preheat to 400 degrees. Line a baking sheet with parchment paper.

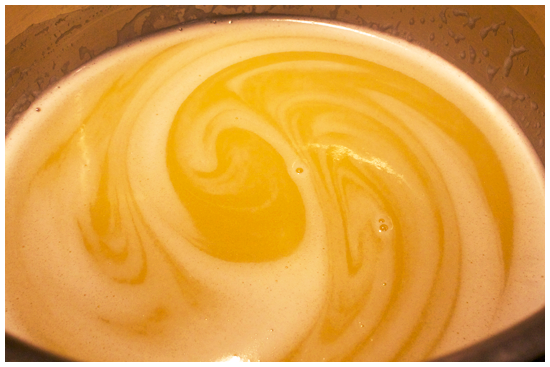
2. In a non-reactive pan (confused? I was too, click the link and read on!) combine water, butter, salt, sugar. Stir occasionally until the butter melts completely. AFTER the butter has melted, increase the heat and bring the mix to a rolling boil.

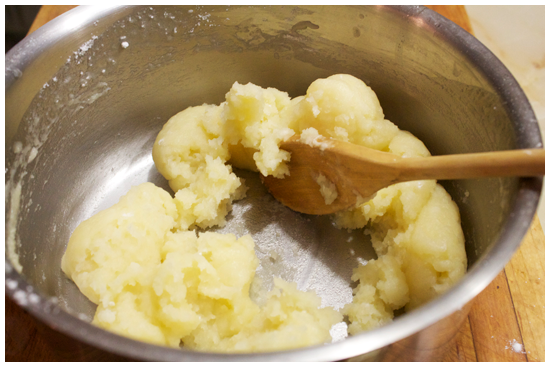
3. Remove from heat and add the flour all at once, stirring vigorously with a wooden spoon until it comes away from the pan and clumps around the spoon. Then, return the pan to medium heat stirring briskly for 1 minute, to cook the flour and dry out excess moisture in the dough.

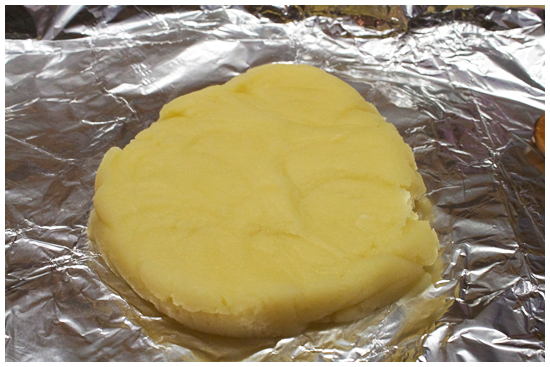
4. Turn your dough out onto a piece of aluminium foil lining your counter top and let it cool for 5 minutes. (You don't want the eggs to begin cooking too soon, or your texture will be off!)

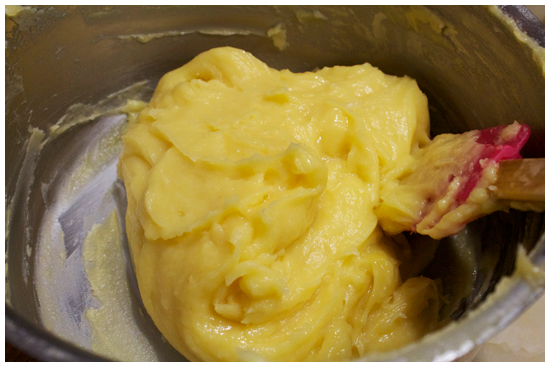
5.  Return the dough to the pan, begin adding the beaten eggs, 1/4 of the mixture at a time.  The mixture will be very slippery at first, so stir slowly to keep it all in the pan. When it becomes more incorporated, stir more quickly until it smooths out. Add the remaining eggs, repeating the process for each 1/4 added. The result should be a slightly sticky, smooth, malleable batter that holds peaks. (If the batter is too firm, beat the 5th egg, and add it 1 tbsp at a time until the consistency is reached.)

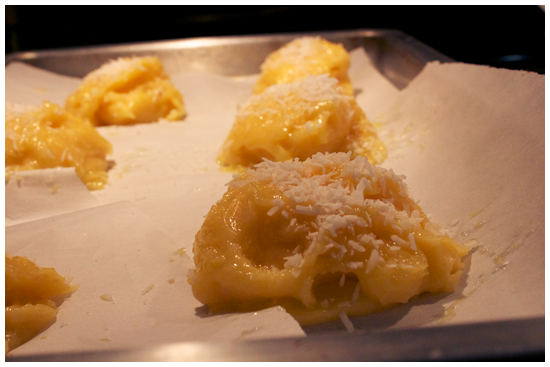
6. Divide the batter into 8 parts and scoop onto the prepared baking sheet 2-3 inches apart. Brush with egg wash and sprinkle each with a tablespoon of shredded coconut.

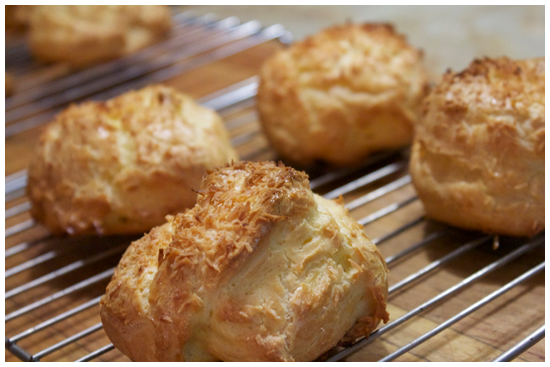
7. Bake for 20-25 minutes, until the puffs are golden brown and puffy. Reduce your oven to 350 and bake for 15 minutes more to make sure the pastry is crisp inside. Transfer to a wire rack to cool.

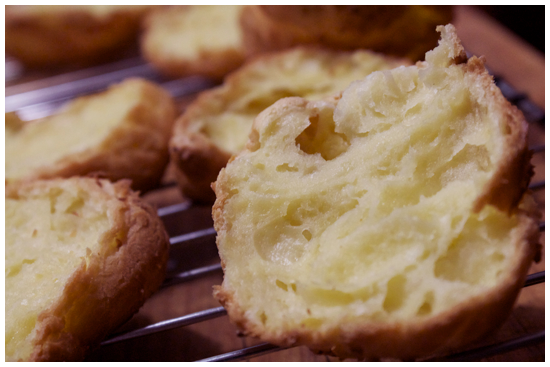
8. With a serrated knife, cut the puffs in half horizontally to release any steam in them. Place the puffs back on the baking sheet and return to the oven for 3-5 minutes to ensure they dry. Remove from the oven and cool completely.

9. Make the filling by whipping the cream and sugar with a chilled bowl with chilled beaters until stiff peaks form. Fold in the shredded coconut gently with a spatula.

10. Fill a pastry bag (or ziplock) bag with the whipped cream and pipe it onto the bottom half of each puff, generously. (You can also just spoon it on, if you're feeling low maintenance.) Place the top half gently on top of the cream (like a coconut chapeau). Serve!
I Am Jack's Step By Step Photos


1. Line a baking sheet with parchment, and preheat the oven to 400 degrees. Combine water, butter, sugar, salt in a non-reactive pan. Let the butter melt, before bringing it to a rolling boil.

2. Remove the pan from heat and add all the flour, vigorously stirring until the mixture clumps around the spoon. Return to medium heat, stirring for 1 minute to dry out any excess moisture.

3.  Let the mixture cool on a foil sheet on your counter for 5 minutes to avoid cooking the eggs when you begin to add them.

4. Stir in the beaten eggs, 1/4 at a time. Stir slow at first to avoid making the batter slop, and then quicker until it smooths out before the next addition. The finished batter should be a little sticky, malleable and able to hold peaks.

5. Divide the batter into 8 and scoop onto the prepared baking sheet. Brush lightly with egg wash and sprinkle with coconut. (Do a nicer job of shaping them than me, that's one of the things I'd tweak next time!)

6. Bake the puffs until golden brown and expanded, 20-25 minutes. Reduce the oven to 350 and bake for  15 minutes more to dry them out. Remove from the oven and set on a wire rack to cool slightly.

7. When the puffs are cool enough to the touch, gently cut them in half horizontally with a serrated knife to release steam. Put the cut puffs back on the baking sheet, and back into the oven for 3-5 minutes. Remove from heat, place on racks and let them cool completely. 

8. Whip together the sugar and heavy cream, then fold in the shredded coconut. (I totally forgot to take pictures of this step, but I know you're ready and willing to give it a go! Pipe onto the bottom half of the puffs and cap them off with the top half. Serve!
Friday, May 24, 2013

Lemon Meringue Pie

HAPPY BIRTHDAY MAMA! 

My mom has distinct tastes: she likes her wine red, her ice cream vanilla, she hates pancakes (WHAT) and she's getting into a habit of asking for birthday pie. I know, it sounds weird. Cake is celebratory. Cake is the life of the party. When you walk by a bakery window, it's cakes that dominate the displays, elaborately iced and dressed like five year old pageant contestants on TLC. But, when it's your birthday, you can cry if you want to (depending on how you feel about birthdays) and you have a divine right to fork whatever you want vigorously into your mouth WHILE crying. My mom wanted pie.

Last year, I made her a beautiful coconut cream pie, a show stoppingly good conjure that I repeated this past weekend for company we were having over. It didn't survive a full day in our fridge before disappearing. So maybe, when it's good, pie is magic. For the actual birthday pie this year, I set my sights on a different model.

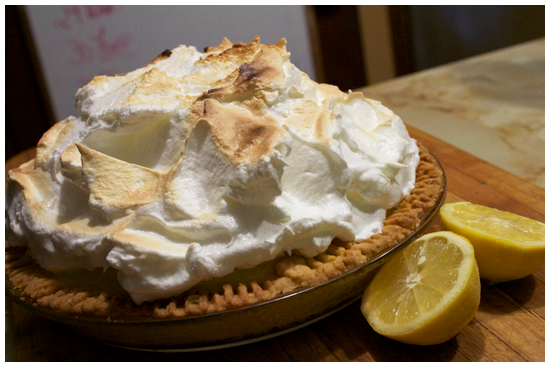
This lemon meringue pie is a sashay up from the simple diner version, and a whole league away from the neon goo model you get in a grocery store. It has a sweet shortbread crust. The filling is glossy smooth as any beauty queen's best answers in the interview portion, with the tang of real lemons to make it a memorable affair. It's topped off with a towering Swiss Meringue crown. Move over, Honey Boo Boo.


"Mile High" Lemon Meringue Pie

Makes 1 9-inch pie
Adapted from Martha Stewart

Shortbread Crust

Ingredients

1 cup unsalted butter
1/2 cup icing sugar
2 cups all purpose flour
1/4 tsp baking powder

1. Preheat oven to 350 degrees. Cream together butter and sugar until fluffy. Sift in flour and baking powder, blending together until dough is crumbly.

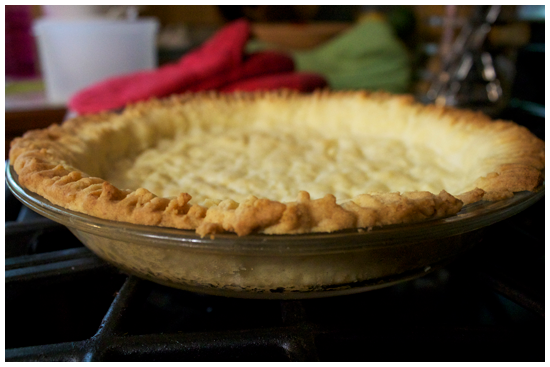
2. Using your fingers, press the shortbread into the pan, trying to keep the thickness as even as possible. Bake 15-20 minutes until golden brown. Set aside to cool.

Glossy Lemon Filling

Ingredients

1/3 cup cornstarch
1/3 cup cake flour, sifted
1/4 tsp salt
1 1/4 cups sugar
2 cups water
5 large egg yolks, lightly beaten
2 tbsp lemon zest
1/2 cup fresh lemon juice
4 tbsp unsalted butter, cut into pieces

1. In a medium saucepan, sift together cornstarch, cake flour, salt and sugar. Slowly whisk in cold water, and put the mixture over medium heat. Whisking constantly, bring mixture to a boil for about 5 minutes until it gets thick.

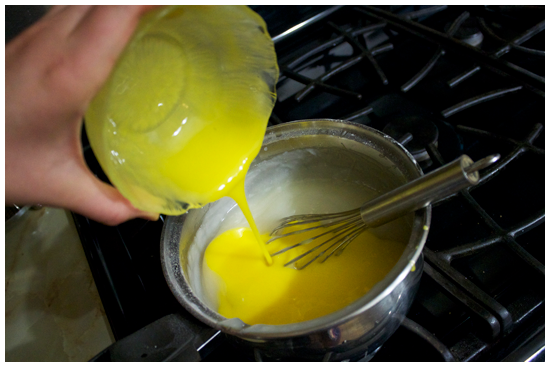
2. Remove the pan from the heat. Bring the eggs to temperature by quickly whisking a small amount of the hot mixture into them. Then, whisk them back into the pan and cook over low heat for 4 minutes.

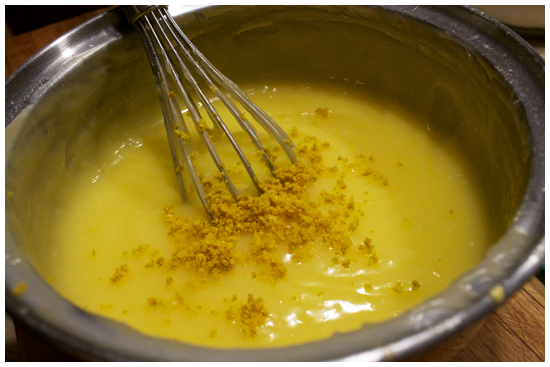
3. Take the pan off the heat once again, stir in the lemon zest and juice. Then, stir in the butter until incorporated. Put the mixture in a bowl to cool.

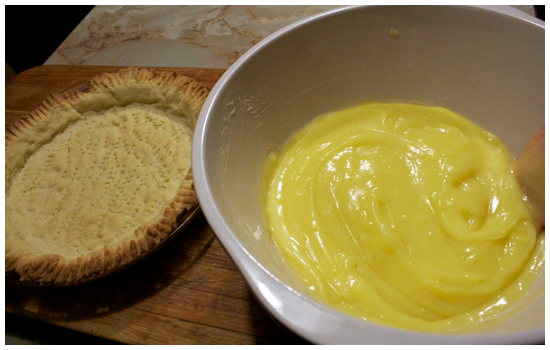
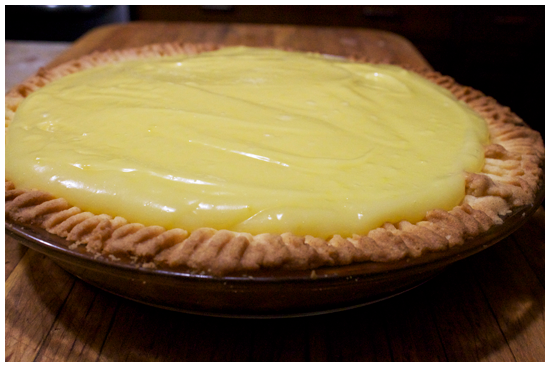
4. When the mixture is cool, spread it into the pie shell, and smooth it all out. Let it set in the fridge for at least one hour.

Swiss Meringue

Ingredients

7 egg whites
3/4 cup sugar
1/4 tsp salt.

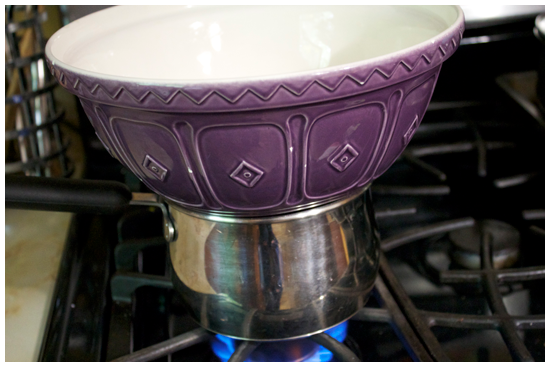
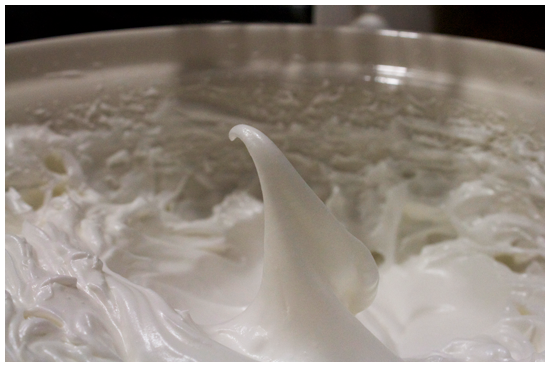
1. Put egg whites, sugar and salt in a heatproof bowl over a saucepan filled with water, bringing the water to a simmer.  Whisk until the whites are warm and the sugar is dissolved.

2. Remove the bowl from the heat and whip with an electric beater (or ultra muscle power) until stiff peaks form.

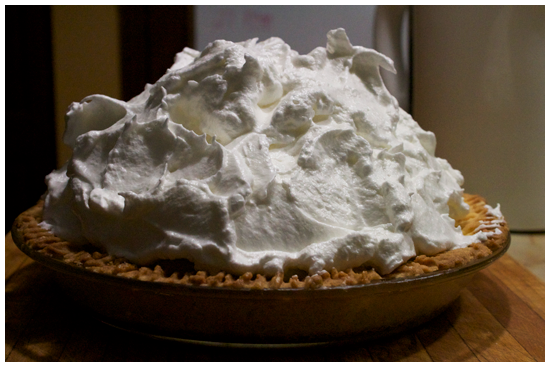
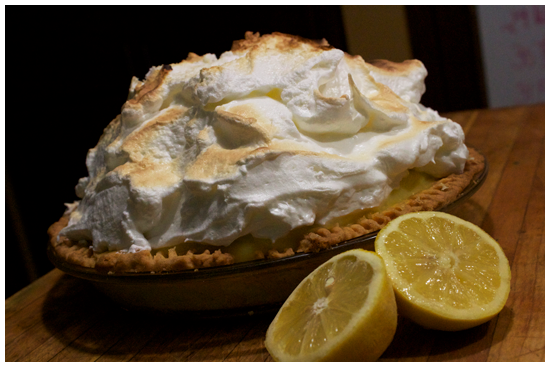
3. Smooth the meringue onto the pie in a giant mound, making sure to get all of the edges. Set under the broiler on high for two minutes. (Watch it. IT WILL BURN!) Serve at room temperature, and enjoy!

I Am Jack's Step By Step Photos 

1. Blend together butter and sugar. Next, sift together flour and baking powder, and add to the butter mix, blending until crumbly. Press with even thickness into a 9 inch pie plate, crimping the edges with a fork. Bake for 15-20 minutes until golden brown. Set aside to cool.

 2. Sift together cake flour, cornstarch, sugar and salt into a medium saucepan. Slowly stream and whisk in two cups of cold water over medium heat. Bring to a boil, stirring constantly for 5 minutes, until mixture thickens.

3. Remove the pan from heat. Add a small amount of the hot mixture to the egg yolks, whisking them quickly and constantly to bring them to temperature without cooking them. Add the yolks back into the mixture-- whisk them in and cook over low heat for 5 minutes.

4.  Remove the pan from heat again. Stir in lemon juice and lemon zest. Then, stir in the butter to incorporate and melt. 

5. Set the mixture aside in a large bowl to cool. 
You can do a lot of things while you're waiting for this to happen. As usual, I went on a run, I think I did some dishes, I maybe practiced my pageant walk, but you can't prove that happened. When it's FINALLY cooled, smooth the filling into the also cooled pie crust. Pop in the fridge for at least an hour. I covered mine with plastic wrap, at the risk of scarring the poor filling for life. (It turned out okay in the end!)

6. When the filling is set and you're getting ready to serve the pie, it's time to make that meringue. Put the sugar, egg whites and salt in a heat proof boil, on a saucepan filled with water. Put it over medium heat. Whisk until the sugar dissolves and the whites are warm and frothy. This is the Swiss Meringue technique.

7. Remove the bowl from heat. Using an electric beater, whip the whites up, up, up until they hold stiff peaks.

 8. Spread and mound that glorious meringue into a mountain on top of the pie filling. ALL OF IT. Try and make it look pretty if you want to, I'm no Martha Stewart, but I can dream. This is the kind of pie that just looks pretty without too much fussing.

9. Stick this baby under your broiler on high for 2 minutes, watching it constantly until has the colour of lightly toasted marshmallow. I found this to be tough! So if you make a mistake and it gets a little burned on the top, just scrape it off and try again.

I admit this step also had me squatting in front of the open oven, rocking the heatproof mittens trying to hold the pie underneath the broiler in all of the places I thought it needed more colour. I don't know if that's dedication or madness. I DO know that it made a pretty pie.
Slice with care and serve at room temperature. Enjoy!

Sunday, May 12, 2013

An Open Letter To My Mother

Dear Mama,

Happy Mother's Day.

Hopefully as you're reading this, I'm making you a delicious breakfast that isn't pancakes. There's a chance that there's an odd bridesmaid or maybe a wayward bride-to-be sleeping somewhere in the house, and I'm hopefully kind enough to make breakfast for them too, taking care of guests, like you always taught me. (Since I'm writing this in advance of not only Mother's Day, but also the bachelorette, which you generously agreed to house, everything at this point is guesswork...)

I thought a blog post written to you here, of all places would be very fitting, because it is safe to say that without you, this site wouldn't exist. I mean obviously, I'm here because of you and our 9 sweet months of bonding time, but there's more to it than that. Without your spirit, your creative influence and your passion for food and entertaining, I don't know that I would have found my way to cooking. You've told me a few times since this blog started that I've inspired you to try some new things. Well, I'm thrilled and humbled by the fact that I can finally return the favour and start to repay you for all of the love and know-how that you instilled in me over the years.

Ever since I can remember, you've been filling my head with creative ideas, my ears with music, and my lunch box with love notes (mostly on bananas). I didn't know it at the time, but these were all gifts you were giving to me, day by day, to take with me on my journey through life. Over the years, you've watched me, and your other two daughters grow, and all the while we've watched you cook. We've watched you work from morning to evening making Thanksgiving dinners for crowds, Christmas dinners for just us, birthday cakes, party appetizers, staff meetings, your famous salads, classic "Gladiator" fare, trying new recipes, summer barbecues and then some. I even remember you cooking in the hard times, bringing muffins to your fellow teachers who were marching in the freezing rain on picket lines. I remember you whipping up a hot meal to take to a grieving neighbor who couldn't think about eating, let alone preparing something to nourish themselves in their time of loss. I hope to be just like you some day in these aspects. You inspire me.

You're always concerned about making sure the less privileged children at your school get breakfast. That the hungriest families in the community have a proper meal over the holidays. You have always understood the relationship between love, comfort, humanity, family, friendship, and food. I'm proud of you.

Mom, your heart is a kitchen, open 24 hours for all meals, a midnight snack, and then some. Any time of day that hits, you have a recipe to cure whatever's ailing. Whether you know it or not, you've taught me just the same things that you believe. I'm inheriting your kitchen wisdom, piece by piece. Dinner is not just a meal, it's a time to experiment with flavours and play with spices, as well as a time to sit and be with the people you love, family time. (Unless it's playoffs or the Olympics!) That the reason no one will ever make Babcia's perogies as well as she does is because she spits in them. To let the dressing sit for at least a day because, otherwise, it won't taste right. That leftovers are often better than the meal the day of. It's alright to have cake for breakfast on your birthday. That true wealth is a dining room full of laughing, happy people, a stocked pantry and a glass of red wine.

I learned all of this, just by watching you cook. It's no small wonder I wanted to take the hobby up for myself and open myself up to a world of kindness, experiments, colours, flavour combinations and love that I see you inhabit day in and day out. So thank you, for inspiring in me what I hope will be one of my life long loves. Thank you for teaching me. Thank you for loving me. Most of all, thank you for being my mother.

Love,
Riley

Saturday, May 4, 2013

Food Porn: What the Food Truck?

Friends, yesterday was a good day. I do mean 'good' as in, awesome things happened to me, and not 'good' as in I behaved myself and ate like a well balanced human being. I started the day off with an 8AM Skype date with my sister Jill who is overseas living in Australia. We haven't had a chance to talk, screen to screen in a few months, so I was excited to have a little chat with her, even if I had to get up earlier than usual to do it. I soothed my tired 4-hours-of-sleep self with coffee, yogurt and strawberry buttermilk cake. Yes, cake is a breakfast food. If you missed the news bulletin, you're so welcome.

After I finished the two and half  hour gab session, I had to get ready to go downtown to meet my friend Jon for lunch. I've already mentioned Jon here once before, in my post about risotto and our foodie friend shenanigans. We had been eyeballing a little French café in downtown Montreal called "Le Paris" which serves French cuisine for a little while. Finally, with Jon accepted into his university program, and my exams polished off, we had the chance to go check it out, and sample some of their fine French fare.
In true Riley style, I got the wrong directions and ended up being about 20 minutes late, which was totally alright because all the running around really worked up my appetite. It was well worth the panic. In addition to a great red wine Jon picked, we settled down to a fantastic lunch. (If you live in Montreal, I highly recommend checking it out. They have a lunch special: 2 apps, 2 entrees, dessert and coffee or tea for 24$.)

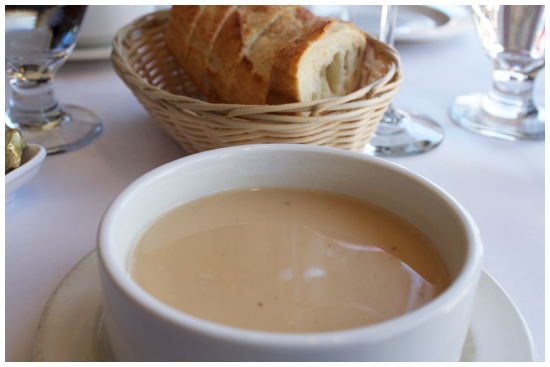
We started off with a creamy turnip soup which came with fresh baguette...

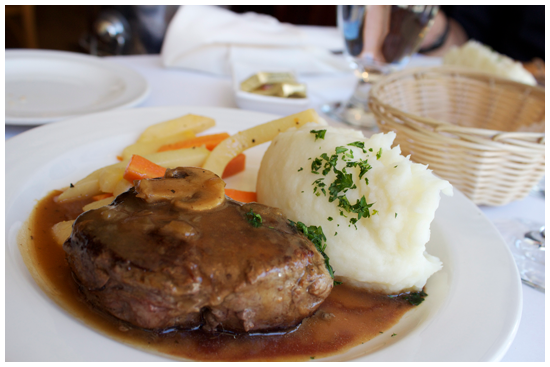
For entrées, Jon and I were also on the same page, ordering boeuf tournedos (filet mignon) mashed potatoes and vegetables on the side. The sauces were amazing, the mash, fluffy without being too heavy. For dessert there was rice pudding made with coconut milk and a pirouline, as well as a good cup of coffee. We even ate like real French people, because it took us over three hours to tuck into the three courses of the meal. (Between my indecision and our conversation, anyway.)

Part II of this adventure involves a little background. Up until recently in Montréal, it was illegal for people to vend food on the streets. Rebekah and I noticed it only because in Toronto there are people selling "street meat" everywhere, but the streets of Montreal are hot dog free. Normally, you think the less hot dogs wandering in gangs in the street, the better, but there are hungry people who disagree with you. So: only about a month ago, the law was repealed.

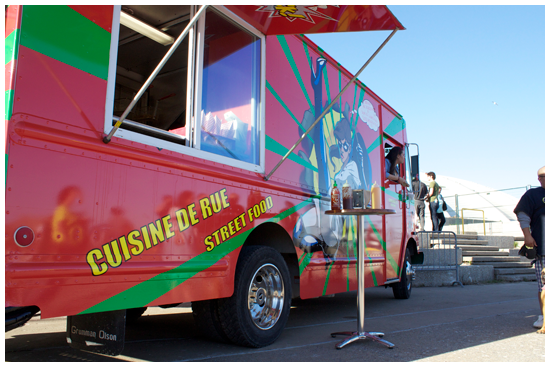
It just so happened that yesterday, there was a sort of food truck expo taking place at the Olympic Park, a short bus ride from my flat. Jon suggested we go check it out, so we split from Downtown to my place. I changed my shoes, and into something with more stomach room, and we picked up Rebekah, setting out as a party of three to go and stuff our faces, which is exactly what we did.

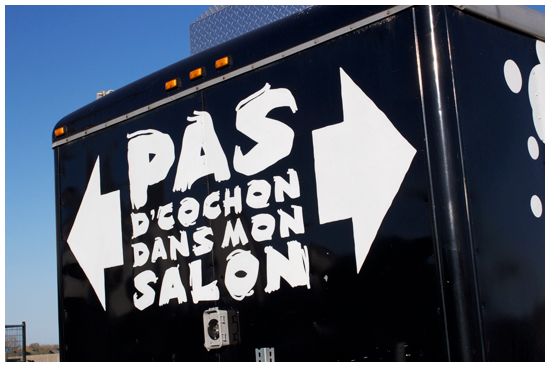
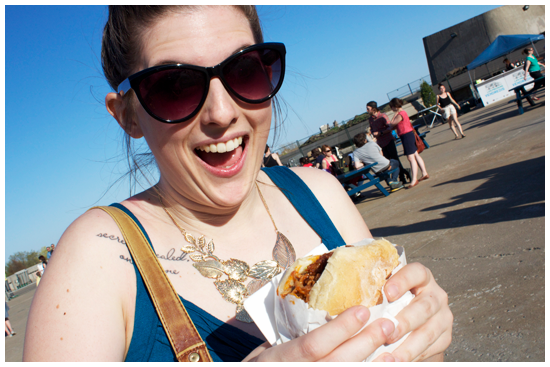
Rebekah opted for pulled pork from Pas D'Cochon Dans Mon Salon. The bun was soft and chewy. The meat was just saucy enough, with more of a sweet tomato flavour, like a chili rather than smoky with barbecue sauce. It was almost like...a pulled pork sloppy joe.
Dat face requires no further explanation.

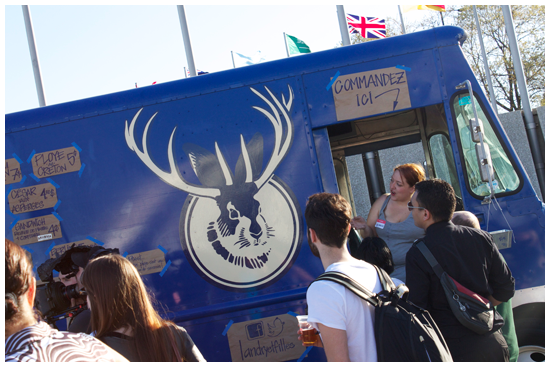
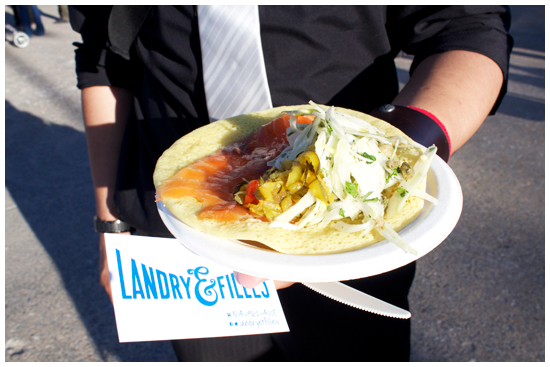
Jon went for a buckwheat crepe with smoked salmon from Landry & Filles. It was a healthy, fresh bite loaded with flavour. The crepe was thicker, easy to hold and I could easily see myself noshing on this on a hot summer day in the park.
See Jon. See Jon nom. Nom Jon, nom!

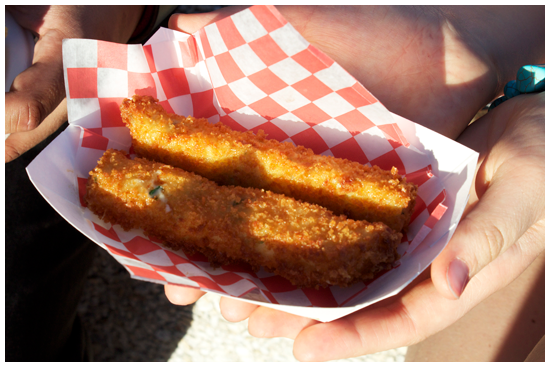
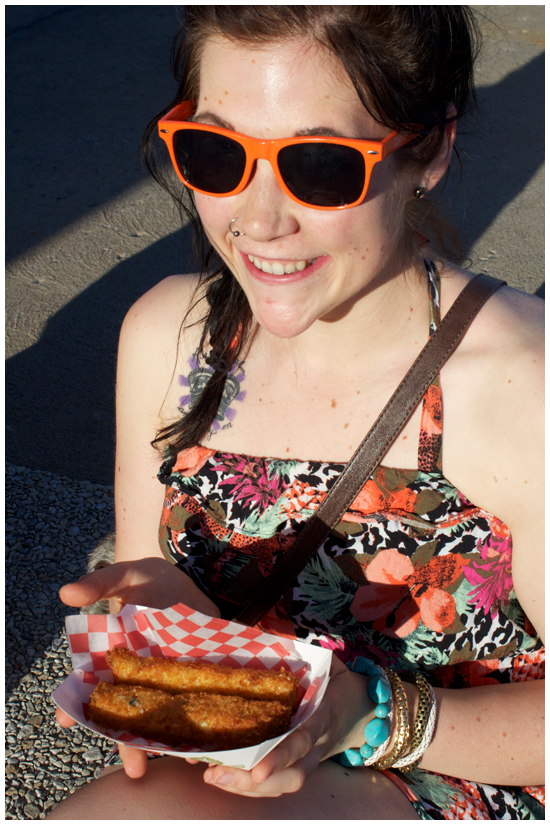
Like an eccentric disco moth to a flame, I opted for the brightly coloured Le Super Truck and got myself some deep fried macaroni and cheese. Yes, yes you are reading that exactly right. The brain meltingly bad but oh-so-good type of food you only see on TV. Deep fried mac sticks, crunchy at first bite, then velvety and smooth on the inside.

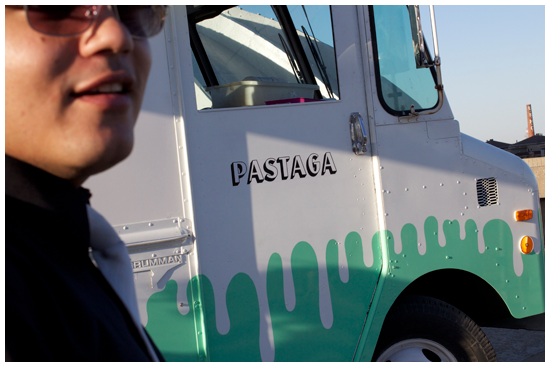
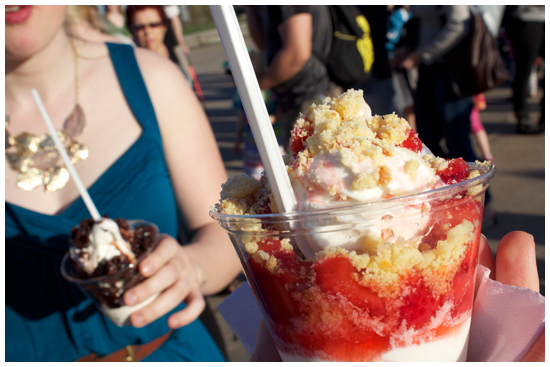
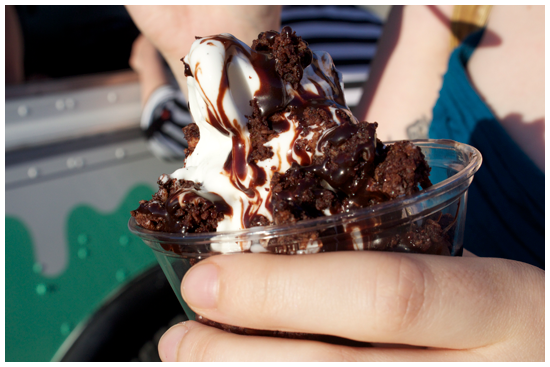
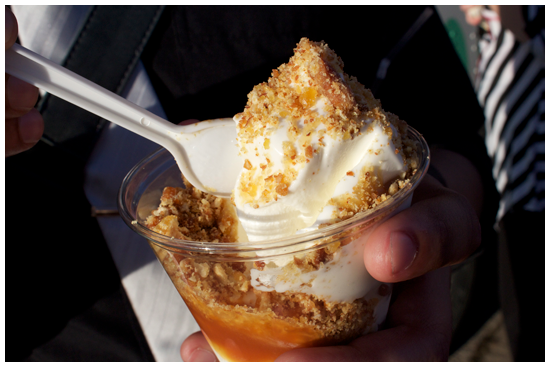
Just when you thought this post wasn't going to get more tasty, we all started screaming and hit the Pastaga truck for ice cream sundaes. Rebekah got chocolat, Jon got noix et caramel, and I got fraises et sablés. (Shortbread cookie.) OMG.
It tasted like summer, and I couldn't have been more happy to shove pretty much all of summer into my smiling face. 

Tuesday, April 30, 2013

The Magnitude

I couldn't very well go through grilled cheese month without posting a grilled cheese of my own! I think that violates some rule or law of food blogging. Or hey, maybe I wanted an excuse to eat grilled cheese just like the rest of you people, with your...fresh breads, your marinades, your bacons and all that melty cheese......... Alright, before I start drooling all over my keyboard.

Ladies and gentlemen, I present to you: The Magnitude. For those of you who watch the show Community:

Somehow, it never gets old.

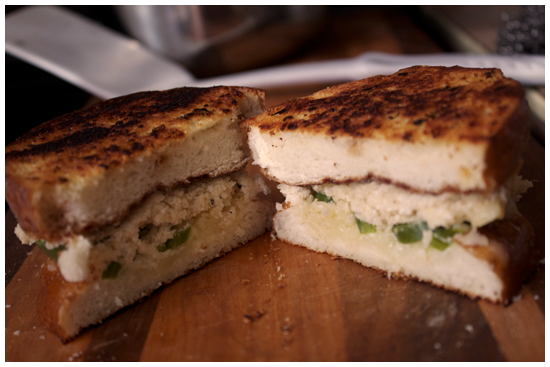
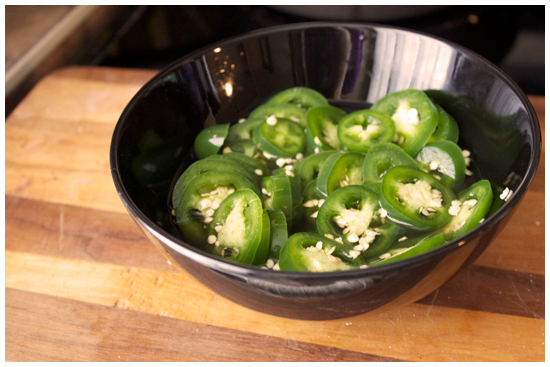
The Magnitude is a sandwich built on a homemade pretzel roll the flavours of a jalapeno (pop) popper in mind. Rather than roast the jalapenos however, I quick pickled them (recipe below!), so they maintained a lot of the heat they naturally possess. The result is a crunchy and creamy grilled cheese sandwich with as little or as much spice as you like. If you want to make this and quick pickle your own peppers, the recipe is just below. If not, keep on scrolling......

Quick Pickled Jalapeno Peppers

Makes 3/4 cup
Recipe by Bon Appétit
 Ingredients

1/2 cup cider vinegar
1 tbsp sugar
pinch kosher salt
4 jalapenos, thinly sliced

1. Whisk together vinegar, sugar, and salt. Add the sliced jalapenos to the mixture, tossing to coat. Let sit for at least 30 minutes before using, tossing occasionally. For deeper flavour, make a day ahead, cover and chill.

Now for the main event!


The Magnitude: Inside Out Pretzel Jalapeno Popper Grilled Cheese

Makes 1 Sandwich
Ingredients

1 pretzel roll (DIY: I used a GREAT, easy recipe from The Slow Roasted Italian.)
3 tbsp plain cream cheese, softened
1-3 tbsp panko bread crumbs
Pinch salt, onion powder and fresh ground pepper, to taste
Cheddar cheese, grated (as much as you want!)
Pickled Jalapeno pepper rings (homemade or store bought), to taste
Butter

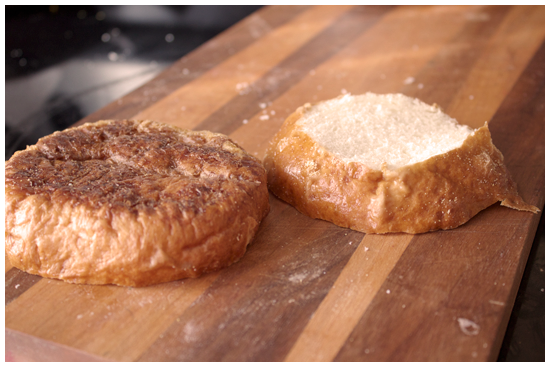
1. Cut the pretzel roll in half, flipping it inside out, so the cut sides are outwards, and the brown part is inside. If you want a flatter sandwich, carve off the "dome" of the bun. 

2. Combine the cream cheese, panko crumbs, salt, onion powder and half of your grated cheddar in a small bowl until it becomes spread-like.

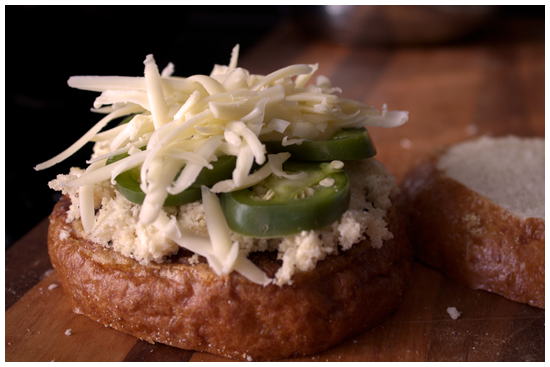
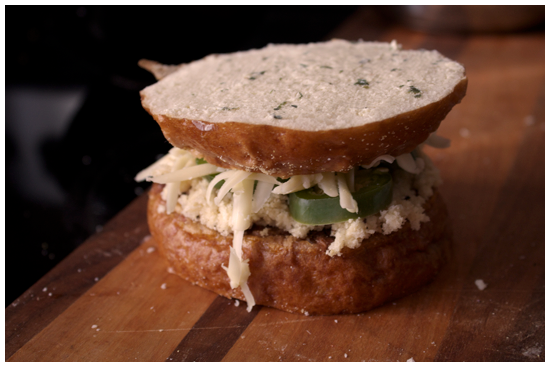
3. Assemble! Spread the cheese mixture on one half of the bun. Add as many jalapeno rings as you like, pressing them into the mixture. Sprinkle the rest of the cheese over top of the jalapenos. Top with the second bun. Butter the hell out of it. (Extra points if you use garlic butter, ooh baby.)

4. Grill in a pan or on a panini press over medium heat until the outside is golden brown and the inside is melty and delicious.

I Am Jack's Step By Step Photos

1.  Cut the buns in half, then cut off the dome section to make a flatter sandwich.

2.  Combine the panko, cream cheese, half of the cheddar, salt, pepper and onion powder in a bowl. Spread it on the roll, press a few jalapeno rings into it, and sprinkle with more cheddar.

3.  Top with the other bun, slather with butter and fry. it. up!
I don't even have another finished picture to show you because I ate this thing so fast.

Thursday, April 25, 2013

Crunch Time

This recipe is so simple that there's not much to say about it.

There's no real story to attach to it. I've never been to a co-op in Portland where they ate this on the daily and I've never gotten lost on a mountainside with a bag of granola as my only food source. I was browsing for recipes, I saw this, bookmarked it, and then I made it. That's it. I didn't have to wrestle plaid clad lumberjacks for it, nothing. Although, I WOULD wrestle rabid lumberjacks for this granola, because that is the depth of my love for peanut butter. My kitchen smells like heaven right now.

This recipe great because it's quicker than most granola recipes- less than 15 minutes total baking time. It's crunchy, not overly sweet and pretty wholesome. I'd try serving it with yogurt or milk and fresh fruit. (I just ate mine with some sliced strawberries and some milk and ooh baby, it was a fine world.) However, if you just eat it, ravenous, handful by handful out of the container, I won't judge.

This shtuff is ALSO vegan, if that's what you're into, you hippie.

Peanut Butter Maple Granola

Adapted from The Sweet {Tooth} Life 

Ingredients

1/3 cup peanut butter (I used all natural)
1/4 cup real maple syrup
1 tsp ground cinnamon
1/2 tsp vanilla
1/2 cup chopped pecans (or a nut of your choice)
2 cups oats

1. Preheat oven to 325 degrees, line a baking sheet with parchment paper and set aside. 

2. In a medium sauce pan over medium-low heat, melt together the peanut butter and the maple syrup, whisking to combine. Add in the cinnamon and vanilla, stirring until evenly distributed.

3.  Now, add the pecans and the oats, stirring until the mixture is evenly coated.

4. Spread the mixture in a thin, even layer on the baking sheet. Bake for 12-15 minutes, then allow to cool completely. Enjoy!


I Am Jack's Step by Step Photos.

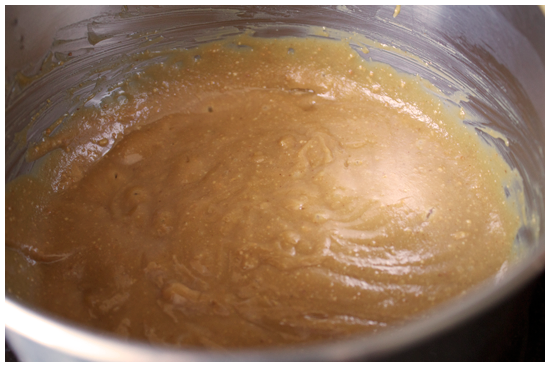
1.  Combine the peanut butter and maple syrup in a saucepan. When melted, add the cinnamon, vanilla and whisk.

2. Mix in the oats and pecans, ensuring they're evenly coated by the mixture. Spread on a baking sheet lined with parchment.

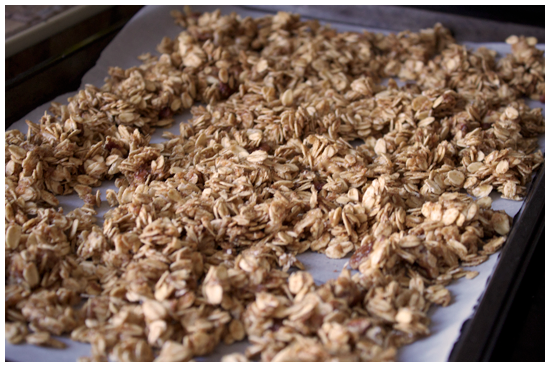
3. Bake at 325 degrees for 12-15 minutes, enjoy peanut butter aromatherapy as the smell fills the kitchen. Remove from oven, let cool on the sheet and store for as long as you can before you eat all of it. Seriously.