Showing posts with label vegan. Show all posts

Wednesday, August 14, 2013

Food Porn: The Vegan Job

I love planning surprises for other people. As a notoriously terrible liar, it's a thrill and a challenge for me to plot, arrange and successfully execute something totally unexpected and amazing for someone I love. For me, few things beat the thrill of scheming behind the back of those close to me, especially when the scheme involves cake. It's like every heist movie I've ever watched gets played out in my own life, except there's no Clooney and Pitt, no Mini Coopers, no Antwerp diamonds, no moles infiltrating my operation, and no burglars dressed up as Orthodox Jews.

...Did I mention there was cake?

My kid sister's birthday is coming up on August 27th, but if all goes according to my heist-- err, plan, I'll be back in Montreal by then. Since I can only imagine what snail mail would do to even the most lovingly prepared and packaged cupcakes, I decided to do the only thing I could: prepare a special vegan dinner, since she recently gave up cheese everything.

I bought the ingredients and hid them all over the house like Easter eggs, taking to baking in the dead of night and while she was out or sleeping. Every resounding slam of the oven door, every time I turned on the beaters to whip vegetable shortening set my heart pounding. I thought I was sure to be caught in my secret, cruelty free endeavours. I was possessed.

It got to the point where it was 2:30AM the day before the dinner and I lay in bed, wide awake over mixing up the triple threat of vegan buttercreams I had planned to do in the early morning. By 3AM, I was downstairs in my pajamas, making raspberry reduction and sifting sugar. By 3:30, I was icing the layer cake, despairing over my sloppy work and resigned to the fact that it was destined to be on Cake Wrecks. By 4, I deemed it "not terrible" and "hopefully it will taste good."

At the end of it all, to get her to the table I had to come clean about the dinner I had prepared for us, saying it was one of the last meals we might get to have together before I left. The cake was still surprise though. Just call me Michael Caine, and bring on the food porn.

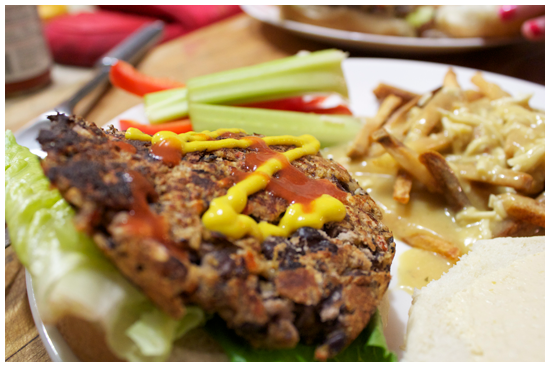
Spicy Red Pepper & Black Bean Burgers - Adapted from Skinny Taste


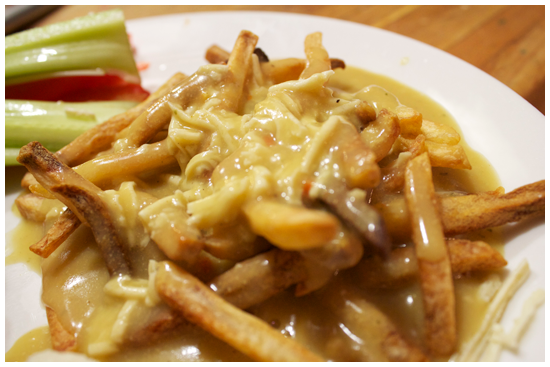
Poutine with Mozzarella style daiya & vegan gravy - From VegWeb


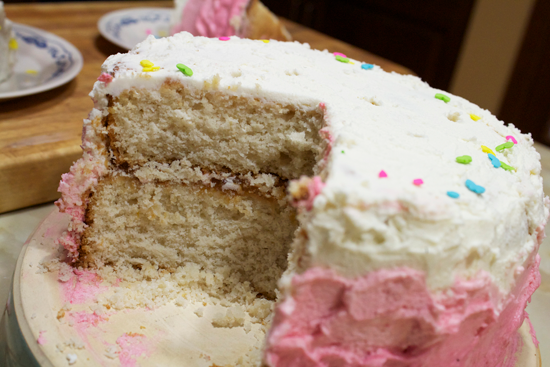
Vanilla Sponge Cake with Peach Preserves & Raspberry Vanilla "Buttercream" - From Lay The Table


Thursday, April 25, 2013

Crunch Time

This recipe is so simple that there's not much to say about it.

There's no real story to attach to it. I've never been to a co-op in Portland where they ate this on the daily and I've never gotten lost on a mountainside with a bag of granola as my only food source. I was browsing for recipes, I saw this, bookmarked it, and then I made it. That's it. I didn't have to wrestle plaid clad lumberjacks for it, nothing. Although, I WOULD wrestle rabid lumberjacks for this granola, because that is the depth of my love for peanut butter. My kitchen smells like heaven right now.

This recipe great because it's quicker than most granola recipes- less than 15 minutes total baking time. It's crunchy, not overly sweet and pretty wholesome. I'd try serving it with yogurt or milk and fresh fruit. (I just ate mine with some sliced strawberries and some milk and ooh baby, it was a fine world.) However, if you just eat it, ravenous, handful by handful out of the container, I won't judge.

This shtuff is ALSO vegan, if that's what you're into, you hippie.

Peanut Butter Maple Granola

Adapted from The Sweet {Tooth} Life 

Ingredients

1/3 cup peanut butter (I used all natural)
1/4 cup real maple syrup
1 tsp ground cinnamon
1/2 tsp vanilla
1/2 cup chopped pecans (or a nut of your choice)
2 cups oats

1. Preheat oven to 325 degrees, line a baking sheet with parchment paper and set aside. 

2. In a medium sauce pan over medium-low heat, melt together the peanut butter and the maple syrup, whisking to combine. Add in the cinnamon and vanilla, stirring until evenly distributed.

3.  Now, add the pecans and the oats, stirring until the mixture is evenly coated.

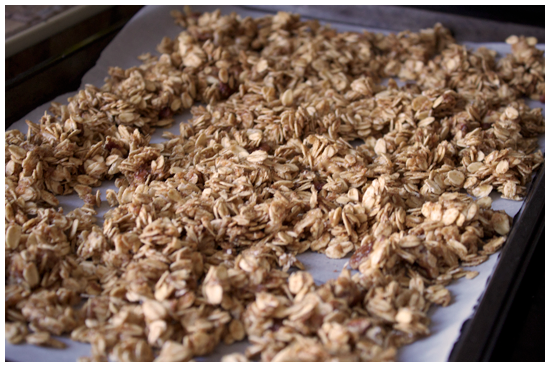
4. Spread the mixture in a thin, even layer on the baking sheet. Bake for 12-15 minutes, then allow to cool completely. Enjoy!


I Am Jack's Step by Step Photos.

1.  Combine the peanut butter and maple syrup in a saucepan. When melted, add the cinnamon, vanilla and whisk.

2. Mix in the oats and pecans, ensuring they're evenly coated by the mixture. Spread on a baking sheet lined with parchment.

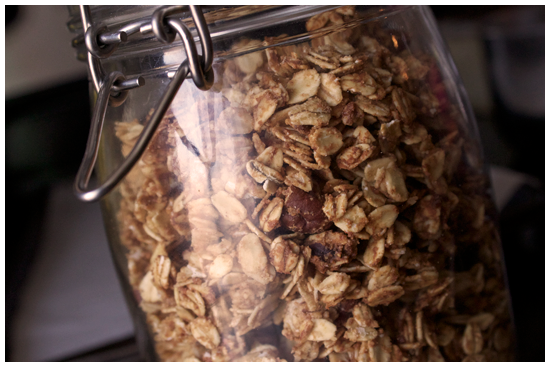
3. Bake at 325 degrees for 12-15 minutes, enjoy peanut butter aromatherapy as the smell fills the kitchen. Remove from oven, let cool on the sheet and store for as long as you can before you eat all of it. Seriously.

Sunday, March 10, 2013

Spice As Nice

You guys, it was so nice outside this weekend. Maaaaaaaaaaaan.

It was so nice I didn't wear my heavy duty parka, not once. It was so nice we saw the sun for BOTH days. It was so nice I finally sucked it up, tugged on my running shoes and ran outside for the first time since November/December. This weekend's weather practically offered you a drive to the airport, even though your flight was leaving super early and it hasn't been able to sleep in for months.

At the risk of jinxing it, I won't say that spring weather is HERE, but this weekend certainly offered a great respite from the cold and the winter blues. The worst thing about it was daylight savings time, losing of a precious hour of slumber. Sure it's easy when you're sleeping in on Sunday, but tomorrow morning when I'm getting up at the new 6:15AM to go to work, I'll probably sit on the bus crying tears of despair into my extra large coffee.

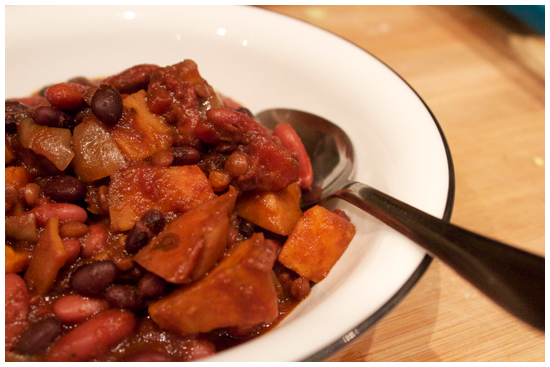
Whether it was the anticipation of a very welcome change of season, or the fact that I knew this week was going to have me hitting snooze too many times to pack lunch in the AM, I decided today would be a great to make one (possibly) last winter dish, my favourite vegetarian chili recipe. It's warm, delicious and it makes enough for a few days worth of lunches!

Unless it's something very special, I usually cook from scratch without a recipe, a skill I attribute to watching many years of kitchen improv by my mama. However, one day, when I was throwing together a random chili, I peered down into the simmering pot and had a thought. I was reminded of the first time I ate Mole sauce, in Texas while I was shooting a documentary for my final film project at Sheridan few years ago. Mole, a savoury sauce, is mostly defined by the fact that it contains Mexican chocolate. On a whim, I threw a spoonful of cocoa powder with the rest of the spices, and I haven't strayed from this recipe ever since. Nor have I written it down...until now.

This recipe is pretty free form, you can add what beans you like, and the sweet potato adds an extra layer to the satisfaction level in an otherwise meat free dish, so any carnivores in the house won't complain (too much). I know it sounds loony, but the addition of the cocoa and even a touch of cinnamon add a savoury depth to the body of this chili that you don't get just any ol' place. It's not so much that when people eat it, they immediately spot the oddity, it's that they take a bite, and then they go, "what IS that?" You can smile brightly and answer, "it's delicious."

"Spicy" Vegetarian Chili 

Serves • Infinity people. (Or maybe 5-8. You know how hungry vegetarians get.)


Ingredients

1 tbsp olive oil
1 medium cooking onion, chopped
2 medium sweet potatoes, chopped

1 tbsp chili powder
 1/8 tsp cayenne pepper
1 heaping tsp ground cumin
1 heaping tsp paprika
1 tsp cinnamon
1 tbsp cocoa powder
salt & pepper, to taste

1 can diced tomatoes
1 heaping tbsp tomato paste

1 can pinto beans, drained and rinsed
1 can black beans, drained and rinsed
Your beans of choice (I added half a cup of dried lentils to mine, for heartiness.)*See notes.
 4 c. veggie stock (Perhaps our homemade veggie stock? I told you it would come up again!)


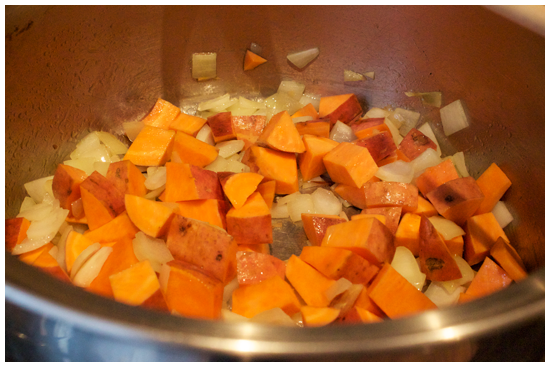
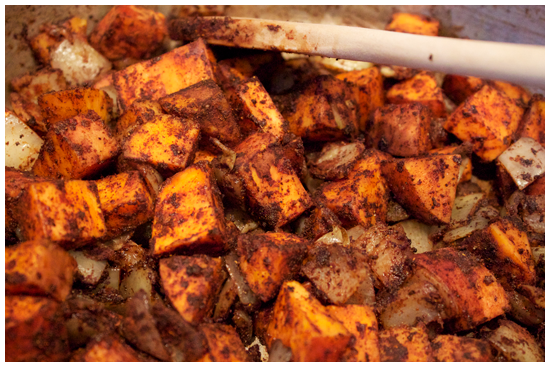
1. Put a large pot over medium-low heat. Saute the onion for about a minute. Add the sweet potato and continue to cook for about 5-7 minutes.


2. Stir in all of the spices to that everything in the pan is evenly coated and fragrant.


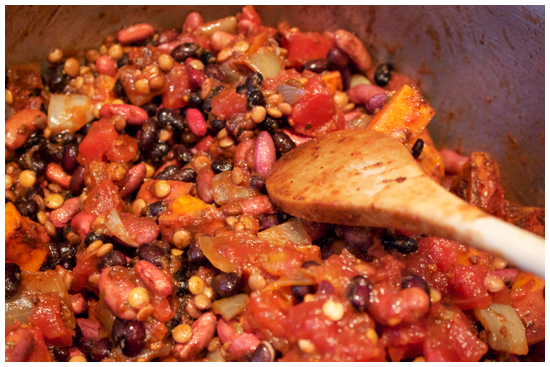
3. Add in the beans, the tomato paste and the canned tomatoes, stir again.


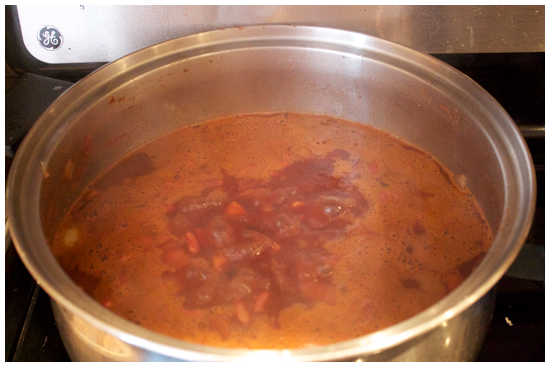
4. Pour in the four cups of veggie stock and bring the mixture to a simmer.


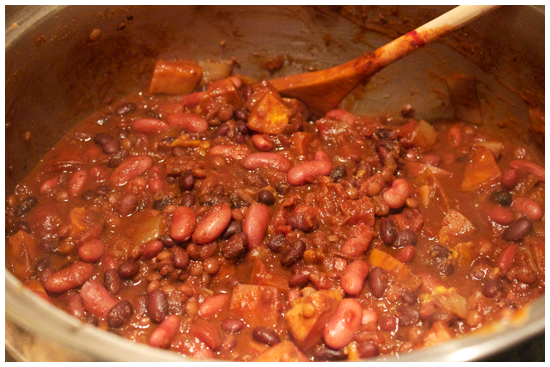
5.  With the lid off, simmer on low-medium heat for an hour (at least) to thicken, stirring occasionally. The longer you let it simmer, the better the flavour and texture of this dish will be.


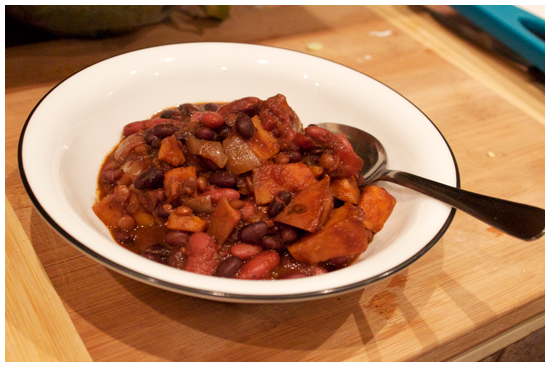
6. When the chili has reached your desire consistency, turn off the heat. Taste, then add salt and pepper as needed. Serve in a bowl with any of the fixings you please! Some options might include garlic toast, tortilla chips, cheddar cheese, sour cream, hot sauce (my personal favourite), avocado or hell, all of them.

Note
*I used dried beans for this recipe (1 cup dried black, 1 cup dried pinto, 1/2 cup green lentils) soaked in water overnight for 12 hours. Dried beans take a longer time to cook up, so if you're in a hurry, I would use canned. On the other hand, with time on your side, dried beans are less expensive than the canned variety and they have a nice bite. I know this because Tyler knows this.


Friday, March 8, 2013

Rock That Stock!

Bite Club rule #2: Never pay for something from a store when you can make it for less at home with ease and a little prep.

Like nearly every other student on the planet, I'm on a budget. I try to make money wise choices when I'm at the grocery store, so that I can make bad money (and health) choices after a night out. (3AM poutine, anyone?) I like to do little things to save money, like bringing my AM coffee fix in a travel mug from home, cutting up my own veggies instead of buying them pre-chopped and well... I keep a close eye on my stocks. The yummy kind, not the Wall Street variety. 

Stocks are awesome, because they're so versatile. They come in chicken, veggie, beef and even seafood varieties, and they go into just as many, if not more dishes. Stews, soups, chilis, rice pilaf, rice, risotto, cous cous-- any savoury application that water does, stock can do better. A box of it from the grocery store is a few bucks, and sure, that's not a lot up front, but it's more than making your own for (close to) free. Intrigued? Read on, friends.

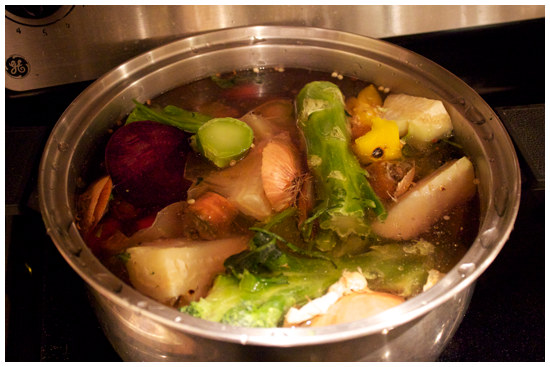
I've been doing this for a few months now. It's stupidly easy and a  great way to make use of something you would just throw out otherwise: scraps of vegetables headed straight for the compost bin. A lot of people buy veg specifically to chop them up and throw it into the stock, but since that seems counter productive to not spending money, I started saving the misfits and scraps, freezing them and then then using those instead. At any given time, there's usually a giant ziploc in my freezer filled with onion stubs, broccoli stems, carrot tops and beet bottoms, just waiting to be boiled down. (Am I the only one who chuckled at 'beet bottoms'?)

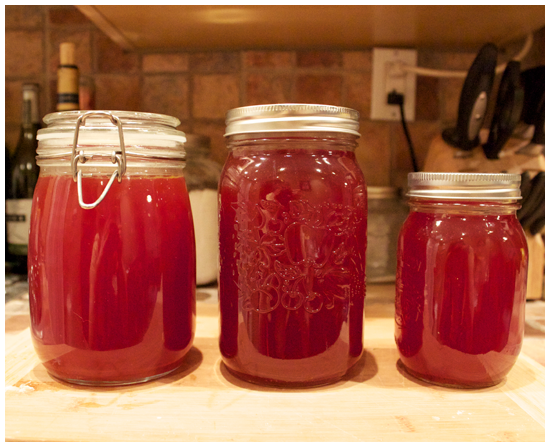
This method produces a different stock every time, which I like, because I live on the edge. Lately, because beets are in season, I've been using a lot of those, which seem to be lending my stocks this warm ruby hue. Gorgeous, dahling. Let's get to it.

Basic Vegetable Stock

Makes about 10-12 cups stock


Ingredients

1 large ziploc full of vegetable trimmings
Water
Salt, to taste
Dried Herbs, if desired

1. Take a large soup pot and pour the vegetables into it. Place it on a burner, turned to high.

2. When the veggies begin to sizzle, add enough water until they're all covered. Add in any of the dried herbs right now, if that's what you're into. I've used rosemary and thyme on different occasions and they both worked it, HARD. Now if you like it, put a lid on it. (And if you don't put a lid on it, anyway.)

3. When the water begins to boil, remove the lid, reduce the heat to medium and simmer for 45 minutes - 1 hour. Don't stir it. Seriously, leave it alone. Go off and live your life. Sing in the shower, watch Friends reruns. Stalk your ex on Facebook while you stock your cooking repertoire with this recipe.

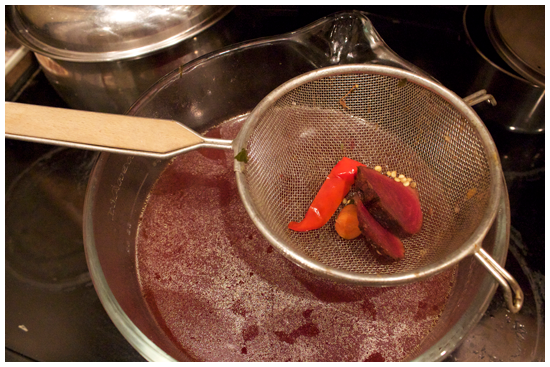
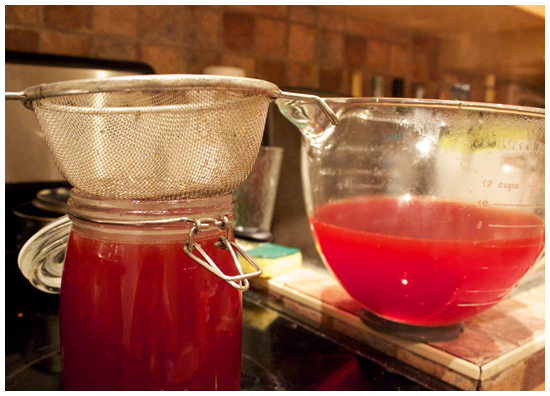
4. When time is up, turn the heat off. Strain the mixture once through a sieve, out of the stock pot, into the fi--err... something easier to pour with. I used the bowl of my stand mixer!

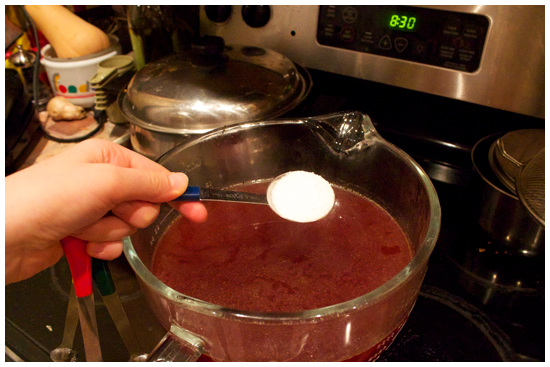
5. Add salt, to taste. I added about a tablespoon. This step is technically optional, as I know some cooks who salt the dish and not the stock, but in the name of seasoning the seasonings... To the salt!

  
6. Strain a second time a second time into jars, and store in the fridge until you have need of it! See? Easypants.


Voila! Stock will keep for about a week. Keep your eyes on the prize, I'll be posting a recipe for you to use your lovely vegetable stock as soon as I can! Happy Friday, kids!