Showing posts with label dinner. Show all posts

Wednesday, June 12, 2013

Say Cheese!...Burger Pizza.

Are you fond of celebrity mash up couple names like Brangelina and Kimye? Do you find yourself often in a tizzy when choosing between two foods upon which to indulge? Are you looking for a recipe which will blow your freakin' mind next pizza night?

Look no further, friends. In celebration of Bite Club having 30 followers on our Facebook page (WOOHOO!), I am sharing with you one of my original recipes.

I invented this on the advent of my roommate's birthday this year. Her birthday fell on a Tuesday, which is pizza night, the most holy day of the week in our flat. I wanted to make her something awesome that still fell under the religious dietary restrictions of our pizza-for-dinner rule. (Amen.) Well, Rebekah's favourite food is burgers. Any time we go to a restaurant, it's a rare occasion indeed that she doesn't order a burger of some kind.

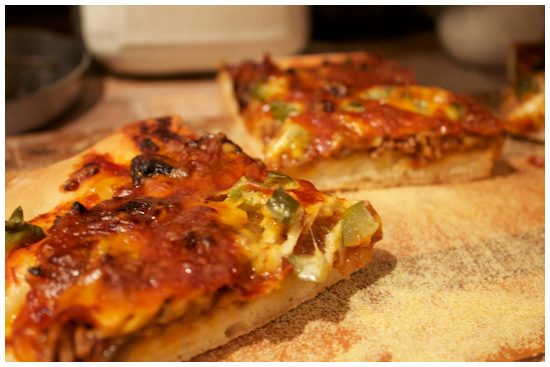
After searching the internet, unsatisfied with pizza recipes that seemed not burger-y enough, or involved hyper processed American cheese, I took matters into my own oven mitts and invented this. Crispy homemade crust, smothered in caramelized onion and mushrooms, ground beef sauteed in burger sauces, and topped off with two kinds of cheeses and pickles. Yes, you read that correctly. Pickles on pizza. Keep the faith. When I made it a second time, for awesome friends Josh and Reb who visited in February, the smell filling the apartment was intoxicating. As we sat around, eating the slices of heaven, even the two of us who had eaten it before would stop between bites and shake our heads in disbelief at the sheer...punch of flavour packed onto this pizza pie. 

This recipe is insanely good. It has crunch, bite, luxurious ooze, a hint of sweet from the caramelized onions, savoury from the beef and salty tang from the pickles. Not to mention, it's FUN! It's the food that childhood and stoner dreams are made of. Dude, imagine a cheeseburger had a baby with a pizza. DUDE. I MADE IT. Now, you should too.

Cheeseburger Pizza

Makes 1 pizza... the pizza of your burger loving dreams.
A Bite Club Original Recipe

Ingredients


1 recipe, basic pizza dough

2 medium cooking onions, diced
1-2 tbsp butter
8 oz. (227g) your choice of mushroom, (I used white) sliced

1/2 lb medium or lean ground beef
2-3 tbsp mustard
1/3 cup ketchup

1-3 tbsp tomato sauce
1 cup cheddar cheese, grated
1 cup mozzarella cheese, grated
2-3 dill pickles, diced

cornmeal, for sprinkling

1. Cut up the onions and add to a large frying pan over medium-low heat with the butter, stirring to make sure they are evenly coated. Cook and stir occasionally to caramelize them, about 45 minutes until golden brown. (Hint: this is a good time to prepare the pizza dough, if you haven't already!) When the onions are golden, add the mushrooms into the same pan and cook until brown. Salt the mixture to taste.

2. Empty the mushrooms and onions into a small bowl and set aside. Put the ground beef into the same pan and crumble it with a wooden spoon. Cook over medium heat until just browned.  Turn off the heat and add the mustard and ketchup to the beef, stirring until it is creamy and evenly mixed. Leave to cool.

3. Preheat your oven to 425 degrees. Generously sprinkle a baking sheet with cornmeal, and roll out the dough onto it, all the way to the edges. Grate the cheeses if you haven't already.

4. Spread the dough with a thin layer of tomato sauce. Then, spread the ground beef evenly over the mixture. Follow this with the onions and mushrooms. Cover the entire thing with the grated cheeses. Over the stop, sprinkle the diced pickles.

5. Bake for 30 minutes. When it's finished, remove from the oven and let cool for an additional ten minutes. Slice, serve and live the dream.

I Am Jack's Step By Step Photos.

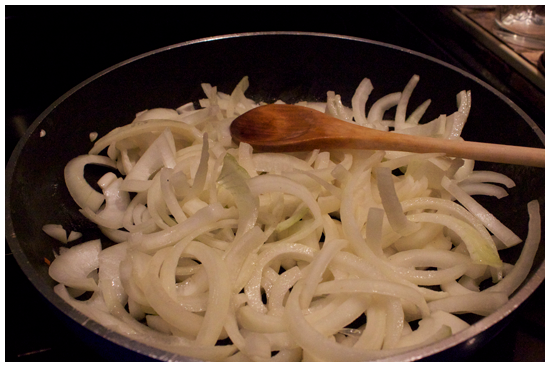
1. Melt butter in a medium frying pan over medium-low heat. Add the onions, stirring to ensure they are properly coated in butter.
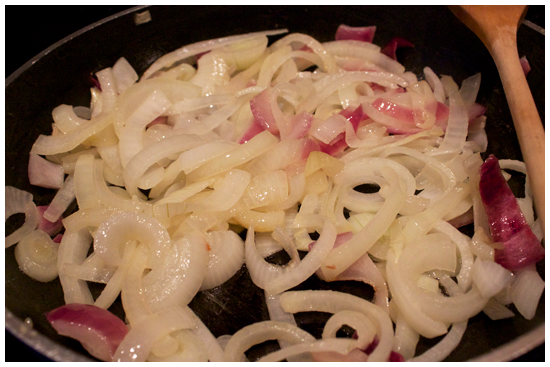
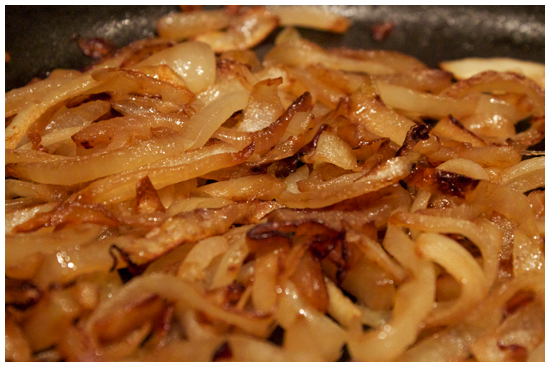
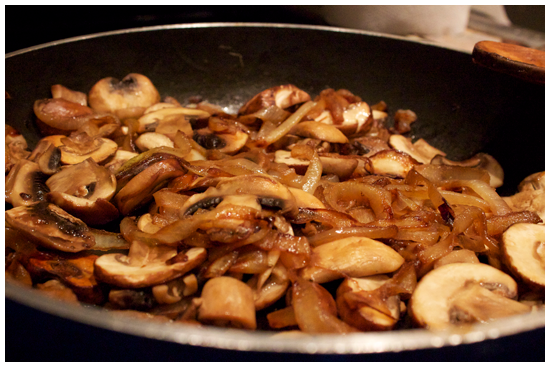
2. After about 35 minutes. The onions will be a golden brown. Add the sliced mushrooms and cook them together, until the mushrooms are browned and slightly shrunken. Empty into a separate bowl, return the pan to the heat.
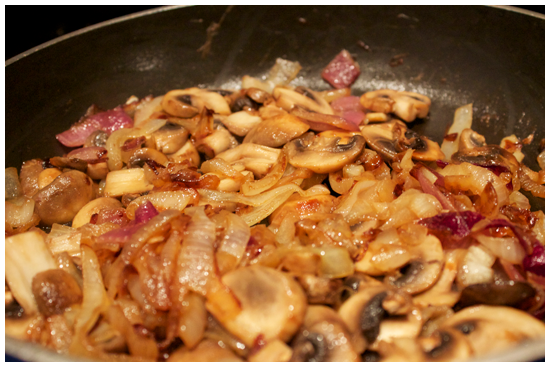
3. Add the ground beef into the same frying pan, cooking over medium heat until just browned. Do not overcook, remember, you'll be baking the pizza for another half an hour!
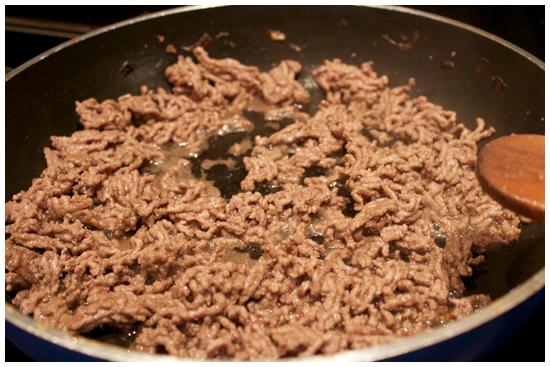
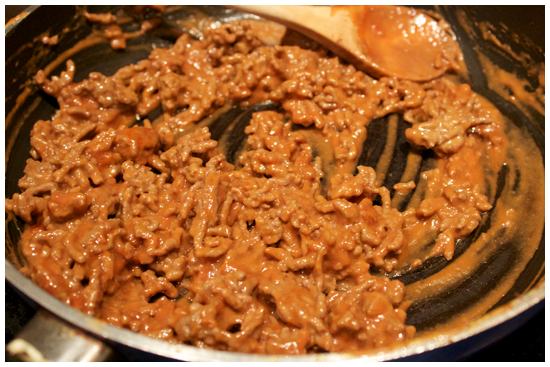
4. When the beef is cooked, turn off the heat. Stir in the ketchup and the mustard until it is evenly mixed and properly coated. Yes, it looks kind of gross. Is it delicious? ABSOLUTELY.
5. Preheat your oven to 425 degrees. Sprinkle a baking sheet with cornmeal generously, then roll the dough out so it meets all of the corners. Spread with a thin layer of tomato sauce, as much to your liking
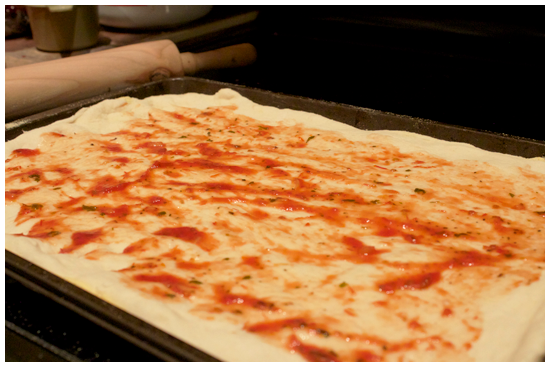
6. Spread the beef evenly over the dough, followed by the mushrooms and onions.
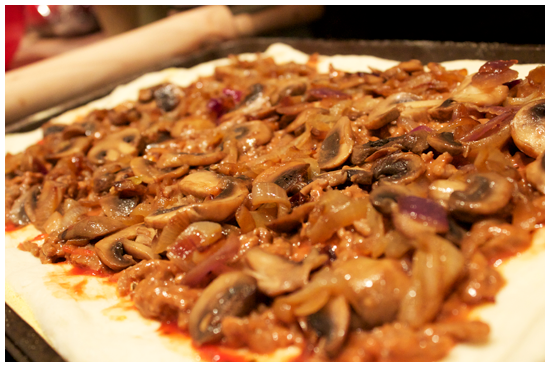
7. Sprinkle both cheeses over the entire pizza, and top it off with the diced pickles.
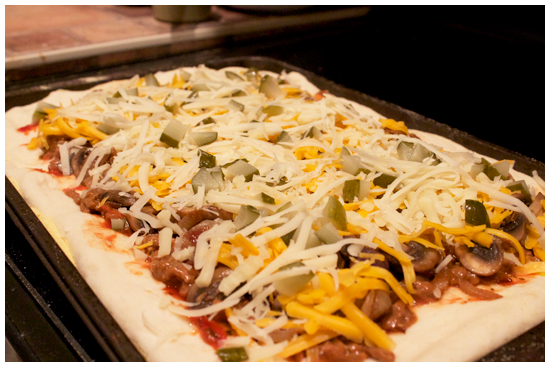
8. Bake for 30 minutes, until cheese is melted, and golden brown.
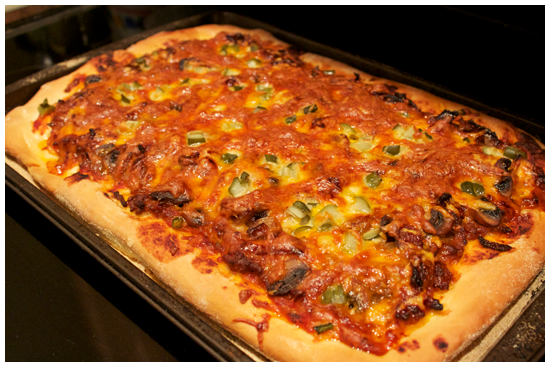
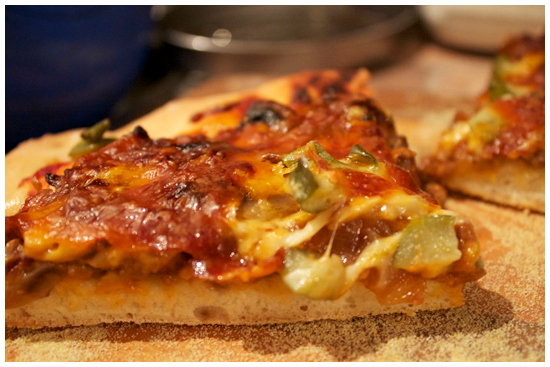
9. Allow the pizza to cool for 10 minutes. Slide it onto a wooden cutting board, slice and serve! 
Friday, March 22, 2013

Holy Crepe!

I woke up on the stupid side of the bed yesterday, the one where you get mad for no reason at the smallest stuff. The customer at work who asked for no foam on their latte (without saying please, wtf, lady), the fact that the metro was so crowded, the old woman moving at a glacial pace who  got stuck behind on the walk home, were all things that normally wouldn't phase me, but yesterday, they did. I know that when it gets to I point where I'm annoyed at old ladies for being old ladies, that I need to do two things: check myself, take a minute or two to collect why I'm freaking out over nothing-- and also, cook. Cooking makes me feel better about all the things, all the time. The sense of accomplishment, reward, and harmony in the kitchen is nearly perpetual.

I concluded a few things: I'm in the middle of post-stress stress- I handed in a paper worth 25% of my mark yesterday, and while I'm happy to have it out of my hands, I got all worked up writing it and now I'm left gun shy over waiting for the mark. I'm sick of winter-- Montréal got buried underneath about a foot of snow this week, on the first day of Spring, just when I thought we were turning a corner. I'm also homesick. I'm heading home next week for the Easter long weekend, and the fact that I know I'm GOING at all is making me chomp at the bit to get there, to see my family and friends. And all of these things brought me to... crepes.

Crepes always remind me of my Babcia, because the only time I ate them as a kid was when we went to visit her in Tinyboringtown, Ontario. Warm homey feelings of nostalgia, plus pride in using her recipe just snugs me right in the 'feelgoods.' From my Russian grandmother, to my mother to me, to you, friends: these crepes are great because you can eat them sweet or savoury, and they're simple. Anything that's simply good in my books is GREAT. I dressed mine up for dinner with caramelized onions, sauteed mushrooms, broccoli florets and cheddar cheese. DELICIOUS. You'll see.

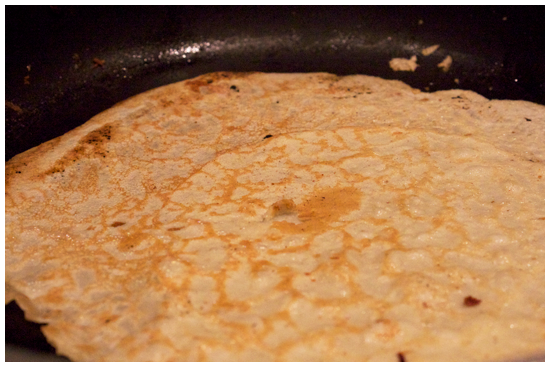
A few things to note: this recipe is an exercise in patience and practice, if at first you don't succeed, try, try again and eat the mistakes because damnit, they will be delicious anyway. Two things are key: butter and timing. I tried to make these awhile back, and I greased the pan with olive oil which didn't work so well. A well buttered pan is your weapon of choice here. Also, I know crepes are thin, tiny pancakes so you think they need nanoseconds to cook, but DON'T flip them until the edges are browning! Just like real pancakes or teenagers, they will come away from the pan easily when they're ready to be flipped. Don't pressure them!

Caramelized Onions

Ingredients

2 cooking onions, chopped into strips
1 tbsp butter
salt

1. Melt butter in a large frying pan, then add the chopped onions.

2. Cook them on medium-low heat. Stir them once in awhile but let them do their own thing, for 30-45 minutes until they're a dark, caramel brown. (I added in the sliced mushrooms just before the onions were done and sauteed them all in the same pan, because multiple dishes are for suckers.) Salt the onions to your taste!


Basic Crepe Recipe

Makes about large 6-8 crepes.

Ingredients

1/2 cup all purpose flour
2 eggs
1 cup milk
1/4 tsp baking powder

1. Whisk together all of the ingredients. Refrigerate for at least an hour. (I try and make my batter 24 hours in advance, then let it sit in the fridge. The batter needs to rest to make good crepes!)

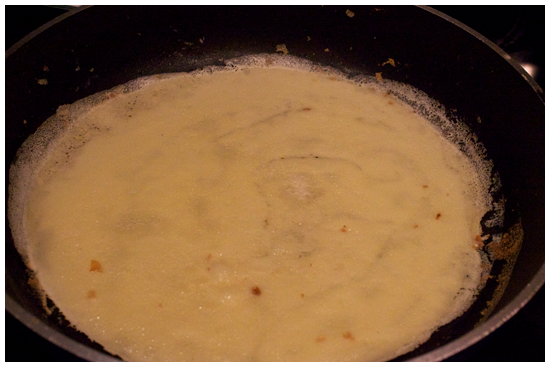
2. Butter a large frying pan and keep it over medium-low heat. I found the best way to pour the batter into the hot pan was to make a circle around the edge of the pan with the batter, then to tilt it until it spread to cover the entire bottom.

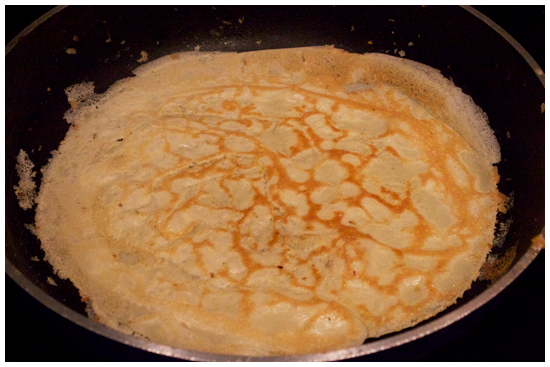
3. When the top of the crepe is no longer shiny and the edges are brown, slide a spatula beneath it, gently easing it away from the pan. Flip that motha', and the other side will cook for about 30 seconds..
.
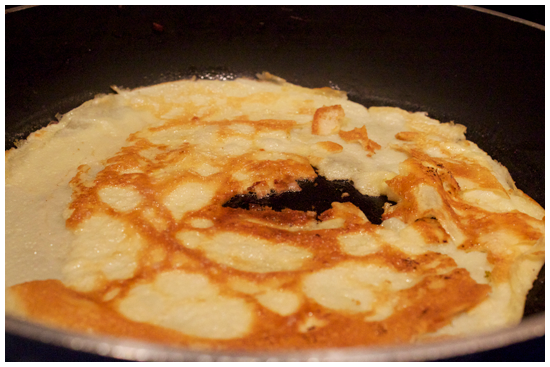
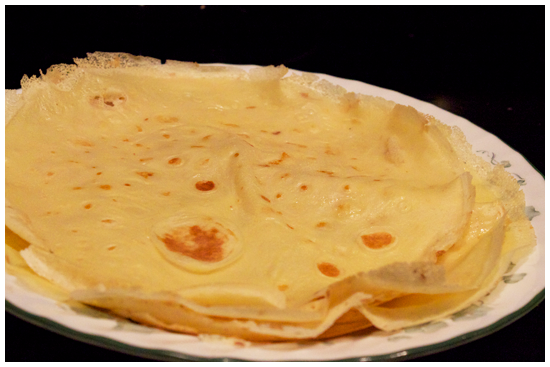
This takes some practice, as you can see from the picture below this caption, sometimes crap happens when you're cooking crepe, and it will create a frustrated sensation in your cranium, but trust, you can do it! I did, and I did a happy dance when I finally achieved my dream of carby perfection. I am being literal about that dancing thing, too.

4. Now you have a tasty pile of crepes to do whatever you please with. As I said, these would be great with maple syrup,  or slathered with Nutella and crammed full of raspberries, but, as this post will demonstrate, this is a dinnertime food, too.

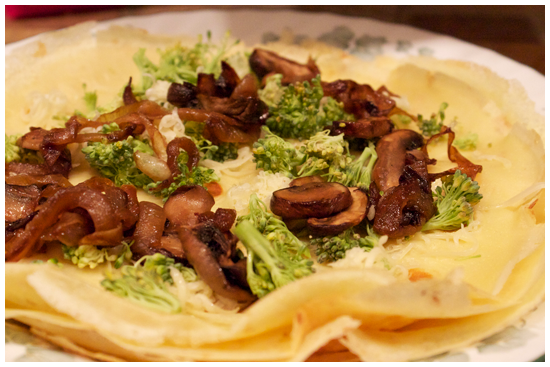
5. I sprinkled a handful of shredded old cheddar, broccoli and the caramelized onions and mushrooms mixtures on one crepe....

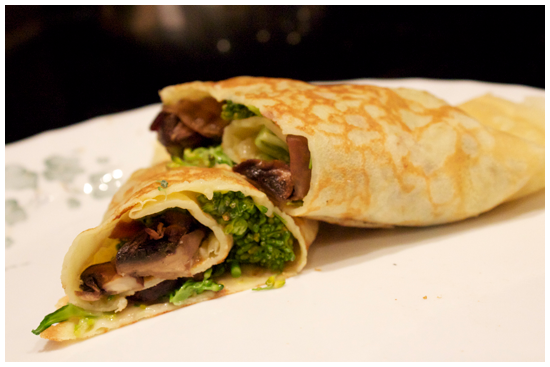
...Rolled it up, and put it back in the frying pan to melt the cheese.
Then I ate it so fast, I barely had time to snap pictures of it, let alone garnish the plate, let alone ANYTHING. 

Wednesday, March 13, 2013

Dough, Yo

I didn't realize how important this recipe was to me until one Friday night a few weeks ago when I was having drinks at a stranger's house. (By stranger, I mean a friend of a friend who I was meeting for the first time, and not a balding dude in an unmarked van-- CALM DOWN MOM.) After a few rum and cokes, we decided what many people getting downright drinksy decide-- we were HUNGRY and we wanted PIZZA.

The three of us being accomplished cooks, agreed that delivery is for suckers and decided to make our pie from scratch. Well-- it was at this point that I volunteered to make the dough, and found myself in the kitchen with the task of whipping it together. To my own surprise, I knew it how to do it from memory. I guess I've made enough pizzas with it and now it's in my brain, and maybe even engraved on the walls of my heart. After all, pizza is my most favourite of foods. (Or one of them... Don't make me choose, please.)

It's probably because every week, the roommate and I declare Tuesday as "pizza night", throw together this recipe, add whatever we have in the fridge by way of toppings, and devour the goodness while watching New Girl. It's our miniature kick off to the rest of the week.
What's that? You still think pizza from scratch is a pain in the asiago? Well then:  I swear to you, this recipe requires very little kneading, making dough at home is probably better for your health (blah blah blah), AND you get to be the smug guy who has enough kitchen skillz to make their own pizza dough at parties. Are we down? Good. Let's get cookin', yo!

How much do I love pizza Tuesdays with Jess and the gang?
Yep, that about hit the nail on the head right there.

Basic Pizza Dough

Makes 1 cookie sheet sized pizza.


Ingredients

1 cup warm water
1 packet instant yeast (2 1/4 tsp)
1 generous pinch sugar

1 tsp salt
2 tbsp olive oil
2 1/2 cups flour* (plus more for kneading, dusting and dough's sticky shenanigans)
cornmeal

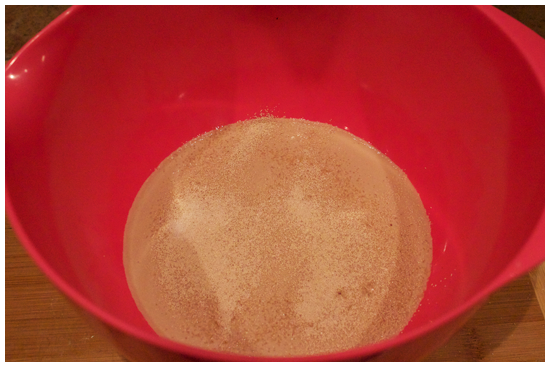
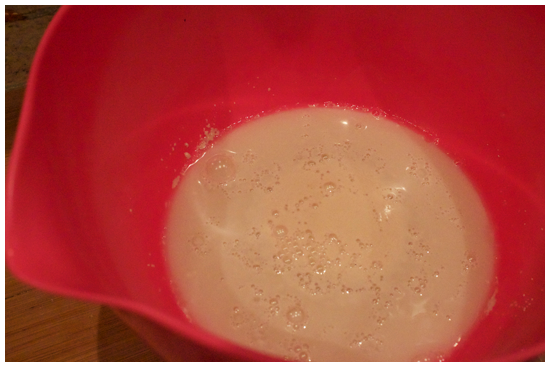
1. Pour warm water, yeast and pinch of sugar into a mixing bowl. Whisk.


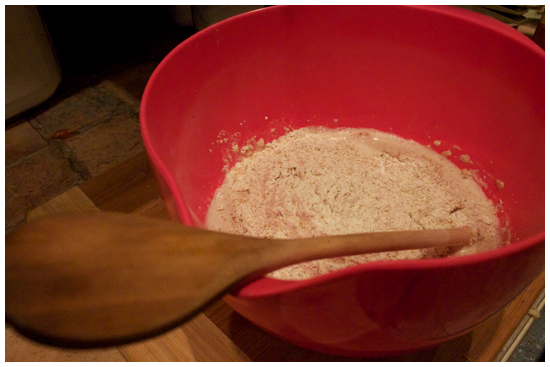
2. When the mixture gets bubbly (about 5 minutes), add the oil, salt and 1 1/2 cups of flour.


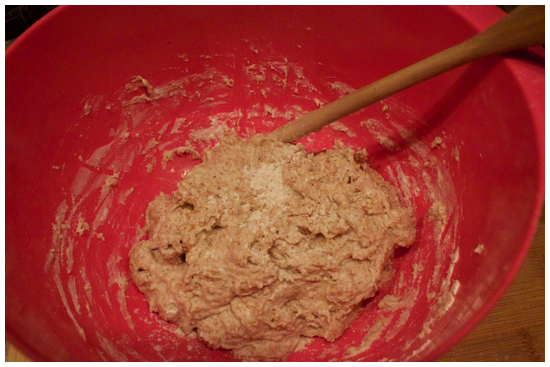
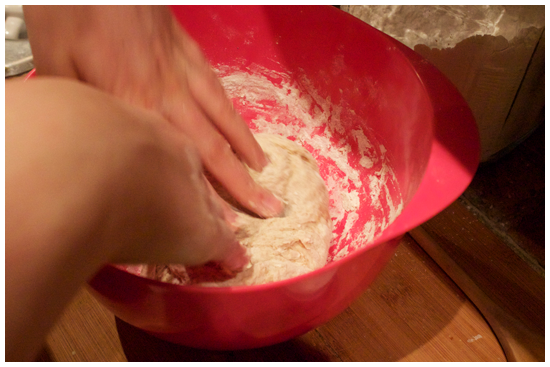
3. I find it's best to start out mixing the dough with the handle of a wooden spoon because it's sticky as hell and easier than clawing raw dough from beneath your fingernails, scraping it off your palms, and having a general breakdown over WHY, WHY DO THE PIZZA GODS HATE ME? Bro, chill and trust the spoon.


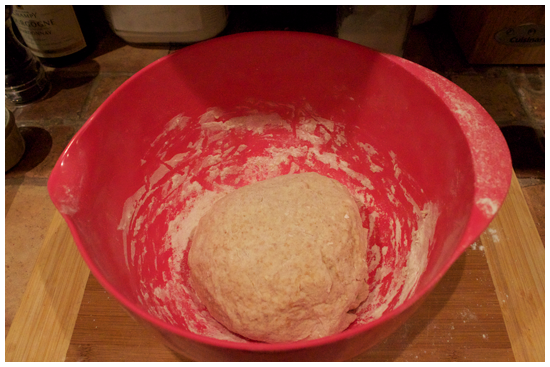
4. Now, the time of knead. Adding the remaining flour, fold and knead it into the dough with your fingers, your knuckles and your British Bulldog determination. You should have have a neat, round ball to work with at the end of it all. Set aside for 10 minutes, minimum, to rise.

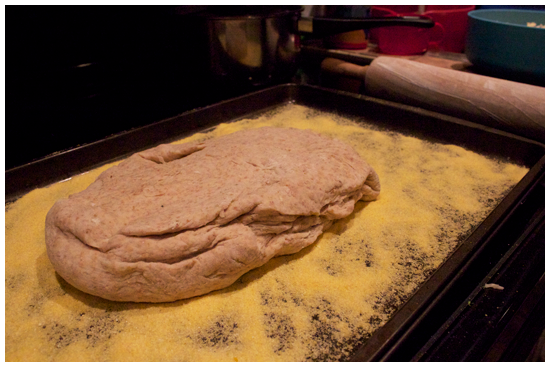
5. In the meantime, grab a cookie sheet and sprinkle it with cornmeal. Don't be shy, in fact, be downright liberal, because you don't want the pizza sticking to the pan. If you're baking the dough now, preheat the oven to 400 degrees. If not, wrap it in cellophane and freeze it for later use. (But seriously, you know you want pizza right now so bake it RIGHT NOW.)


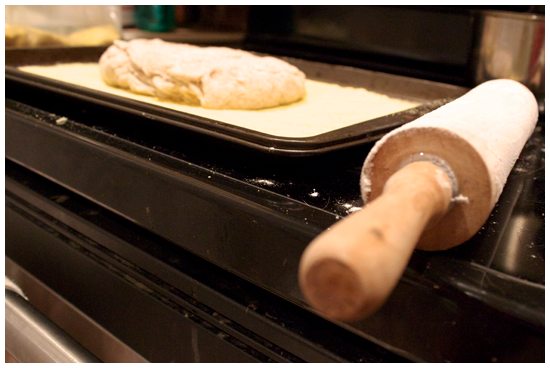
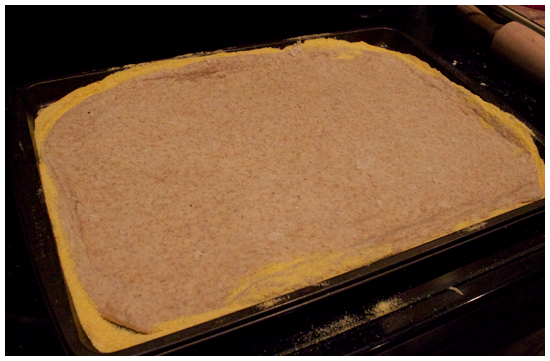
6. Roll out the dough on the cookie sheet to the edges,  gently flouring the top if it is sticking to the rolling pin.


7. Now is the time to make art with your freshly primed canvas. Top with desired toppings (sauces and cheeses and meats, oh my) and bake for 30 minutes. Allow 10 minutes to cool, and then get cray with the eating and everything!

Note
*You can use many different combinations of flour with this recipe. I've tried a combination of whole wheat flour & all-purpose flour (about 1 1/2 cups & 1 cup, respectively) as well as one made from only all-purpose flour. Don't be afraid to experiment, and if you come up with some brand new genius combination, leave me a comment, a tweet or an email and tell me about it! I'd love to hear from you! I know this, because Tyler knows this.

Sunday, March 10, 2013

Spice As Nice

You guys, it was so nice outside this weekend. Maaaaaaaaaaaan.

It was so nice I didn't wear my heavy duty parka, not once. It was so nice we saw the sun for BOTH days. It was so nice I finally sucked it up, tugged on my running shoes and ran outside for the first time since November/December. This weekend's weather practically offered you a drive to the airport, even though your flight was leaving super early and it hasn't been able to sleep in for months.

At the risk of jinxing it, I won't say that spring weather is HERE, but this weekend certainly offered a great respite from the cold and the winter blues. The worst thing about it was daylight savings time, losing of a precious hour of slumber. Sure it's easy when you're sleeping in on Sunday, but tomorrow morning when I'm getting up at the new 6:15AM to go to work, I'll probably sit on the bus crying tears of despair into my extra large coffee.

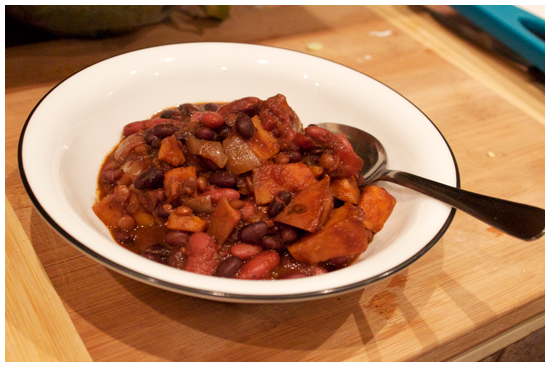
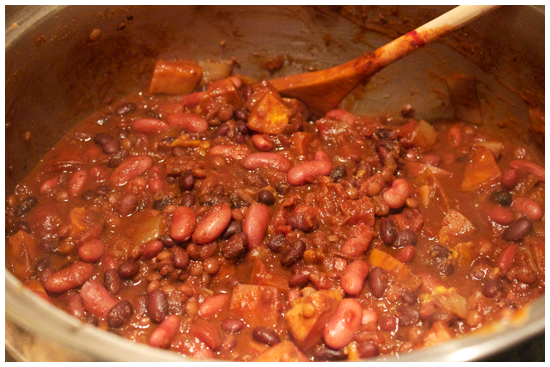
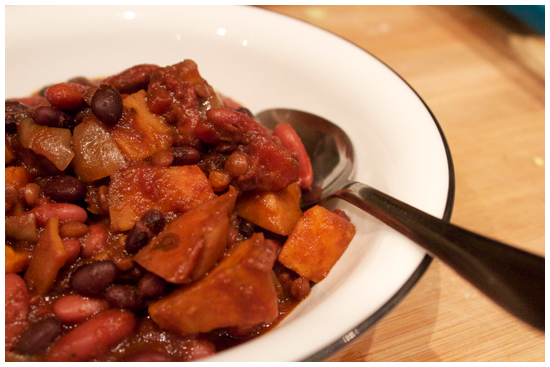
Whether it was the anticipation of a very welcome change of season, or the fact that I knew this week was going to have me hitting snooze too many times to pack lunch in the AM, I decided today would be a great to make one (possibly) last winter dish, my favourite vegetarian chili recipe. It's warm, delicious and it makes enough for a few days worth of lunches!

Unless it's something very special, I usually cook from scratch without a recipe, a skill I attribute to watching many years of kitchen improv by my mama. However, one day, when I was throwing together a random chili, I peered down into the simmering pot and had a thought. I was reminded of the first time I ate Mole sauce, in Texas while I was shooting a documentary for my final film project at Sheridan few years ago. Mole, a savoury sauce, is mostly defined by the fact that it contains Mexican chocolate. On a whim, I threw a spoonful of cocoa powder with the rest of the spices, and I haven't strayed from this recipe ever since. Nor have I written it down...until now.

This recipe is pretty free form, you can add what beans you like, and the sweet potato adds an extra layer to the satisfaction level in an otherwise meat free dish, so any carnivores in the house won't complain (too much). I know it sounds loony, but the addition of the cocoa and even a touch of cinnamon add a savoury depth to the body of this chili that you don't get just any ol' place. It's not so much that when people eat it, they immediately spot the oddity, it's that they take a bite, and then they go, "what IS that?" You can smile brightly and answer, "it's delicious."

"Spicy" Vegetarian Chili 

Serves • Infinity people. (Or maybe 5-8. You know how hungry vegetarians get.)


Ingredients

1 tbsp olive oil
1 medium cooking onion, chopped
2 medium sweet potatoes, chopped

1 tbsp chili powder
 1/8 tsp cayenne pepper
1 heaping tsp ground cumin
1 heaping tsp paprika
1 tsp cinnamon
1 tbsp cocoa powder
salt & pepper, to taste

1 can diced tomatoes
1 heaping tbsp tomato paste

1 can pinto beans, drained and rinsed
1 can black beans, drained and rinsed
Your beans of choice (I added half a cup of dried lentils to mine, for heartiness.)*See notes.
 4 c. veggie stock (Perhaps our homemade veggie stock? I told you it would come up again!)


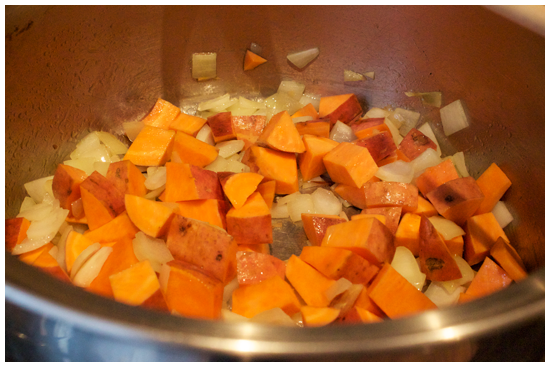
1. Put a large pot over medium-low heat. Saute the onion for about a minute. Add the sweet potato and continue to cook for about 5-7 minutes.


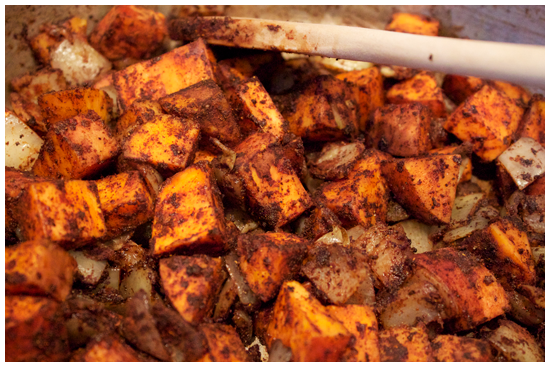
2. Stir in all of the spices to that everything in the pan is evenly coated and fragrant.


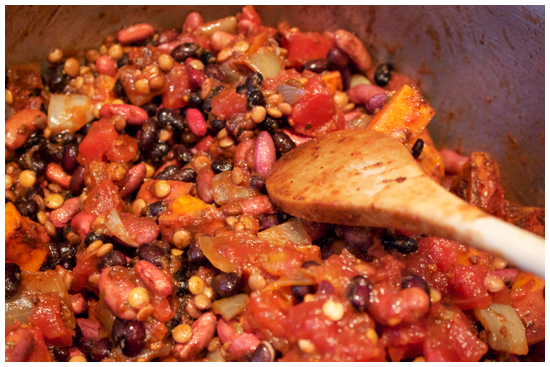
3. Add in the beans, the tomato paste and the canned tomatoes, stir again.


4. Pour in the four cups of veggie stock and bring the mixture to a simmer.


5.  With the lid off, simmer on low-medium heat for an hour (at least) to thicken, stirring occasionally. The longer you let it simmer, the better the flavour and texture of this dish will be.


6. When the chili has reached your desire consistency, turn off the heat. Taste, then add salt and pepper as needed. Serve in a bowl with any of the fixings you please! Some options might include garlic toast, tortilla chips, cheddar cheese, sour cream, hot sauce (my personal favourite), avocado or hell, all of them.

Note
*I used dried beans for this recipe (1 cup dried black, 1 cup dried pinto, 1/2 cup green lentils) soaked in water overnight for 12 hours. Dried beans take a longer time to cook up, so if you're in a hurry, I would use canned. On the other hand, with time on your side, dried beans are less expensive than the canned variety and they have a nice bite. I know this because Tyler knows this.

Monday, March 4, 2013

Welcome to Bite Club.

Can I just say I am SO excited to be writing this first post? Because I am SO EXCITED TO BE WRITING THIS FIRST POST. Starting this blog has been a process of patience, design, decisions and taste testing, but here we are at last! Welcome! 

I'm torn between waxing dramatic about my hopes and dreams here or just cutting it out and getting down to the cooking. As a rule, I know that bacon conquers all, so let's get to the pots and pans instead. (Yes, keep reading and I promise you bacon.)

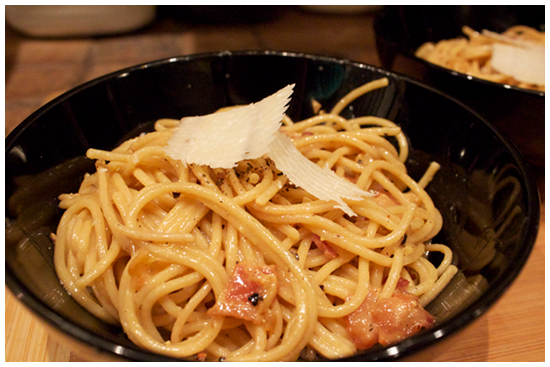
This dish is everything I want to serve up as a first impression. It's not too complicated but it's not too simple. It's hearty and comforting with a twist of Canadiana. Also, it has mysterious historical origins. Who invented Carbonara? Soldiers? Coal miners? Nonnas with a serious love of breakfast food? Google it, and you still won't know for sure. 

One thing most people agree on is that true carbonara sauce contains no cream. Just eggs, bacon (or pancetta), and oil, which when combined, make a silky rich sauce that coats each noodle to buttery, yolky perfection. Mine is no exception to this rule, but it does contain one special ingredient: maple syrup.

SAY WHAT? I know it sounds crazy, but let me explain.

I've been thinking about maple and pasta ever since I watched Elf this past Christmas. You know the scene where Buddy is eating spaghetti with his new family and he pours maple syrup all over it? Instead of being grossed out, or going batty and crumbling Pop Tarts onto my pasta (wtf?), I wanted a more elegant solution. Then I shoved the idea to the back of my head where algebra and other useless knick knacks hang out until I need them.

That was until I started this blog, and began the search for a unique recipe when the answer appeared right in front of my face. Here in Quebec, it is syrup season! The shelves of every grocery store are piled high with the stuff, from candies and spreads, to bottles and cans. It's maple mayhem, probably the best thing this weather has going for it, and it triggered something in my head. Are you ready for this?


Maple Bacon Carbonara
Serves • 4


Ingredients

• 2 eggs, room temperature
• 1/2 - 2/3 cup parmigiano reggiano
• 500g dried spaghetti
• 2 tbsp extra virgin olive oil
• 1/2 pound bacon, sliced
• 5 cloves garlic, finely minced
• 1/2 onion, chopped
• 2/3 cup white wine
• 1/3 cup real Maple syrup
• salt & fresh ground pepper, to taste

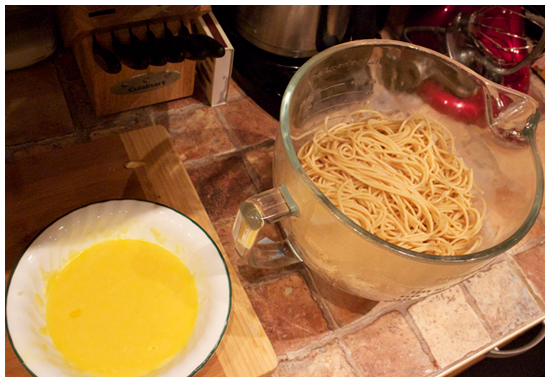
1. In a small bowl, combine cheese and eggs. Beat well and set aside.

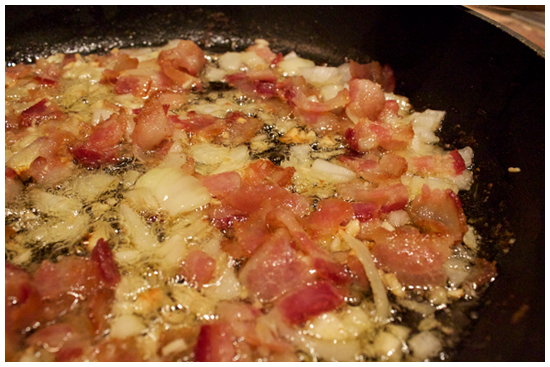
2. Heat oil in a large skillet on medium heat, then add the bacon. Cook until just starting to crisp, about 5 minutes. Then, add in the garlic and onion, cooking until just beginning to soften -- about 1 minute.


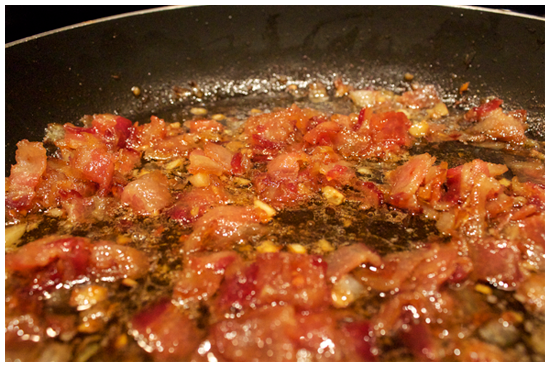
3. At this point, the pan is going to be a crackling party of oil-y, bacon-y goodness. If your conscience is bothering you, drain off some of the fat, but leave at least 3 tbsp worth left in the pan! This is what makes primo pasta sauce, people. Trust. 

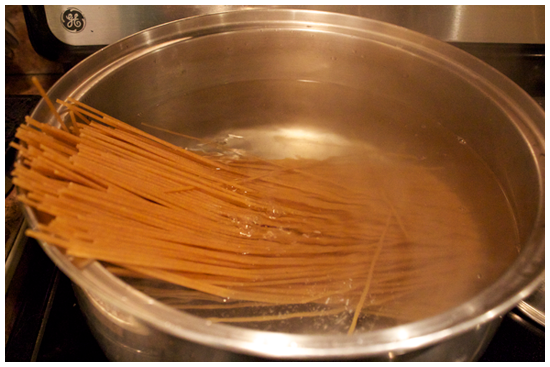
4. Oh yeah, you should get your pasta going too. (I found 500g is about 1 and 1/4 boxes of pasta.) Fill a big pot with water (salt the water!) and bring it to a boil. Cook the pasta to al dente, or however long you feel like. I'm not the boss of you.


5.
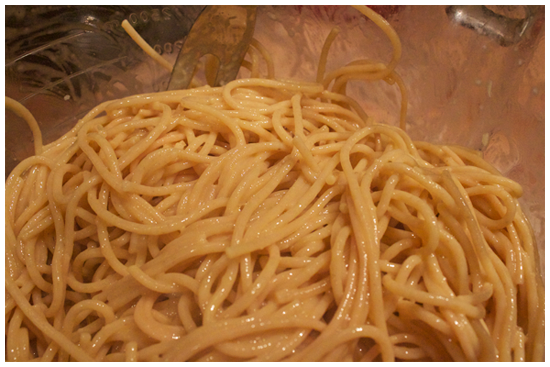
Add the wine to the bacon pan, and cook until it is reduced by half. At this point, add the maple syrup and turn the heat to low-- so it is bubbling gently, but not simmering.


6. Drain the pasta and put it in a large bowl, reserving about 1/4 of a cup of the hot water for tempering the eggs. What is tempering? Glad you asked! Here, it's the process of beating a little bit of the hot pasta water into the egg mixture, so that when we add it to the pasta, it doesn't scramble on contact. When I first made carbonara, I was freaked about this. 

If you're like me, when it comes to something with a possibility of failure, a little voice speaks up in the back of your head. If you're REALLY like me, that voice sounds like Gordon Ramsay screaming at contestants on Hell's Kitchen. Well, forget about those f-bombs, take a deep breath, and arm yourself with a fork or whisk. Beating the eggs rapidly, slowly stream the hot water into the mixture, until you're out of water. Easy. 

7. Now for part two of 'DON'T-SCRAMBLE-THE-EGGS-BECAUSE-GORDON-IS-WATCHING.' (Just kidding.) Add the egg mixture to the hot pasta bit by bit, tossing to coat quickly as you go.


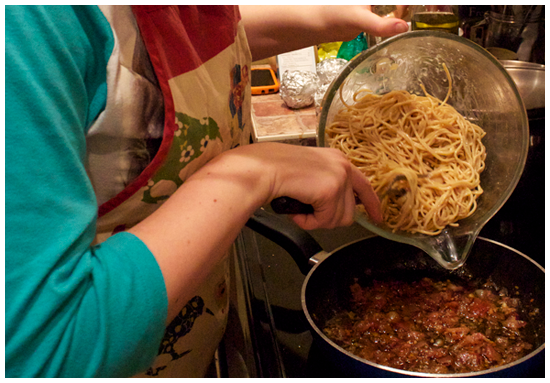
 8. When this is done, you want to add the egg-y pasta into the bacon skillet and toss it until all combined.


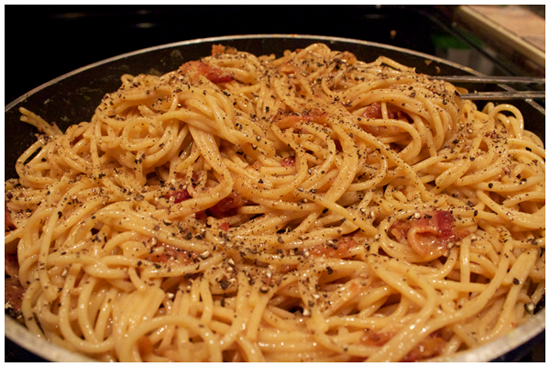
 9. Add salt if it needs it, and lots of pepper. LOTS OF IT. Serve. Bask in the glory of maple.


It's just that easy, and just that awesome. If you don't believe me, you'll have to try it for yourself.
I cooked this one for myself and my roommate, Rebekah, who fantastically designed everything you see on the blog! It was risky, because she is not a self proclaimed 'pasta person'. However, upon trying her first bite, with me cliffhanging on her reaction, I watched her brain melt. Maple bacon-gasm. When she had finished, she even asked for a second helping.
 

If you're reading this, that means you read this post all the way through! (Or you scrolled through straight for the food porn, but whatever, I don't judge.) I can't thank you enough for checking it out in the first place!

The first rule of Bite Club is to talk about Bite Club, so if you like what you see, leave a comment, follow me on Twitter, Pinterest, Facebook or check me out on Foodgawker!