Sunday, September 22, 2013

Gettin' Whiskey

CUPCAKES - imagine I'm yelling that at the very height of my lungs.

CUPCAKES! Or from a rooftop, down onto the ears of the poor, cake-less citizens in the streets below. You suckers, you.

CUPCAKES!!! 

Now guess what I made this weekend. Friends, family, bros, space monkeys, fight clubbers, and everyone else, I am smashing my blogging hiatus with one of my favourite things. Birthday cupcakes.

This month's were for my fellow English Literature bff/writer/baking enthusiast Jocelyn. She's a one woman snark machine, who whips up meals for 4+ people in 45 minutes without breaking a sweat, and spews Shakespearian sonnets like she time traveled from the Elizabethan era, only to crash land in Montreal with a quill in one hand and a full glass in the other. She has her own writing blog, Writing and Whiskey, and recently, encouraged me to start one of my own, to post my scribbles that don't have to do with sugar, flour and pastry cream. I knew I wanted to make her something amazing, for not only being generally awesome, but pushing me to make more art. (You can find me at Coyote Prints, for the literarily inclined.) I also knew that as a kitchen force, she would appreciate something made with a little more panache. You impress a fellow cook, you impress everyone else in the room by default!

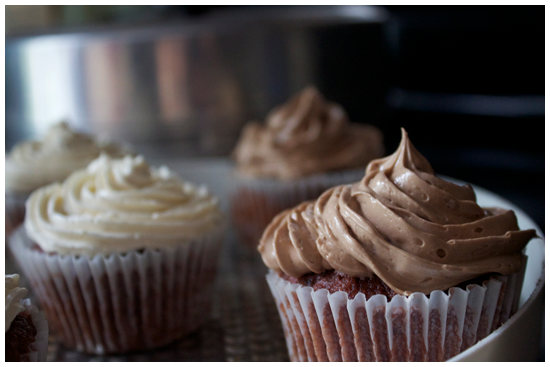
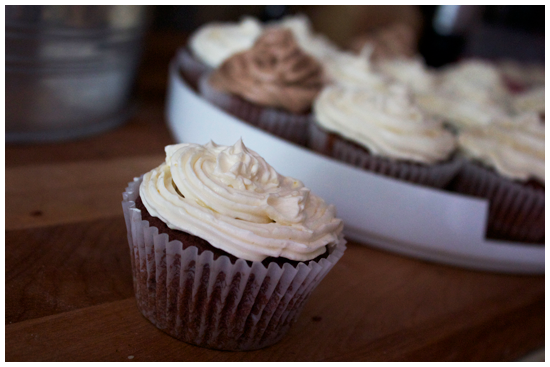
And thus: red velvet cupcakes, with airy whiskey Swiss meringue buttercream. These turned out spectacularly if I do say so myself. They exceeded my expectations. They are moist, and the slightly dense subtle chocolate of the sponge paired amazingly with the cloud soft, silky sweet, whiskey laced Swiss buttercream. Definitely a must for any aspiring writer or cake connoisseur in your life. The flavours meld and aren't overpowering in the slightest.

Note: I also had some leftover chocolate buttercream in the freezer from an earlier attempt at macarons, and I used some of that, too. I can say, first hand, that they also are AMAZING with chocolate frosting. So if you have kids, or your alcoholic tastes are not in line with Hemingway's, give chocolate a chance instead.

Red Velvet Cupcakes with Whiskey Swiss Meringue Buttercream

Makes 24 Cupcakes, iced
Adapted from Paula Deen

For the Cupcakes
2 1/2 cups all-purpose flour
1 1/2 cups sugar
1 tsp baking soda
1 tsp salt
1/4 cup cocoa powder

1/2 cup canola oil
1 cup unsalted butter, melted
1 cup buttermilk
3 large eggs
Red food colour, to taste
1 tsp cider vinegar
1 tsp vanilla extract.

1. Preheat the oven to 350 degrees. Line two muffin tins with cupcake liners. (Note: you do not need to grease the liners, the cupcakes are plenty moist and will do the job for themselves.)

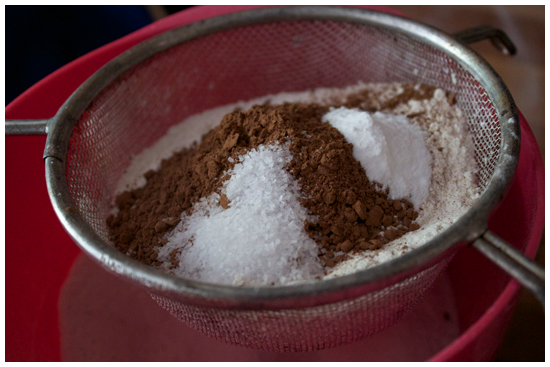
2. In one bowl, sift together flour, sugar, baking soda, salt and cocoa powder.

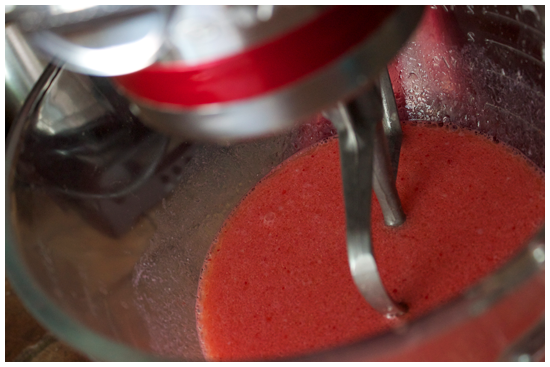
3. In another bowl, put oil, melted butter, buttermilk, eggs, food colouring, vinegar and vanilla. Mix until well combine.

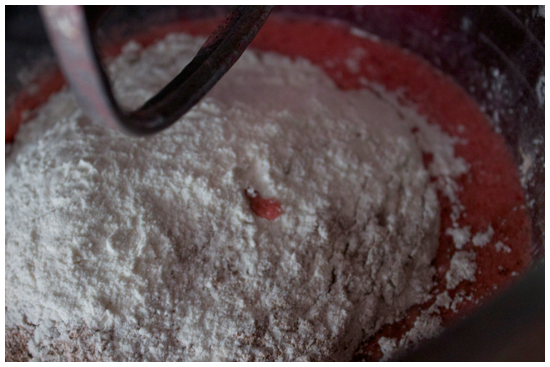
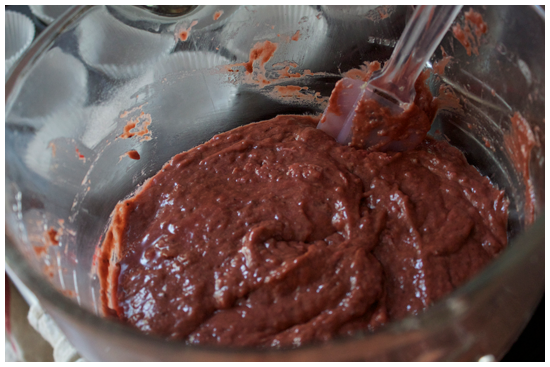
4. Add the dry ingredients to the wet ingredients all in one go, and beat until the batter is thoroughly combined and smooth.

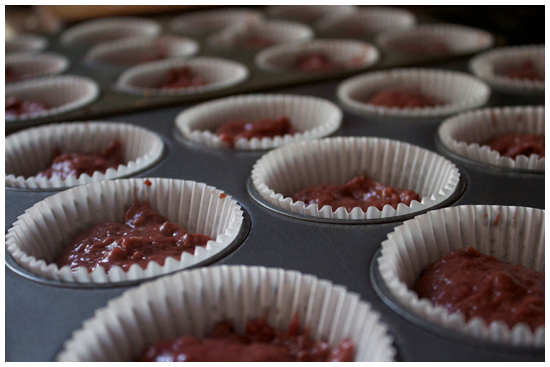
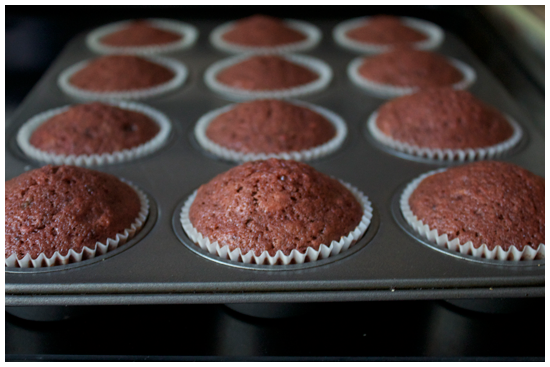
5. Divide the batter evenly among the muffin tins, and bake for 20 minutes, rotating the pans half way through the baking time.

6. Remove from the oven, let cool for 10 minutes in the pans, then remove and cool completely on a wire rack before frosting.

For the whiskey Swiss meringue buttercream
Adapted from Bravetart

2.5 oz sugar
2.5 oz egg whites
Pinch of kosher salt 
Splash vanilla

1/2 lb unsalted butter, very soft
1/4 cup whiskey, any kind (I used Jack Daniel's Tennessee Honey), plus more to taste

1. Make a double boiler by filling a saucepan with water, and then setting a glass, ovenproof bowl on top of it. Bring the water to a low simmer, until it's steaming.

2. In the bowl, combine sugar, egg whites, salt and vanilla. Continuously whisk the whites as they heat, so the sugar dissolves and they don't cook. 

3. When the sugar is dissolved and the mixture is adequately hot, (145-150 degrees if you have a kitchen thermometer), transfer the egg whites into the clean bowl of a stand mixer (or regular bowl if you're not blessed by the KitchenAid gods, and break out the electric mixer). Whip them on high until doubled in size and stiff. 

4. While the whites are cooling, put the whiskey in a small saucepan over medium-low heat until simmering. Keep simmering until the mixture is halved, and then set aside to cool. 

5. It is now time to add the butter to the egg whites. Feel the bowl holding the egg whites with your hands to ensure the bowl itself is cool to the touch. I MEAN IT.

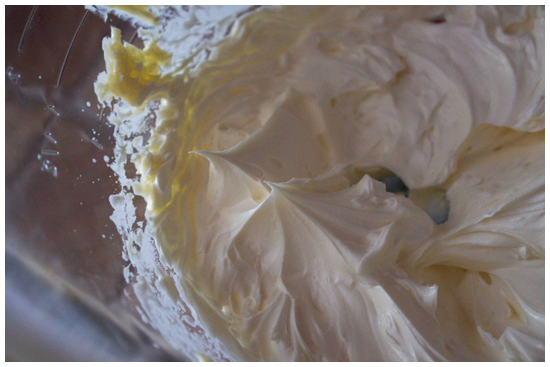
6. Mixing on low, add the butter, one spoonful at a time until fully incorporated. Add the whiskey reduction and whip it into the frosting. Then add a splash of raw whiskey if you want more flavour. (But don't add too much or you'll have a liquid mess.)

7. Frost cupcakes. Eat cupcakes.

I Am Jack's Step By Step Photos
Cupcakes

1. Preheat the oven to 350 degrees. Prepare two muffin tins with cupcake liners. Don't bother greasing them. These suckers have enough oil and butter to look after themselves.

2. In one bowl, sift together flour, sugar, baking soda, salt and cocoa powder. (Gold star if you figured out these were all the dry ingredients!)

3. In another bowl, put oil, melted butter, buttermilk, eggs, food colouring, vinegar and vanilla. Mix until well combined. Say it with me kids, the wet ingredients!

4. Add the dry ingredients to the wet ingredients all in one go, and beat until the batter is thoroughly combined and smooth. Smoothish. Smoother than your average bro, but less smooth than a baby's bottom. ....Those were odd comparisons. Moving on.

5. Divide the batter evenly among the muffin tins, and bake for 20 minutes, rotating the pans half way through. Do this as quickly as possible because you don't want all the heat of the oven to escape and mess with your cooking time! I like to make it a game called, "How Fast Can You Go Without Horribly Scorching Yourself?"

6. When an inserted knife, toothpick or other poking object comes out clean, remove from the oven, let cool for 10 minutes in the pans. After that, remove and cool completely on a wire rack before frosting.

Whiskey Swiss Meringue Buttercream

1. Make a double boiler by filling a saucepan with water, and then setting a glass, ovenproof bowl on top of it. Bring the water to a low simmer, so it's steaming. The steam is actually what heats the bowl. 

2. In the bowl, combine sugar, egg whites, salt and vanilla. Continuously whisk the whites as they heat, so the sugar dissolves and they don't cook. They'll get hot and foamy. Kind of the early stages of the meringue.

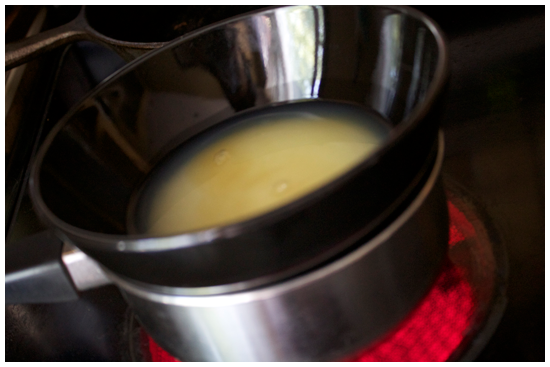
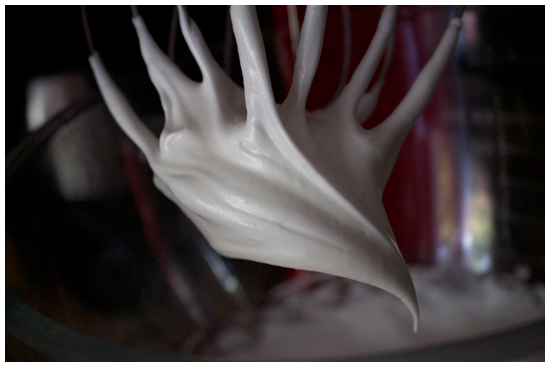
3. When the sugar is dissolved and the mixture is adequately hot, (145-150 degrees if you have a kitchen thermometer), transfer the egg whites into the clean bowl of a stand mixer (or regular bowl if you're not blessed by the KitchenAid gods, and break out the electric mixer). Whip them on high until doubled in size and stiff. 
4. While the whites are cooling, put the whiskey in a small saucepan over medium-low heat until simmering. Keep simmering until the mixture is half the volume and syrupy. Also, don't breath it. I mean, unless that's what you're into.

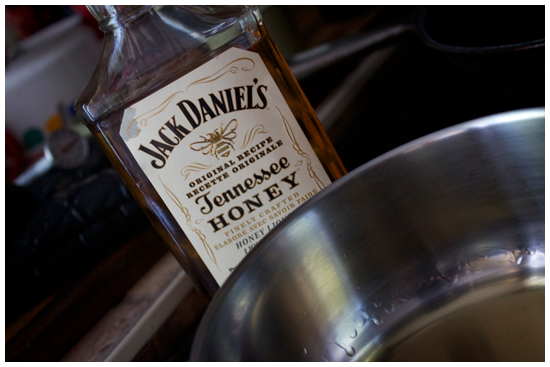
5. It is now time to add the butter to the egg whites. Feel the bowl holding the egg whites with your hands to ensure the bowl itself is cool to the touch. I MEAN IT, OR ELSE.

The butter will melt and you will have a sloppy, unsalvageable mess. Seriously. Let everything cool off. Also, there will be a point where it will look like the stuff is NOT going to come together. Just keep whipping it, and eventually it will come together. As long as you let the temperature fall. 

Mixing on low, add the butter, one spoonful at a time until fully incorporated. Add the whiskey reduction and whip it into the frosting. Then add a splash of raw whiskey if you want more flavour. (But don't add too much or you'll have a liquid mess.)

7. Frost cupcakes. Spread with a knife, pipe them, anything. Eat cupcakes. Or if you're me, photograph them like as much as they're your first born child.

Friday, September 13, 2013

Bite Back: Neato Keto

So this post is just going to be me rambling about why I haven't been posting. So if you came here for food cake porn, regular porn (Google: you're doing it wrong), click elsewhere my friends! 

Between starting school and working part time once again, volunteering for CFSW getting busier by the week, and beginning to write for the university newspaper, I haven't had the time to photograph and write about what I'm chewing on.

But, I really want to take a moment here to talk about what is also a large contributing factor to my slacking posting. I've been on the Ketogenic Diet for the past two weeks. Also known as just plain keto, it's basically eating low carb, medium protein, high fat, flipping the traditional food pyramid or dinner plate or what-have-you on its head. The theory is, when your body runs out of carbs to burn, it goes into what is called "ketosis" which means it will begin burning fat for energy.

A couple of friends and I got into a discussion about the chemistry of it all, and made the choice to take on the challenge of eating strictly keto for a month in the name of curiosity and science. Our decision was greatly helped that this is a lifestyle which encourages both bacon and cheese. 

I don't believe in diets, as they're often unrealistic. You can't live on lemon juice and cayenne pepper while sharing a special family meal or a night out with friends. If a diet interferes with your happiness and lifestyle, there is a better road to health for you. Protein bars or shakes for two meals a day is a sneak preview of hell. Weight loss ads pimping portion controlled, pre-packed meals? Cringe. So I've found something that allows me some exploration in the kitchen. However, this has drawbacks too.

One of the big drawbacks of changing how you eat is that you have to teach yourself how to cook in a new style. My kid sister was bemoaning this to me a month ago, about how she automatically wanted all the knowledge of vegan cookery to be in her brain, a big wish for a kid who used to text me begging for the finite details of making rice. Now I'm in the same boat, albeit sailing in a more bacon-y direction, in a boat made of bacon with bacon sails. (Did I mention I'm allowed to eat bacon?) Everything I'm cooking at the moment is more or less an experiment. Every time I reupholster a recipe to fit into this dietary experiment of mine, I have no idea if it's going to turn into something delicious or crash and burn in a mess of melted cheese and disappointment. Thus, I haven't been taking pictures. Thus, no blogs for you.

But, friends, I have been cooking! I've made pulled pork, cauliflower crust pizza, coconut milk chicken curry, taco salads, stuffed bell peppers, hot chocolate, peanut butter cookies, cheese souffles, espresso whipped cream... I just haven't had the time to write about any of it. Believe it or not, I try and keep a standard of decent quality on the blog, and I don't want to serve y'all some sub-par posts just for the sake of putting up content.

I swear there will be posts coming along soon! In the meantime, here's a quick recipe to tide you over:


Bacon

Serves 1


Ingredients

2-3 slices bacon

1. Put a frying pan over medium low heat. Put the slices of bacon in the pan.

2. Cook until crispy and brown, but still a little chewy. Drain the excess fat. Or don't...I won't judge. Put on a plate. Eat. Be happy.

Wednesday, August 21, 2013

Easy As

This slow cooker apple sauce is what my older sister and I would call "easy as." (She picked the slang up while living in New Zealand, and I absorbed it by sibling osmosis.) I feel almost dumb posting something this simple, but it's a SWEET recipe to have around and apple season is nigh upon us all, so I thought I might as well put it up for you lovely people.

If you don't like eating apple sauce, you can still use it as a baking substitute, in place of melted butter or oil!

Easy As Crockpot Applesauce 

Makes  1 1/2 cups

Ingredients

5 apples, peeled and sliced
cinnamon, to taste

1. Put the apple slices in the crock pot. Cover them up and cook them on low for 6 hours, or on high for 3-4 hours.

2. When apples are brown and soft, season them with cinnamon and mash with a potato masher. If you like extra smooth, use an immersion or regular blender!

Wednesday, August 14, 2013

Food Porn: The Vegan Job

I love planning surprises for other people. As a notoriously terrible liar, it's a thrill and a challenge for me to plot, arrange and successfully execute something totally unexpected and amazing for someone I love. For me, few things beat the thrill of scheming behind the back of those close to me, especially when the scheme involves cake. It's like every heist movie I've ever watched gets played out in my own life, except there's no Clooney and Pitt, no Mini Coopers, no Antwerp diamonds, no moles infiltrating my operation, and no burglars dressed up as Orthodox Jews.

...Did I mention there was cake?

My kid sister's birthday is coming up on August 27th, but if all goes according to my heist-- err, plan, I'll be back in Montreal by then. Since I can only imagine what snail mail would do to even the most lovingly prepared and packaged cupcakes, I decided to do the only thing I could: prepare a special vegan dinner, since she recently gave up cheese everything.

I bought the ingredients and hid them all over the house like Easter eggs, taking to baking in the dead of night and while she was out or sleeping. Every resounding slam of the oven door, every time I turned on the beaters to whip vegetable shortening set my heart pounding. I thought I was sure to be caught in my secret, cruelty free endeavours. I was possessed.

It got to the point where it was 2:30AM the day before the dinner and I lay in bed, wide awake over mixing up the triple threat of vegan buttercreams I had planned to do in the early morning. By 3AM, I was downstairs in my pajamas, making raspberry reduction and sifting sugar. By 3:30, I was icing the layer cake, despairing over my sloppy work and resigned to the fact that it was destined to be on Cake Wrecks. By 4, I deemed it "not terrible" and "hopefully it will taste good."

At the end of it all, to get her to the table I had to come clean about the dinner I had prepared for us, saying it was one of the last meals we might get to have together before I left. The cake was still surprise though. Just call me Michael Caine, and bring on the food porn.

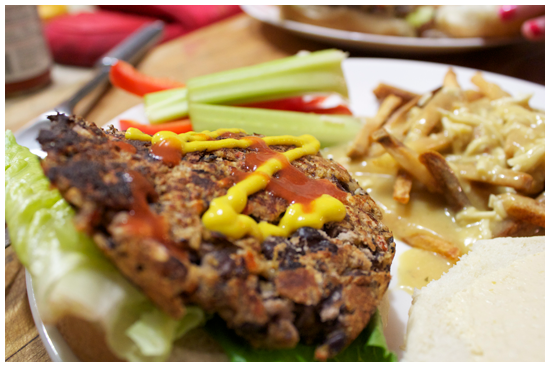
Spicy Red Pepper & Black Bean Burgers - Adapted from Skinny Taste


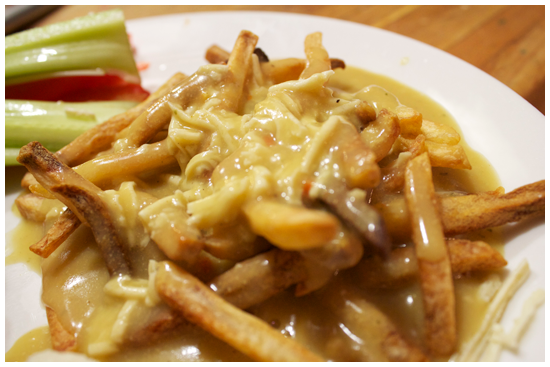
Poutine with Mozzarella style daiya & vegan gravy - From VegWeb


Vanilla Sponge Cake with Peach Preserves & Raspberry Vanilla "Buttercream" - From Lay The Table


Friday, August 9, 2013

Bassets Love Blueberries

Most of the time I spend in the kitchen is solitary. I tend to think of myself as a one man wolf pack... sans the Galifianakis beard. In my head, a recipe is something I take step by step, and when even one person joins the cake walk, I end up fumbling their directions (and mine), trying to keep them occupied and entertained. Sometimes, I'm lucky enough to have company who's content just to listen as I crack eggs and lame jokes, and often give half-assed explanations as to what I'm doing. I'm like a half baked cooking show host. Even though with more complex recipes I'm at my best alone with some good music, some things I can't do all by my beardless lonesome.

For example, last Friday, my friend Steph volunteered to help me shoot my first official Bite Club video! So without further ado, I give you the crushing bad news that I came unprepared, brought a spatula to a gun fight, and bailed on shooting it.

Steph and I have known each other since 6th grade, so we've been friends for half of our lives. I was in her wedding party this past May, and she and her husband Philip live less than 10 minutes from my parents' house. Since I never get to see her when I'm in Montreal, I was thrilled to pack up my supplies and traipse over, crash landing in her kitchen to bake up today's muffins. They're a healthy bite for breakfast, packed with island flavours of coconut and macadamia nut, exploding with fresh blueberry. DIG IT.

It was a cool and rainy day outside. Inside, I mixed and folded while trying not to trip over Hazel, the basset hound, who wandered lost around the kitchen, trying to give us her sad puppy eyes in exchange for muffin batter. Steph snapped pictures. We drank Lemon Cream tea and talked about wedding photos, Neil Patrick Harris and singing things from Moulin Rouge. The sort of easy chatter you miss with people when you live cities or provinces away from each other. Food bringing us together-- is there anything it CAN'T do?

Blueberry Macadamia Coconut Muffins

Makes 12 muffins. Om nom.
Adapted from Fitness Magazine

Ingredients

Muffins
1/4 cup unsweetened coconut, shredded
3/4 cup all purpose flour
1 cup whole wheat flour
1/2 cup brown sugar
1 tsp baking powder
1/2 tsp baking soda
1/8 tsp salt
1 tsp ground cinnamon

1 large egg
1 large egg white
3/4 cup buttermilk
2 tbsp applesauce
1/2 tsp vanilla extract

3 tbsp macadamia nuts, chopped
1 1/2 cups fresh or frozen blueberries

Topping
2 tbsp all purpose flour
2 tbsp macadamia nuts, chopped,
2 tbsp brown sugar
1 tbsp canola oil

1. To make the topping, combine the all purpose flour, chopped nuts and brown sugar in a small bowl. Drizzle the oil over top and whisk all of the ingredients together. Set aside.

2. Preheat the oven to 400 degrees. Spray a standard muffin pan with non-stick cooking spray.

3. In a large bowl, whisk together both flours, brown sugar, baking powder, baking soda, salt and cinnamon.

4. In a separate bowl, mix together the egg, egg white, buttermilk, applesauce and vanilla.

5. Make a well in the center of the dry ingredients and add the wet ingredients. Stir with a spatula until only just combined. Fold in the blueberries and the macadamia nuts.

6. Divide the batter evenly until the 12 muffin tins, then top with the topping, gently pressing it into the batter. Bake for 18-20 minutes, or until a toothpick inserted comes out clean.

I Am Jack's Step by Step Photos

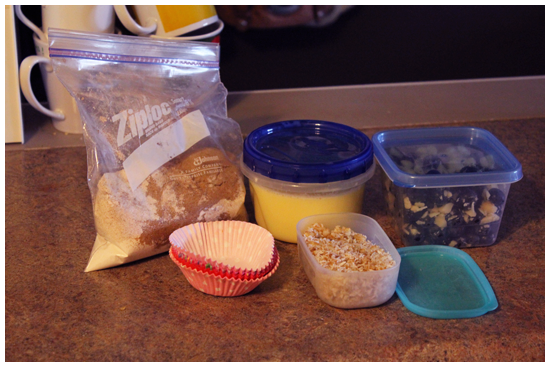
1.  Gather up all of your ingredients. (I packaged mine up neatly since this is Bite Club going mobile.) Dry ingredients, wet ingredients, blueberries & nuts, coconut topping. In a small bowl, combine the ingredients for the topping and mix until combined. Preheat your oven to 400 hundred degrees.

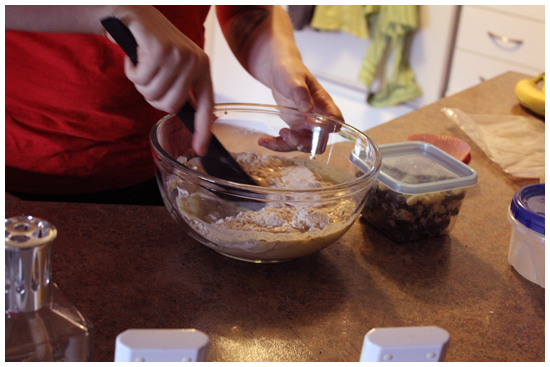
2.   Whisk together the dry ingredients. In a separate bowl, beat together the wet ingredients, then make a well in the dry ingredients and add the wet ingredients. Stir until JUST combined. (Over beating muffin batter is inhumane and also produces tough muffins.)

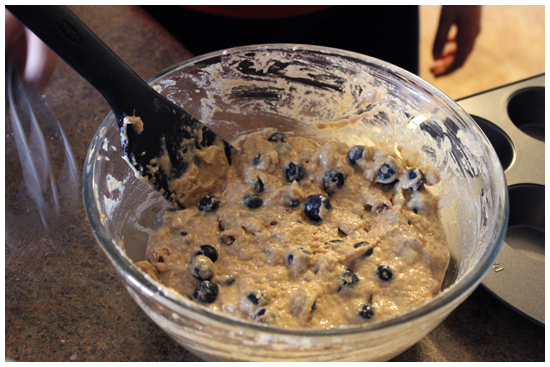
3. Fold in the blueberries and the 3 tablespoons of blueberries. 

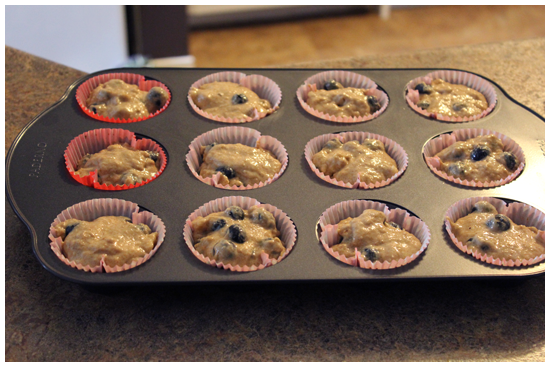
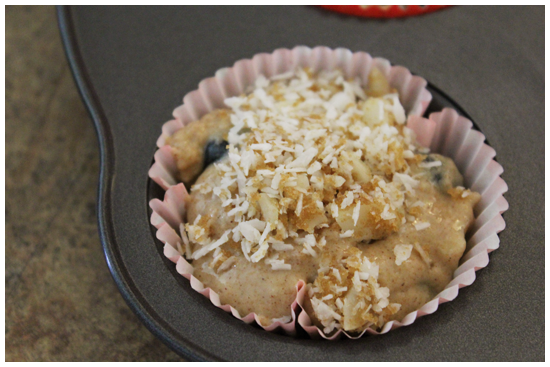
4. Spoon them into 12 waiting muffin tins, lined and sprayed with nonstick cooking spray, unless you like eating paper for breakfast. 

5.  Spoon topping onto the batter, pressing it down gently with the back of the spoon. 

6. Pop these into the oven for 18-20 minutes, or until an inserted toothpick comes out clean! (Hey look, it's me! Hallo internet!)

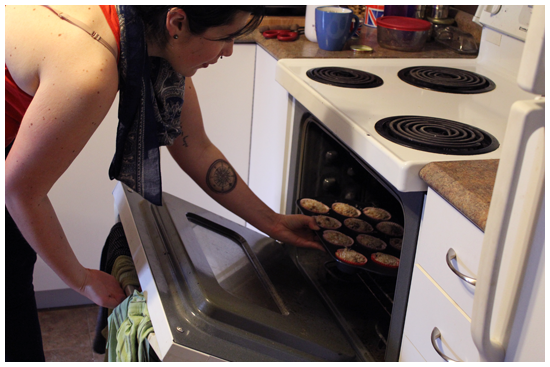
7. Remove from oven, and let cool for 10 minutes in the tray, then remove and cool if you can resist trying them for that long. Serve with tea and enjoy!

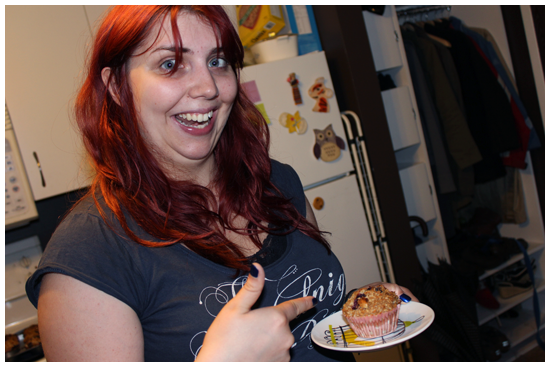
Steph went coocoo for coconut (macadamiablueberry) muffins!

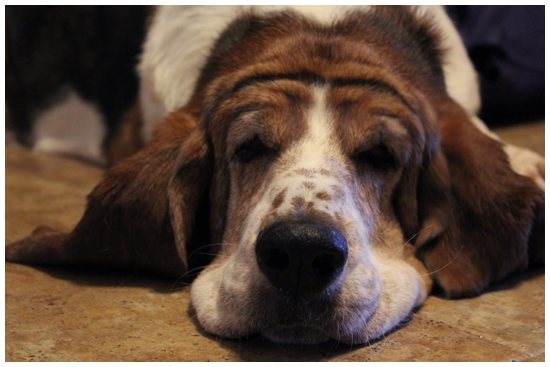
And Hazel was upset and muffinless, because everyone knows from our dear Roald Dahl that beagles bassets love blueberries. There there, Hazel.

Wednesday, July 24, 2013

Tastes of Oz: Burgers

So, contrary to popular belief, I haven't joined a cult or become a hermit. I just got back from a three week trip to AUSTRALIA, where I visited my older sister and her fiancé, who are living over there and teaching! We journeyed into the Outback without internet or other amenities (i.e. showers) for two weeks, which explains my lack of posting. However, I swear, there was no shortage of eating on the trip. And now, I'm really glad, and really excited to be back!

Between the jet lag and the serious extent of field research (AKA stuffing my face), I didn't even know where to begin writing my first post. Since we were out camping, with limited resources, the kitchen victories were few and far between. Not only that, but because this is chiefly a cooking blog, I wasn't too sure about penning restaurant reviews or idle storytelling. I didn't just want to write about the food in Australia, I wanted to give y'all something you could DIY! Your own taste of Oz... So.

Let's talk about BURGERS! 


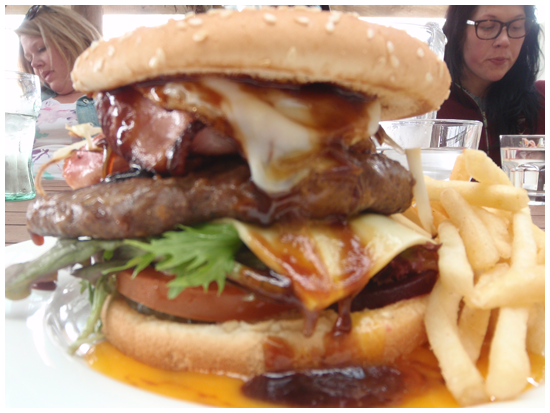
Down in Australia right now, it's wintertime. While most Aussies were turning to stews, curries and hearty meat pies to keep them warm in their adorable, snow-less version of the coldest time of year, my fellow Canadians and I were still looking for summer barbecue fare. Behold, the glorious hamburger! Just like us regular fast food noshing North Americans, Australians embrace the burger as a culinary phenomenon, and boy, they do it well. Beef, lamb and even kangaroo burgers make regular appearances on Aussie menus. While we sampled burgers-a-plenty on the trip (obviously in the name of science), I tried to keep notes on some of the more distinct flavours we came across. How can YOU get a bite of Australia at your next BBQ? Read on.


#1. The Aussie Burger. 

Burger patty (your choice) + roasted beetroot + fried egg + back bacon. These three toppings make regular appearances on burgers EVERYWHERE down under. I know, I know, it sounds weird, but the tang of the beetroot, cut with the silky, saucy yolk of the fried egg, and the salt of the back bacon work really well together. Something I discovered at my first meal on the day we arrived in Melbourne.

#2. The Nacho Cheese Burger.  

Burger patty (your choice) + original Doritos + shredded iceberg lettuce + melted cheese + salsa & sour cream sauce. One thing Australian hamburgers have in common with the North American variety is that they're looking to serve up something indulgent, weird and delicious too. We were driving to Clare Valley for an afternoon of wine touring, when Steve (my sister's fiancé) and I got into a huge discussion about food. Big, greasy, over the top, dirty diner food. By the time we stopped in the next town, we had talked ourselves into a salivating starvation. We NEEDED something to eat. I popped into a bakery and ended up getting a Peppersteak pie, only to go next door to join the others at their fast food joint. They were noshing on giant burgers & crispy fries.
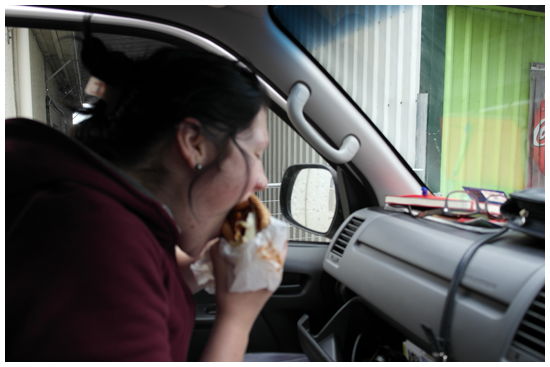
Long story short, I ended up eating the pie I had bought AND the Nacho Cheese burger, because I was told that I NEEDED to try it. NEEDED with a capital "WRAP YOUR FACE AROUND THIS, IT IS SO GOOD-- you need to eat more or you're going to get plastered at light speed this afternoon."
I had to take my glasses off, it was so huge and so messy.  Dear people who made this burger: you were doing it right.

#3. The Steve Special. 

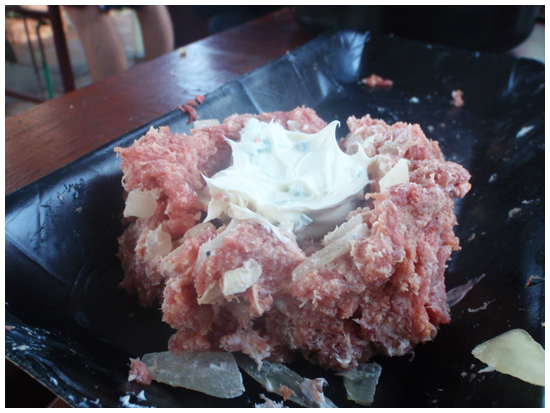
One of the best burgers I ate on the didn't come from a restaurant or even an Australian at all. It came from Steve, who masterminded this recipe some time ago and then made it for us one night at a campsite in Alice Springs. The savoury, well seasoned bite of meat in these burgers gives way to a creamy, rich, cream cheese center, spiced up with a zip of freshly chopped jalapenos.

Note: This recipe is rustic at best, so use every kitchen skill and instinct you have to make it happen. COURAGE! It will be WELL worth it

STEVE's Spectacular Super Secret Surprise Burgers

Makes 5-6 Burger patties

 Ingredients

1 package lean ground beef
2 eggs
breadcrumbs
secret sauce of your choice (i.e. bbq)
3 cloves garlic
1 medium onion
salt & pepper
jalapenos
1 package cream cheese
Any extra seasonings or herbs you like.

1. Finely chop both garlic and onions, then put into a bowl with the beef and eggs. 

2. Add some sauce and seasonings of your choice to the bowl, along with a generous amount of bread crumbs. Combine with your bare hands, really well, until everything is evenly mixed. (If too dry, add more sauce.)

3. Halve and seed the jalapenos, (as many as you like, to your taste) and then finely chop them.

4. In a separate bowl, add one package of cream cheese and the tiny jalapenos. Mix to combine!

5. On a plate (or wax paper) flatten some of the meat and form it into a bowl shape. Fill the bowl with the jalapeno cream cheese mixture. Then, take another handful of meat and flatten it on top. Seal it up tight! Continue this until all the meat/cream cheese is used up.

6. Preheat a grill to hot, and cook the burgers to your personal preference. ENJOY!

Wednesday, June 12, 2013

Say Cheese!...Burger Pizza.

Are you fond of celebrity mash up couple names like Brangelina and Kimye? Do you find yourself often in a tizzy when choosing between two foods upon which to indulge? Are you looking for a recipe which will blow your freakin' mind next pizza night?

Look no further, friends. In celebration of Bite Club having 30 followers on our Facebook page (WOOHOO!), I am sharing with you one of my original recipes.

I invented this on the advent of my roommate's birthday this year. Her birthday fell on a Tuesday, which is pizza night, the most holy day of the week in our flat. I wanted to make her something awesome that still fell under the religious dietary restrictions of our pizza-for-dinner rule. (Amen.) Well, Rebekah's favourite food is burgers. Any time we go to a restaurant, it's a rare occasion indeed that she doesn't order a burger of some kind.

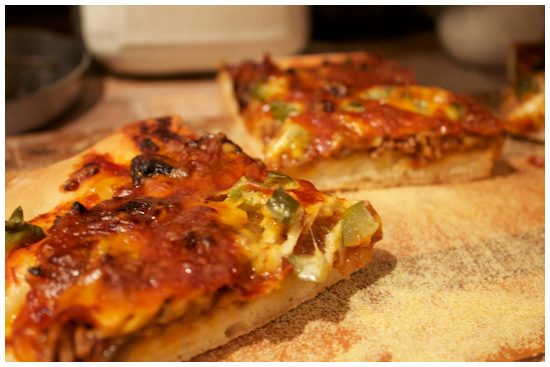
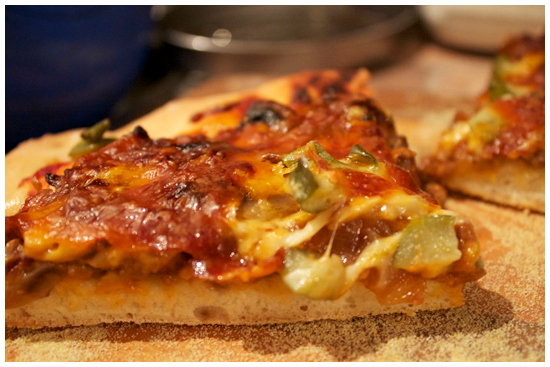
After searching the internet, unsatisfied with pizza recipes that seemed not burger-y enough, or involved hyper processed American cheese, I took matters into my own oven mitts and invented this. Crispy homemade crust, smothered in caramelized onion and mushrooms, ground beef sauteed in burger sauces, and topped off with two kinds of cheeses and pickles. Yes, you read that correctly. Pickles on pizza. Keep the faith. When I made it a second time, for awesome friends Josh and Reb who visited in February, the smell filling the apartment was intoxicating. As we sat around, eating the slices of heaven, even the two of us who had eaten it before would stop between bites and shake our heads in disbelief at the sheer...punch of flavour packed onto this pizza pie. 

This recipe is insanely good. It has crunch, bite, luxurious ooze, a hint of sweet from the caramelized onions, savoury from the beef and salty tang from the pickles. Not to mention, it's FUN! It's the food that childhood and stoner dreams are made of. Dude, imagine a cheeseburger had a baby with a pizza. DUDE. I MADE IT. Now, you should too.

Cheeseburger Pizza

Makes 1 pizza... the pizza of your burger loving dreams.
A Bite Club Original Recipe

Ingredients


1 recipe, basic pizza dough

2 medium cooking onions, diced
1-2 tbsp butter
8 oz. (227g) your choice of mushroom, (I used white) sliced

1/2 lb medium or lean ground beef
2-3 tbsp mustard
1/3 cup ketchup

1-3 tbsp tomato sauce
1 cup cheddar cheese, grated
1 cup mozzarella cheese, grated
2-3 dill pickles, diced

cornmeal, for sprinkling

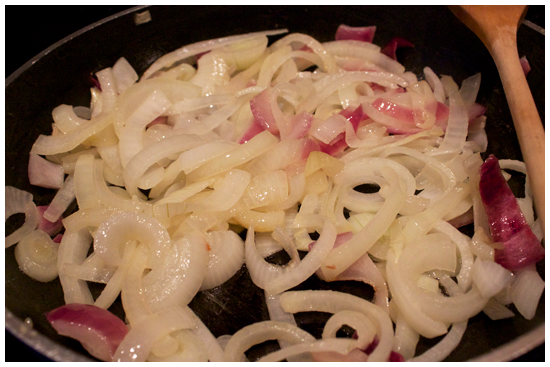
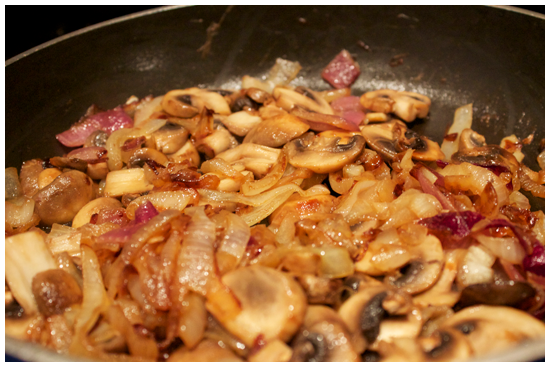
1. Cut up the onions and add to a large frying pan over medium-low heat with the butter, stirring to make sure they are evenly coated. Cook and stir occasionally to caramelize them, about 45 minutes until golden brown. (Hint: this is a good time to prepare the pizza dough, if you haven't already!) When the onions are golden, add the mushrooms into the same pan and cook until brown. Salt the mixture to taste.

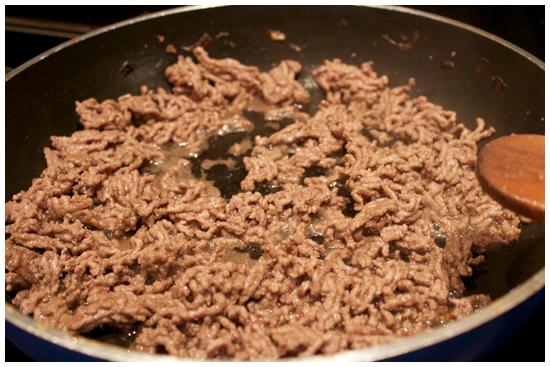
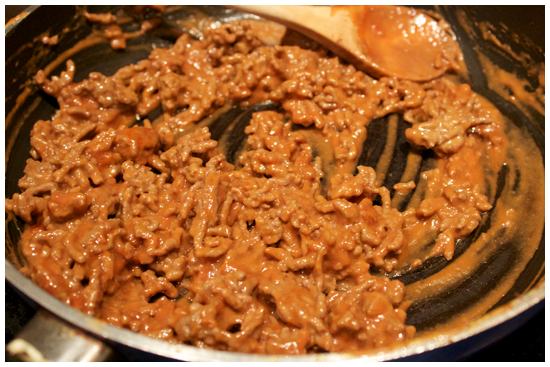
2. Empty the mushrooms and onions into a small bowl and set aside. Put the ground beef into the same pan and crumble it with a wooden spoon. Cook over medium heat until just browned.  Turn off the heat and add the mustard and ketchup to the beef, stirring until it is creamy and evenly mixed. Leave to cool.

3. Preheat your oven to 425 degrees. Generously sprinkle a baking sheet with cornmeal, and roll out the dough onto it, all the way to the edges. Grate the cheeses if you haven't already.

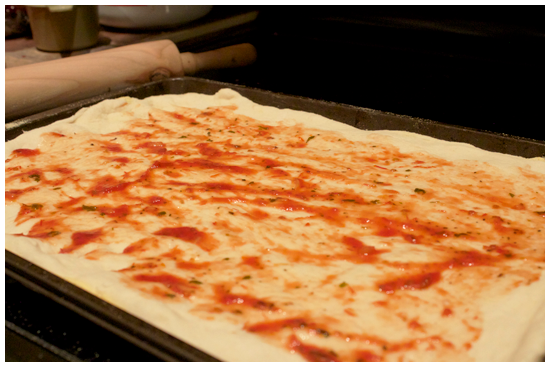
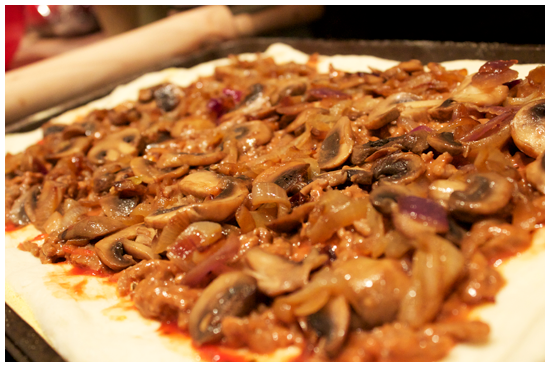
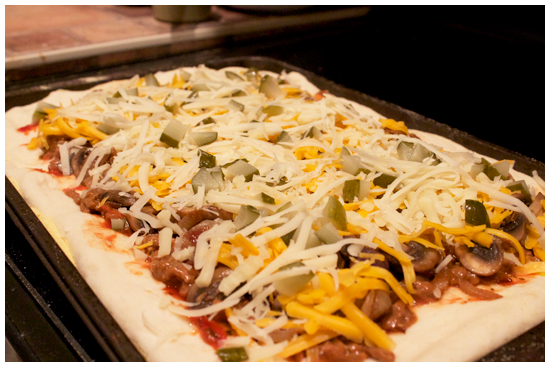
4. Spread the dough with a thin layer of tomato sauce. Then, spread the ground beef evenly over the mixture. Follow this with the onions and mushrooms. Cover the entire thing with the grated cheeses. Over the stop, sprinkle the diced pickles.

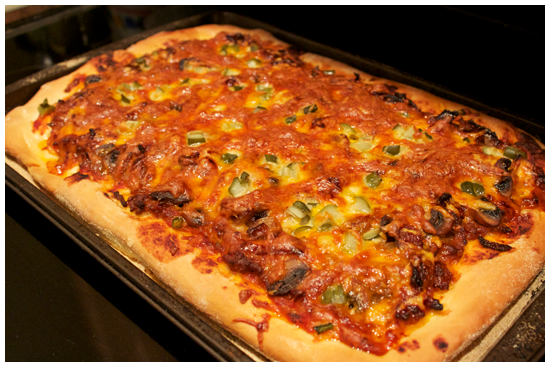
5. Bake for 30 minutes. When it's finished, remove from the oven and let cool for an additional ten minutes. Slice, serve and live the dream.

I Am Jack's Step By Step Photos.

1. Melt butter in a medium frying pan over medium-low heat. Add the onions, stirring to ensure they are properly coated in butter.

2. After about 35 minutes. The onions will be a golden brown. Add the sliced mushrooms and cook them together, until the mushrooms are browned and slightly shrunken. Empty into a separate bowl, return the pan to the heat.

3. Add the ground beef into the same frying pan, cooking over medium heat until just browned. Do not overcook, remember, you'll be baking the pizza for another half an hour!

4. When the beef is cooked, turn off the heat. Stir in the ketchup and the mustard until it is evenly mixed and properly coated. Yes, it looks kind of gross. Is it delicious? ABSOLUTELY.

5. Preheat your oven to 425 degrees. Sprinkle a baking sheet with cornmeal generously, then roll the dough out so it meets all of the corners. Spread with a thin layer of tomato sauce, as much to your liking

6. Spread the beef evenly over the dough, followed by the mushrooms and onions.

7. Sprinkle both cheeses over the entire pizza, and top it off with the diced pickles.

8. Bake for 30 minutes, until cheese is melted, and golden brown.

9. Allow the pizza to cool for 10 minutes. Slide it onto a wooden cutting board, slice and serve!