
There are all sorts of rules and guidelines to life. My parents taught me to never show up to an invitation empty handed. A common rule of thumb is that you should never try out a brand new recipe when you're serving it to other people. I have a belief that if I'm going to spend money on ingredients, I want to put that money to good use by trying something I've never done before. I want to push the limits of my knowledge and my skills, and I admit, be the one who shows up to the pot luck with the dish that's a touch more elaborate than the rest. It comes with the territory of being competitive. ANYWAY.
As you might guess, my philosophy sort of thumbs its nose at the first rule in the wrong situation, and completely stomps on the toes of the second. If you try a new recipe and it goes wrong, you're the one showing up with the store bought two bite brownies. Delicious, but don't get me wrong, not spectacular.
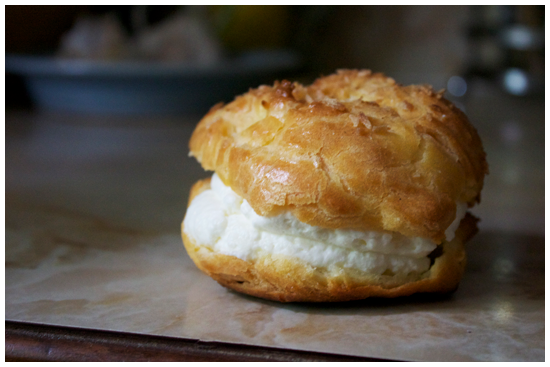
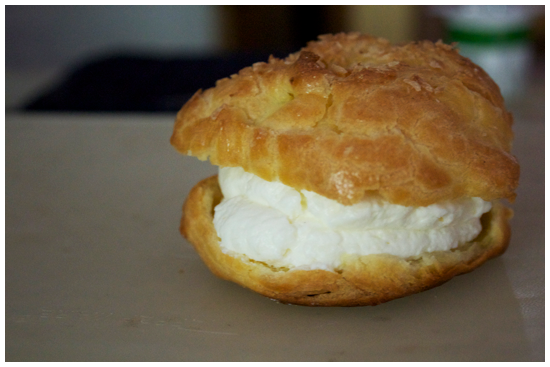
Know what's spectacular? Cream puffs. Baked up to puffy, crispy heights and sandwiched around smooth, sweet whipped cream, nuanced with light bite and warm milky flavour of shredded coconut. Although it was only my second crack ever at making choux pastry, I threw caution to the wind and whipped up these babies to bring to lunch with my two friends, Sarah and Hannah. They're light and summery and they make a great first impression. The cream puffs were delicious too.
Giant Coconut Cream Puffs
Makes 8 PuffsRecipe adapted from Sticky, Chewy, Messy, Gooey by Jill O'Connor
Ingredients
1 cup water
1/2 cup unsalted butter
1/2 tsp salt
2 tbsp sugar
1 1/4 cups all purpose flour, sifted and THEN measured
4-5 large eggs, beaten
1 egg + 1 tbsp water for eggwash
1/2 cup shredded coconut
1 1/2 cups heavy cream, cold
1/2 cup icing sugar
1 cup shredded coconut (sweetened or unsweetened, to your own taste)
1. Move a rack to the bottom of the oven and preheat to 400 degrees. Line a baking sheet with parchment paper.
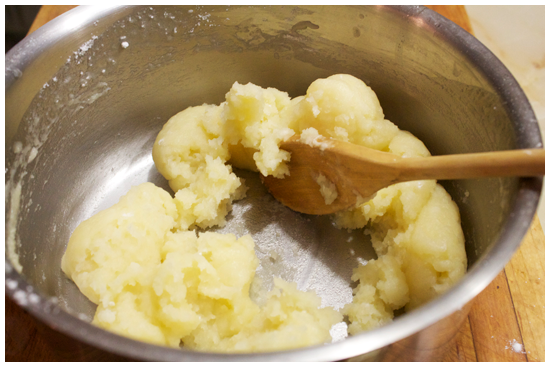
3. Remove from heat and add the flour all at once, stirring vigorously with a wooden spoon until it comes away from the pan and clumps around the spoon. Then, return the pan to medium heat stirring briskly for 1 minute, to cook the flour and dry out excess moisture in the dough.
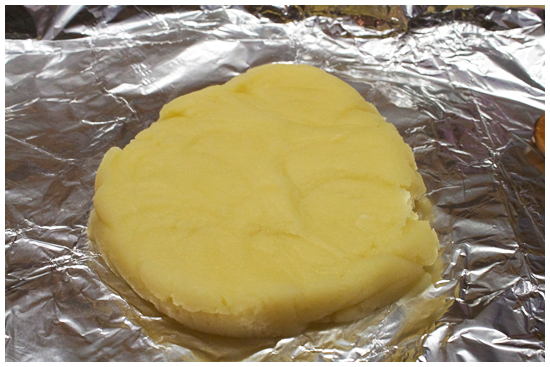
4. Turn your dough out onto a piece of aluminium foil lining your counter top and let it cool for 5 minutes. (You don't want the eggs to begin cooking too soon, or your texture will be off!)
5. Return the dough to the pan, begin adding the beaten eggs, 1/4 of the mixture at a time. The mixture will be very slippery at first, so stir slowly to keep it all in the pan. When it becomes more incorporated, stir more quickly until it smooths out. Add the remaining eggs, repeating the process for each 1/4 added. The result should be a slightly sticky, smooth, malleable batter that holds peaks. (If the batter is too firm, beat the 5th egg, and add it 1 tbsp at a time until the consistency is reached.)
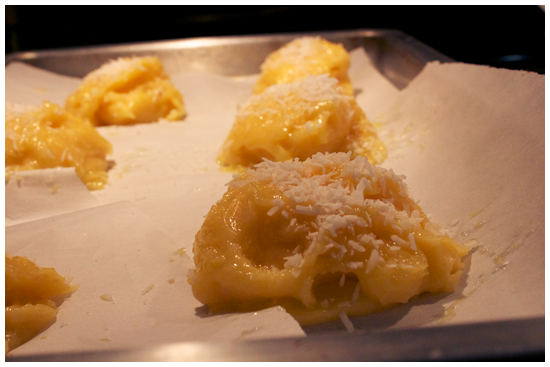
6. Divide the batter into 8 parts and scoop onto the prepared baking sheet 2-3 inches apart. Brush with egg wash and sprinkle each with a tablespoon of shredded coconut.
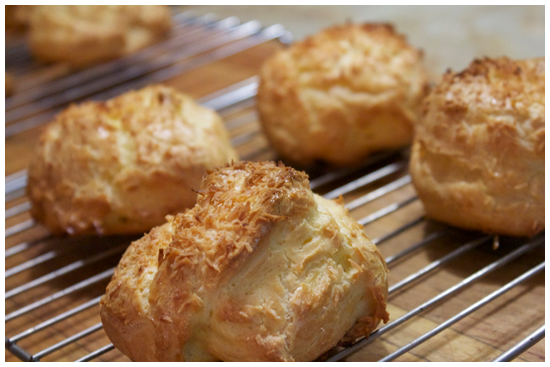
7. Bake for 20-25 minutes, until the puffs are golden brown and puffy. Reduce your oven to 350 and bake for 15 minutes more to make sure the pastry is crisp inside. Transfer to a wire rack to cool.
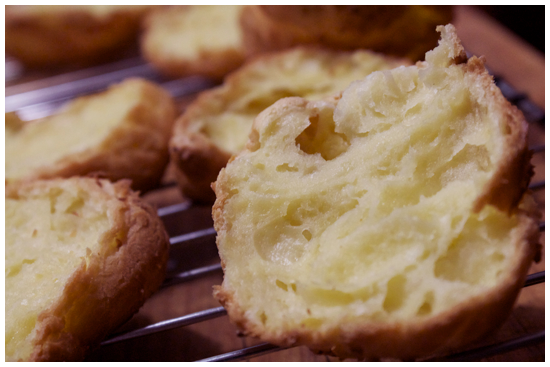
8. With a serrated knife, cut the puffs in half horizontally to release any steam in them. Place the puffs back on the baking sheet and return to the oven for 3-5 minutes to ensure they dry. Remove from the oven and cool completely.
9. Make the filling by whipping the cream and sugar with a chilled bowl with chilled beaters until stiff peaks form. Fold in the shredded coconut gently with a spatula.
10. Fill a pastry bag (or ziplock) bag with the whipped cream and pipe it onto the bottom half of each puff, generously. (You can also just spoon it on, if you're feeling low maintenance.) Place the top half gently on top of the cream (like a coconut chapeau). Serve!
I Am Jack's Step By Step Photos
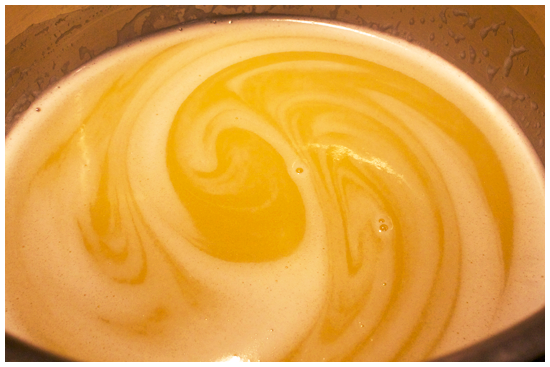
1. Line a baking sheet with parchment, and preheat the oven to 400 degrees. Combine water, butter, sugar, salt in a non-reactive pan. Let the butter melt, before bringing it to a rolling boil.
2. Remove the pan from heat and add all the flour, vigorously stirring until the mixture clumps around the spoon. Return to medium heat, stirring for 1 minute to dry out any excess moisture.
3. Let the mixture cool on a foil sheet on your counter for 5 minutes to avoid cooking the eggs when you begin to add them.
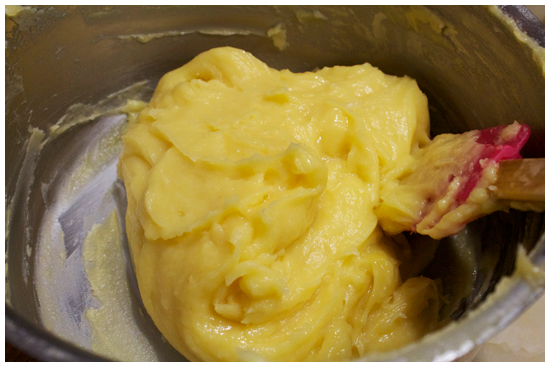
4. Stir in the beaten eggs, 1/4 at a time. Stir slow at first to avoid making the batter slop, and then quicker until it smooths out before the next addition. The finished batter should be a little sticky, malleable and able to hold peaks.
6. Bake the puffs until golden brown and expanded, 20-25 minutes. Reduce the oven to 350 and bake for 15 minutes more to dry them out. Remove from the oven and set on a wire rack to cool slightly.
7. When the puffs are cool enough to the touch, gently cut them in half horizontally with a serrated knife to release steam. Put the cut puffs back on the baking sheet, and back into the oven for 3-5 minutes. Remove from heat, place on racks and let them cool completely.
8. Whip together the sugar and heavy cream, then fold in the shredded coconut. (I totally forgot to take pictures of this step, but I know you're ready and willing to give it a go! Pipe onto the bottom half of the puffs and cap them off with the top half. Serve!
No comments:
Post a Comment