Tuesday, April 30, 2013

The Magnitude

I couldn't very well go through grilled cheese month without posting a grilled cheese of my own! I think that violates some rule or law of food blogging. Or hey, maybe I wanted an excuse to eat grilled cheese just like the rest of you people, with your...fresh breads, your marinades, your bacons and all that melty cheese......... Alright, before I start drooling all over my keyboard.

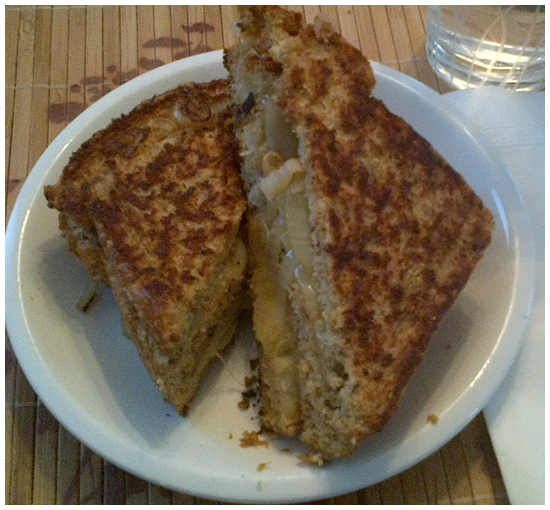
Ladies and gentlemen, I present to you: The Magnitude. For those of you who watch the show Community:

Somehow, it never gets old.

The Magnitude is a sandwich built on a homemade pretzel roll the flavours of a jalapeno (pop) popper in mind. Rather than roast the jalapenos however, I quick pickled them (recipe below!), so they maintained a lot of the heat they naturally possess. The result is a crunchy and creamy grilled cheese sandwich with as little or as much spice as you like. If you want to make this and quick pickle your own peppers, the recipe is just below. If not, keep on scrolling......

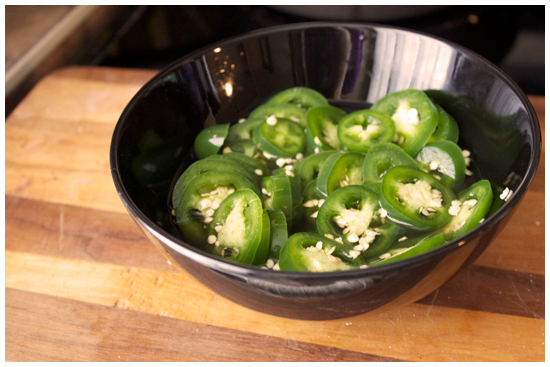
Quick Pickled Jalapeno Peppers

Makes 3/4 cup
Recipe by Bon Appétit
 Ingredients

1/2 cup cider vinegar
1 tbsp sugar
pinch kosher salt
4 jalapenos, thinly sliced

1. Whisk together vinegar, sugar, and salt. Add the sliced jalapenos to the mixture, tossing to coat. Let sit for at least 30 minutes before using, tossing occasionally. For deeper flavour, make a day ahead, cover and chill.

Now for the main event!


The Magnitude: Inside Out Pretzel Jalapeno Popper Grilled Cheese

Makes 1 Sandwich
Ingredients

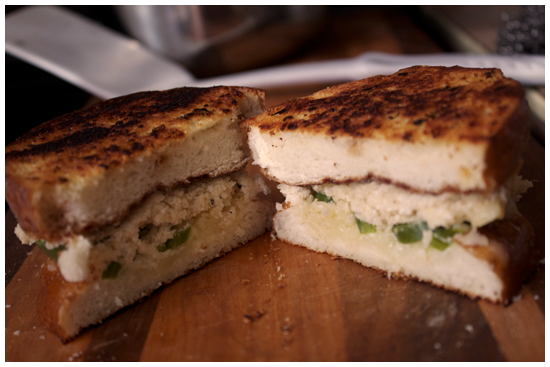
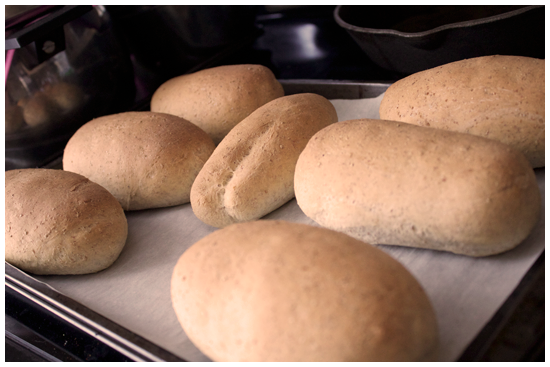
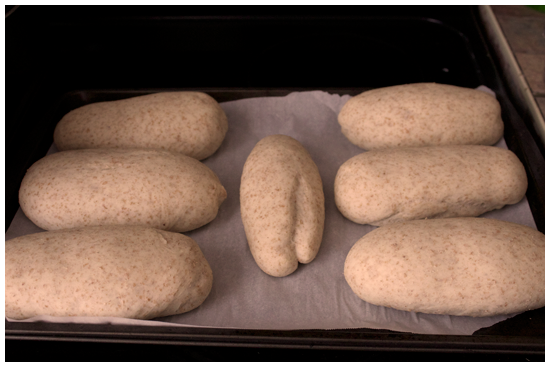
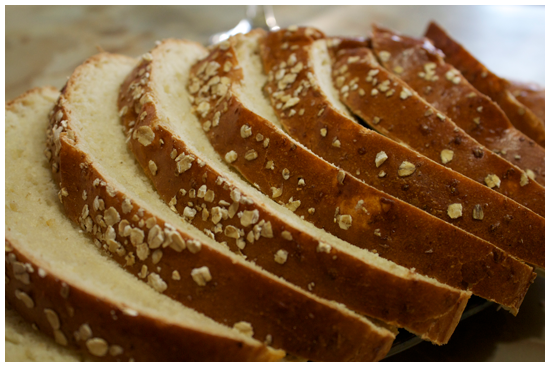
1 pretzel roll (DIY: I used a GREAT, easy recipe from The Slow Roasted Italian.)
3 tbsp plain cream cheese, softened
1-3 tbsp panko bread crumbs
Pinch salt, onion powder and fresh ground pepper, to taste
Cheddar cheese, grated (as much as you want!)
Pickled Jalapeno pepper rings (homemade or store bought), to taste
Butter

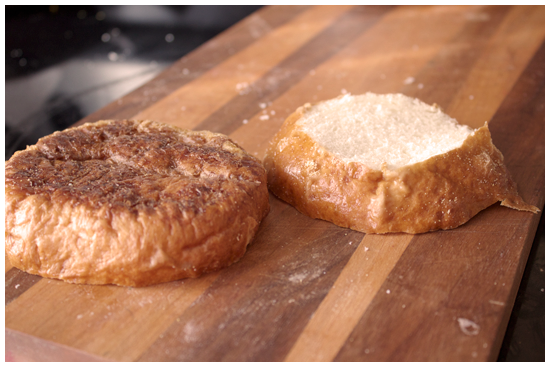
1. Cut the pretzel roll in half, flipping it inside out, so the cut sides are outwards, and the brown part is inside. If you want a flatter sandwich, carve off the "dome" of the bun. 

2. Combine the cream cheese, panko crumbs, salt, onion powder and half of your grated cheddar in a small bowl until it becomes spread-like.

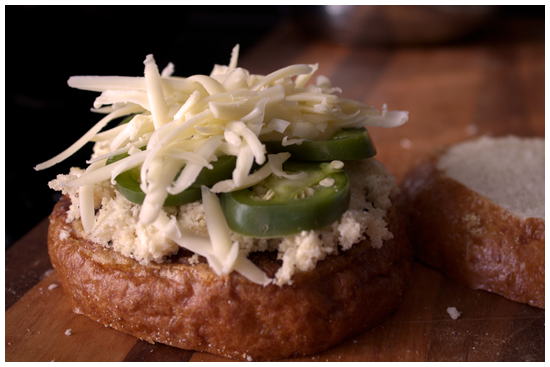
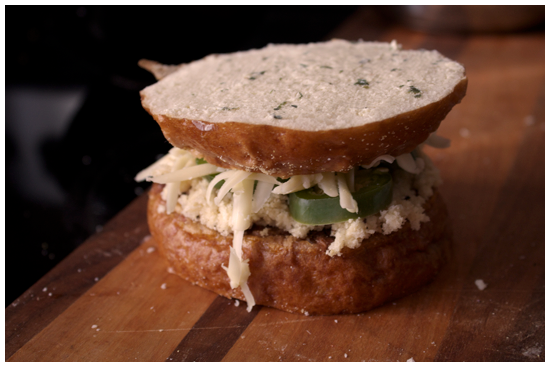
3. Assemble! Spread the cheese mixture on one half of the bun. Add as many jalapeno rings as you like, pressing them into the mixture. Sprinkle the rest of the cheese over top of the jalapenos. Top with the second bun. Butter the hell out of it. (Extra points if you use garlic butter, ooh baby.)

4. Grill in a pan or on a panini press over medium heat until the outside is golden brown and the inside is melty and delicious.

I Am Jack's Step By Step Photos

1.  Cut the buns in half, then cut off the dome section to make a flatter sandwich.

2.  Combine the panko, cream cheese, half of the cheddar, salt, pepper and onion powder in a bowl. Spread it on the roll, press a few jalapeno rings into it, and sprinkle with more cheddar.

3.  Top with the other bun, slather with butter and fry. it. up!
I don't even have another finished picture to show you because I ate this thing so fast.

Thursday, April 25, 2013

Crunch Time

This recipe is so simple that there's not much to say about it.

There's no real story to attach to it. I've never been to a co-op in Portland where they ate this on the daily and I've never gotten lost on a mountainside with a bag of granola as my only food source. I was browsing for recipes, I saw this, bookmarked it, and then I made it. That's it. I didn't have to wrestle plaid clad lumberjacks for it, nothing. Although, I WOULD wrestle rabid lumberjacks for this granola, because that is the depth of my love for peanut butter. My kitchen smells like heaven right now.

This recipe great because it's quicker than most granola recipes- less than 15 minutes total baking time. It's crunchy, not overly sweet and pretty wholesome. I'd try serving it with yogurt or milk and fresh fruit. (I just ate mine with some sliced strawberries and some milk and ooh baby, it was a fine world.) However, if you just eat it, ravenous, handful by handful out of the container, I won't judge.

This shtuff is ALSO vegan, if that's what you're into, you hippie.

Peanut Butter Maple Granola

Adapted from The Sweet {Tooth} Life 

Ingredients

1/3 cup peanut butter (I used all natural)
1/4 cup real maple syrup
1 tsp ground cinnamon
1/2 tsp vanilla
1/2 cup chopped pecans (or a nut of your choice)
2 cups oats

1. Preheat oven to 325 degrees, line a baking sheet with parchment paper and set aside. 

2. In a medium sauce pan over medium-low heat, melt together the peanut butter and the maple syrup, whisking to combine. Add in the cinnamon and vanilla, stirring until evenly distributed.

3.  Now, add the pecans and the oats, stirring until the mixture is evenly coated.

4. Spread the mixture in a thin, even layer on the baking sheet. Bake for 12-15 minutes, then allow to cool completely. Enjoy!


I Am Jack's Step by Step Photos.

1.  Combine the peanut butter and maple syrup in a saucepan. When melted, add the cinnamon, vanilla and whisk.

2. Mix in the oats and pecans, ensuring they're evenly coated by the mixture. Spread on a baking sheet lined with parchment.

3. Bake at 325 degrees for 12-15 minutes, enjoy peanut butter aromatherapy as the smell fills the kitchen. Remove from oven, let cool on the sheet and store for as long as you can before you eat all of it. Seriously.

Tuesday, April 23, 2013

"Hail Cheeses!" Result

Well! We're coming into the homestretch of April AKA Grilled Cheese Month, so it only seems fitting that before the month is out, I submit to your rabid anticipation and reveal the winner of the "Hail Cheeses!" Contest.

If you follow me on Twitter, you may have already been spoiled as to this information, BUT, for the sake of posterity (and celebration!) we have the results straight from Cheeses Murphy, the authority on everything cheesy, edible, and perfect right here....

Drum roll please....


The winner is The Beach Please!
Ingredients: Fresh white bread, marinated chicken (peach jam, soy sauce, lime juice, cayenne, sugar, garlic cloves), Champfleury (brie), Mozzarella cheese, avocado spread (avocado, greek yogurt, lemon juice, chili powder, cinnamon, salt & pepper) & butter.

Insanely delicious, to boot. A big congratulations to Rebekah for this winning sandwich! It may be available at your local Cheeses Murphy soon... And if you don't have one of those, well...friends, that's when it's time to give DIY a cheesy try.

I want to thank you everyone who sent in sandwiches, I can't believe the enthusiastic turnout and I'm so excited that you all got to experiment and explore the world of the grilled cheese. You truly made the sandwiches of my dreams, and you created something completely new for yourselves, in a creative and savoury stand off. Bravo!

Monday, April 22, 2013

Submarine

The other day I tweeted a recipe for a vegetarian "cheesesteak" style sandwich, which I didn't take pictures of because I was not aware of how bombastically delicious it was going to turn out. It was so good, I actually decided I had to make it again. (Post impending.) However, I had used a store bought roll in the original and realized one way to elevate it to an even HIGHER state of deliciousness would be to make my own submarine rolls for it. Moisty, chewy, simple rolls that let the ingredients be the star of the show. Yes, this plan was starting to take a tasty shape.

Bread baking is one of my favourite things, and so it took all of 10 seconds before I made up my mind. I ran to the internet, in the direction of "YES, LET'S MAKE BREAD!"  to find a basic recipe for the rolls, and then something strange and wonderful happened. What started off as someone's recipe became my own design, as I realized what I did and didn't have in my cupboard, and what I wanted from the recipe. I was baking bread, from scratch-- off the cuff of my own instincts! It was a strange, proud moment when I pulled the tray of these soft, simple roll babies out of the oven, the entire flat smelling like fresh baked bread. It was only minutes before I ripped one in half and ate it.

....Probably shouldn't have used the word babies in there. OH WELL.

Riley's Whole Wheat Submarine Rolls

Based on a recipe by The Galley Gourmet
Makes 6-8 Rolls.

 Ingredients

2 1/2 tsp (1 packet) quick rise yeast
1 1/4 cups warm water
1 tbsp sugar
 1 1/2 cups all purpose flour or bread, plus more for rolling & shaping
1 1/2 cups whole wheat flour
1 tbsp salted butter, softened
1 1/4 tsp salt
oil (for greasing the bowl)

1. Put the warm water into a large bowl, sprinkle it first with the yeast, then with the sugar. Whisk, and wait until it gets foamy and fragrant.

 2. Add the butter and, gradually, the all purpose flour to the water mixture. If making this bread by hand, stir it in with a spoon, adding more flour until it won't stick to your hands, and knead with those unsticky hands. Then, add the salt and knead more. Work those biceps!

If you're lucky (or lazy like me) put it in the bowl of a stand mixer fitted with the hook attachment. Mix on low until combined, then add the whole wheat flour, and let the machine do the hard work. Knead it on medium speed for 10 minutes, until a smooth, elastic dough is formed.

3. Put the dough on a floured surface and form it into a ball. Grease a large bowl,  put your dough in it, and cover it with plastic wrap. Place in a warm place and let rise until doubled in volume. An hour or so.

4. When the dough is risen, turn it out onto a floured surface, and depress the air out of it. Divide into 6-8 equal pieces. Cover and let rest, 15 minutes. Then, on a tray covered in parchment, shape the balls into rolls 6-8 inches long or so.

6. Cover and let rise for an additional hour until puffed up, just like the photo below... Bread making is a practice in patience, and finding other stuff to do in the meantime. (I watched Nigella Lawson and went for a run.)

7. Bake in the oven at 375 degrees until golden brown, 30 minutes or so. Remove to cooling racks, and then go to town, or else, freeze for future use! Voila, soft fluffy dinner rolls for you to create your sandwich masterpiece on.

Saturday, April 20, 2013

Hail Cheeses! Entries

First off, I want to thank everyone who took part in the contest! You guys really outdid yourselves with some bite worthy creations. (P.S. I'll be crashing your place of residence ASAP to try them for myself.) I'm so excited to have the turnout that I did; I was expecting maybe one or two grilled pity sandwiches, but y'all busted it up. So, merci for showing up and participating, I hope you guys had as much fun getting creative with this as I had drooling over each idea.

Without further ado, my dear grillers, I present your gallery of competitors.
Note: I've removed all but special instructions and the ingredients lists from the emails, to make the judging as equivalent as possible!

#1. The Beetallmania

Ingredients: Herbed focaccia flatbread, slow roasted beets, avocado, double cream brie, grainy mustard, sweet onion, smoked salmon, capers, salt & pepper, olive oil

#2. The Super Mario

Ingredients: Rosemary Focaccia, pesto, provolone, prosciutto and mozzarella

Fun fact: This thematic bite sports an Italian flag colour scheme. AMAZING.

#3. The Vegus Cheesus

Ingredients: Hempseed bread, homemade vegan cheese slices, radishes, fresh spinach

#4. The Delice Harlequin

Ingredients: Marble Bread (pumpernickel & rye) made into French toast (eggs, almond breeze, cinnamon), oven baked maple bacon, cheddar, mozzarella, butter

Fun fact: The sandwich's theme revolves around two tones, so the cheeses are each on a different side of the sandwich!

#5. The Beach Please! 

Ingredients: Fresh white bread, marinated chicken (peach jam, soy sauce, lime juice, cayenne, sugar, garlic cloves), Champfleury (brie), Mozzarella cheese, avocado spread (avocado, greek yogurt, lemon juice, chili powder, cinnamon, salt & pepper), butter

#6. The Triskaimaplecius

Ingredients: 3 slices 12 grain bread, mozzarella cheese, caramelized onions, maple syrup

Fun fact: The two outside slices are buttered, the middle one is soaked in maple syrup.

#7. Mozzloaftops!

Ingredients: White Sandwich Bread, Meatloaf (ground beef, garlic, onions, breadcrumbs, dijon, tomato juice, parsley, eggs, Worcestershire sauce, cayenne pepper), Mozzarella cheese, butter

Fun fact: This competitor made their bread from scratch!

Thursday, April 18, 2013

Whip It Good

I've been watching a LOT of "The Great British Bake Off" lately, Britain's search to find the greatest amateur baker among their tea gargling masses. For those of you without friends in the UK who induct you into the culture (thank yoooooou, Joshua), it's basically like any competitive cooking show you ever saw, but with charming British people, history lessons on food and oh yes, lots of baking. They've made everything from cupcakes to savoury pies, and in the most recent episode I watched, the amateur bakers even had to tackle croissant and danish pastries. (Bless their brave hearts.)

Watching cooking shows for hours on end usually has me sprinting to put on my apron as is, however, Bake Off has me aching for baking more than usual. I watch the contestants tackle each challenge salivating at how ridiculously good everything looks. With every signature bake (the contestants must make a pastry that represents them) I'm wracking my brain for what my own entry might look like. I want to walk around covered head to toe in flour. I have a need to knead. You get what I'm saying. 

HOWEVER, there is a problem with the need to bake things constantly-- and that problem looks exactly like the purple chiffon bridesmaids dress I picked up from the shipping people today for my dear friends wedding next month. See, it fits. It just fits. If I bake anything, there is no way I'm not tasting as I go ("product quality testing," we call it in the business") and no way I'm not at least trying the finished product. How then, to keep up a food blog, satisfy my tastebuds and my baking urges, without going overboard and finding myself sucking in for all of the wedding photos?

Drumroll please!

Basic Meringues-- technically challenging (slightly), egg whites (healthy), crunchy on the outside, soft on the inside texture (tasty).

Basic Meringues

Makes....a lot of meringues, depending on how large you make them.
Ingredients

4 egg whites, room temperature
1 tsp lemon juice
1 cup sugar
1 tsp vanilla extract

1. Preheat your oven to 200 degrees, and line two cookie sheets with parchment paper.

First rule of meringues is NEVER make them in plastic bowls. The ability of the egg whites to whip up is completely ruined if even a single drop of fat-- oil, butter, whatever, gets into them. So, use a glass bowl, wash it well. Some people even wipe their bowl clean with lemon juice or vinegar before starting.

With your bowl prepped, add your egg whites. Whip them on a medium speed until frothy.

2. Once the whites have become slightly bubbly and white, add the lemon juice and whip until soft peaks form on medium-high. Lemon juice is an acid which will help the egg whites form and fluff-- vinegar or cream of tartar will also do the trick. They will start to look like they do below.

3. Begin adding the sugar, one tablespoon at a time until it is all combined in and the batter forms solid peaks. (Note: I abused the hell out of my stand mixer to get to this stage, so don't be afraid if it takes a LONG TIME. I was worried that maybe there had been fat in the bowl, or the fact that today was rainy were sabotaging my efforts-- these babies also don't like humidity. "Keep calm and crack on" as they say in Bake Off. It will be okay, I swear.)

4.  When you have stiff peaks, add the vanilla and whip until thoroughly combined.

5. You can put the meringues on the cookie sheets any way you want. Some people use tablespoons. I grabbed a piping bag with a star tip and went to town, making them a little bit bigger than a toonie. (Canadianisms, eh?)

6. Bake the meringues for 1 hour. Then, turn the oven off leave them in there for at LEAST another hour, to dry out the centres. Some people leave their meringues in overnight. I am nowhere near that patient. Enjoy!

Monday, April 15, 2013

Pesto Change-O


This post has been a long time coming-- meaning that it's food I cooked quite some time ago but procrastinated on writing about, because life is what happens when you're busy jamming giant cookie wedges into your mouth with your friends, readying for finals, getting spring air for the first time in long time, and oh yes, not blogging.

This, however, is what happens when you get my friend & fellow foodie, Jon and I in a kitchen together. Jon is as passionate about "food culture" as I am, so when I heard that he'd only had risotto once and that it had been BAD risotto, I was scandalized. Shocked. Appalled. Other synonyms for mortified. I knew I had to fix it as soon as possible. So two Fridays ago, we made a culinary tag team and cooked dinner for he, Rebekah and I.

We ended up with a delicious meal: Honey Balsamic Oven Baked Chicken with Fresh Mint, (Homemade) Pesto Risotto, and a baguette with Champfleury cheese. If you aren't drooling all over your keyboard right now I suggest you read that again-- maybe in Morgan Freeman's voice, or else, get your head checked. You should totally click on the link above and check out the chicken recipe on Jon's blog. It was beyond belief tender and tasty. As. Hell.

So while we drank wine and talked about the dishes we inherited from our grandmothers, I took to making this recipe up from scratch. The best thing about risotto is that once you overcome your fear and master the basics, you can improvise it and make it with almost whatever you want. I made this based on what Jon had kicking around in his fridge and pantry. It was totally worth carrying a big jar of vegetable stock around with me in my knapsack at school that day. #FoodieProblems

Freestyle Pesto Risotto

Serves 4
Ingredients

4 cups vegetable stock
1 white cooking onion, chopped
3 cloves of garlic, minced
1 tbsp olive oil

1/2 cup white wine
1/2 cup arborio rice
1/2 cup pearled barley*
Basil Pesto, to taste
Parmesan cheese
Salt & Pepper

1. On the stove, get a small saucepan, size enough to hold all of the stock, and put it over low heat. First rule of risotto: do not add cold liquid to the risotto. You may have to put your wine in the microwave to ensure this but-- I am Jack's lack of shame. Cold liquid will "shock" the rice and you will not be able to get that famous, creamy texture you want. So, the second rule of risotto is do NOT add cold liquid to the risotto.

In a medium-large saucepan, add the oil, onions and garlic. Sautée until slightly browned.

2. When the onions are soft, add the barley and the rice. Stir until coated, and cook until slightly translucent, about one minute.

3. Now you can start adding liquids! This is the longest, most time consuming part of cooking risotto: you're going to have to babysit it for a good 30 minutes, stirring it constantly to coax the rice into a good mood. I kickstart rice into a good mood the way I myself get into a good mood: add that (warmed) white wine. Stir until it's absorbed, then add the stock, 1 cup at a time, stirring constantly.

4. Add more stock as the rice absorbs each cup. Third rule of risotto: stir stir stir. In the meantime, open that jar of pesto. Or better yet, have your kitchen bro make it fresh for you while you're working. (Check out Jon's recipe for fresh pesto here!)

5. When you're almost fresh out of stock (the last cup or so) add the pesto and grated parm! As much or as little as you like. I would say I probably made use of a good 1/4-1/2 cup, but it's hard to be sure. Start with a little, then add more if you want it. Stir it in, to let it combine with the other flavours. Taste, season with salt, pepper and more parm if you want. (Let us face it: of COURSE you want more.) 
Risotto works as a main or a side dish really nicely. This one might not be pretty, but it was unbelievably good.

Notes
* It's possible to use an entire cup of arborio rice for this recipe instead of half arborio, half barley. I just like the variance in texture, so I mix it up a little. It adds a bite that isn't present otherwise. I know this because Tyler knows this. 

Saturday, April 13, 2013

Child's Play

Sometimes, it happens to me out of the blue: the sudden urge to get messy and bake something. I'll be minding my own business when the urge arises to get up to my elbows in flour, creaming butter and sugar, measuring, tasting. To have the flat filled with the smell of something delicious just coming to life in the warm belly of my friend, the oven. Always baking, this self renewing compulsion, usually late at night. If only these urges came as strongly with laundry and exercise, I might be all set.

Yesterday, it was 1:30AM when I decided that I would try and proof some dough overnight to bake it in the morning. Fresh bread on a Saturday morning? YES PLEASE. There was only one problem: I had no milk, and only about a 1 1/2 tsp of yeast, nowhere near a regular amount to make a decent, quick bread.

This called for experimentation. (Gasp. Experimenting with bread, I know. I believe in baking DANGEROUSLY.)
So I used Julia Child's White Bread Recipe, which contained no milk, but instead, made use of butter, naturally. Julia was notoriously wonderful at finding ways to put butter in EVERYTHING. After some quick Googling, I discovered that you can actually use LESS yeast in a recipe a long as you give it a longer rise time.

Perfect for someone who plans on sleeping in between making and baking, non?

I unfortunately did NOT take pictures of the process, because half of me was very convinced that there was going to be a disaster, and also, it was 2AM by the time I got started. I have never messed with the yeast proportions in a recipe before, or let dough chill in the fridge overnight for a slow rise. I was nervous the cold would wipe out the yeast like a snowstorm and some unsuspecting villagers. Cut me some slack, or at least a slice.  I did take some pictures of the beautiful after bake though. I probably could have left it a little longer in the oven but... I'm not unhappy with how this loaf turned out.

Just the opposite!

I got up in the morning to put this thing together, and now I can't stop eating it. You can see a pocket/slice of air in the top, which I think could have been fixed in forming the actual loaf. But even imperfect homemade bread is one THOUSAND times tastier than the bagged, store bought Wonderbread you're thinking about right now. It's soft. Chewy. Moist. Buttery. The crust is crisp in contrast to the warm airy inside.


Find Julia Child's bread recipe here and try it yourself! Then you could use it in the Hail Cheeses! Challenge...

Monday, April 8, 2013

Challenge: Hail Cheeses!


EDIT: The contest deadline is now FRIDAY APRIL 19th, 2013!


 In case y’all had no idea, APRIL is NATIONAL GRILLED CHEESE MONTH, and I thought it was something worth celebrating, because I will take almost any excuse at any time to eat bread and cheese. Let’s be fair here though, it’s hardly that simple anymore: everyone’s favourite sandwich has had more facelifts than Hollywood in the recent years, and no one’s complaining, with all the tasty results.

One of the things I miss about living in Waterloo is their hip, late night, weekends only grilled cheese window, Cheeses Murphy.  Cheeses cooks up incredible sandwiches and then crowns them with names that are so puntastic, I practically wrote them myself. (My personal favourite: “The Big Lebowskcheese.”) Their signature sandwich, the Cheeses Murphy features bacon jam. I had never heard of such a thing before I accepted Cheeses as my 12:30AM, Saturday night savior.
Do not adjust your screens. This is a real live paparazzi shot of myself, caught in the act with a grilled Cheeses Murphy sandwich with mac & cheese on it.  
Since I miss Cheeses oh so much, I decided to bring a little bit of their inventive spirit to the blog and into my own kitchen with a contest, because I’d like to get to know my audience a little cheddar. (Wah waaah.)

The "Hail Cheeses" Challenge


THE CHALLENGE: Create a unique grilled cheese creation (get crazy!), photograph it, name it and send it to me at IAmJacksHunger@gmail.com.

THE PRIZE: I’ll be posting my favourite creation of all the submissions on the blog for all to see, so get ready for bragging rights. Plus, you’ll have your own personal sandwich invented: cross it off your bucket list. Look, do you really need motivation to get competitive and make yourself a delicious, original creation?

EDIT: It's not official yet, but Cheeses Murphy tweeted at me, saying it's a possibility that they COULD feature the winning sandwich at their digs. Which means your delicious genius would be available to the masses. THINK ABOUT IT PEOPLE.

RULES:
•  Your beautiful sandwich should be sent to me by APRIL 15th, 2013, puntastic and clever name, a pic, list of ingredients and all! That's next Monday, so be sharp and feta move on!

• Any cheese and any bread combination are allowed, so long as it becomes a sandwich in the end. (Sorry wraps, not this time.)

• There are literally unlimited toppings, too. Fruits, vegs, spreads, snack foods. Let your imagination run wild. Literally send me the sandwich of your dreams!

That's all for today, friends. If you're craving inspiration, you can also find Cheeses Murphy on Twitter & Facebook.

Sunday, April 7, 2013

Iron, Man

The Easter Bunny gave me something unexpected this year-- a cast iron skillet -- which only would have been more of a surprise if it had been delivered to me in a giant egg. I've been pining after one ever since I found out about them. An old school, ultra durable, incredibly versatile, slightly unwieldy non-stick pan with special instructions: never wash it with soap. (I know, say WHAT?) How could I not be into that?

Cast iron pans are "seasoned" over time. This involves coating them with a thin layer of fat or oil, then baking them at a low temperature for an hour, as often as you like. When the iron of the pan heats up, it expands and takes on some of the fatty molecules. The longer you go without really washing them, the deeper the seasoning, the better the nonstick surface. I strongly feel as though this is kitchen magic, the kind that runs from generation to generation. Some people have had them in their families for literally years and years. They're that durable, and compared to other cookware, they're not expensive. Anyway--  Macheesmo has a great post-- 10 Reasons You Need a Cast Iron Skillet to back up my argument here. And if you don't want to read a top ten, you can feast your eyes on last night's dinner and be convinced much faster.

Riddle: What do you get when you combine a cast iron skillet & my whole wheat dough recipe?
Answer: Pizza, and this time, it's personal. One for me, one for Rebekah, my friend and roommate, and glorious toppings for all! This is more of a technique than a recipe, but keep up with me now. 

Personal Cast Iron Pizzas

Makes 2 personal pizzas.

Ingredients

1 recipe, Bite Club's pizza dough, or any pizza dough...
Tomato sauce
Cheese
Toppings (your choice!)

Required: Cast Iron Skillet

1. Make the dough as instructed. Divide the recipe in two equal portions. (My skillet is on the small side, which makes it perfect for personal pizzas!) Rolling out the dough into a circle just larger than your skillet. Roll the edge of the crust inward, gently tucking it in with your fingers to make the deep dish style crust. Preheat the oven to 400 degrees. 

2. Add your toppings. I used tomato sauce, three cheeses: mozzarella, cream cheese, spicy habanero cheddar, roasted jalapeños, red onions and baby spinach. (Yes, feel free to OMG with me.)

3. To get the same effect on your crust as a pizza stone, before you put your masterpiece in the oven, put your skillet on the stovetop burner on high for 3-5 minutes. Then put it in the oven.

4. Bake for 20-30 minutes, depending your preferred tan of the crust. Are you a summer whisper or Jersey Shore? (Contrary to popular belief, I promise not to judge you if you find yourself saying, "I like my pizza Jersey Shore tan. GTL not included.)

5. When you're done, remove the pizza from the oven. It will be artful, it will smell delicious and unlike everyone on reality TV, cheesy in a great way. The best way possible. Note: Be careful when you remove the pan! Iron remains hot long after you it remove from the oven.

6.  The pizza should slide right from the pan onto your handy cutting board with little difficulty. Let it cool for ten minutes, then slice and serve! This crust: golden and crunchy on the bottom, but fluffy inside, the middle like a chewy, perfect carb-alicious cloud. 


As they say: YEAH. BUDDY. I wish I had taken a reaction video of the two of us biting into our individual pizza pies, because time stopped. Seriously, we spent the rest of dinner laughing with disbelief between bites at how good it was. What would you put on your perfect personal pizza?

Tuesday, April 2, 2013

Food Porn: Easter 2013

Happy (belated) Easter, friends.

I went home for the weekend and did tons of cooking. Lucky for you, I took pictures. Unluckily for you, some of these recipes are inventions, or I was having too much fun cooking with my mama to get step by step photos, or even recipes. I linked the recipes I located/am able to remember.

Without further ado, let there be food porn!

Mama's Limoncello & Herb Chicken


Spinach, Feta & Egg Phyllo Pie


Cole's Amazing Oat & Honey Bread - From Epicurious 


Oatmeal Cream Pies - From Homemade by Holman


What did y'all enjoy for your Easter extravaganzas? (Extra points if you put pics on the Facebook page!)